Ransomware has become a massive problem for individual users or entire organizations in recent years. Cryptolocker is a type of ransomware that encrypts valuable files (documents, photos, images) on users’ hard drives and displays a message demanding a ransom to restore the data.
In this article, we will look at some of the key built-in Windows tools and organizational practices that can help protect your computer from ransomware and viruses.
- Enable the Basic Built-in Security Tools on Windows
- Enable Microsoft Defender Ransomware Protection with Controlled Folder Access
- How to Block Viruses and Ransomware Using Software Restriction Policies (AppLocker)?
- Protect Shared Folders from Ransomware with FSRM on Windows Server
- Protecting Files from Ransomware Attacks with VSS Snapshots
Enable the Basic Built-in Security Tools on Windows
First, ensure that the basic Windows security tools are enabled and configured correctly:
- Make sure you have the built-in Windows Defender or third-party anti-virus software installed;
- The Windows Defender firewall must be enabled;
- User Account Control (UAC) protection must be enabled.
Among the organizational measures that you can take to help protect your computer, we recommend the following:
- Install Windows security updates on a regular basis;
- Update third-party apps installed on your computer;
- Users should not use accounts with local administrator privileges on their machines (restrict local administrator list with GPO or use change the local administrator password regularly using Windows LAPS);
- Back up your critical data regularly (always use the 3-2-1 rule when backing up).
These are basic tips to reduce the risk of infection and make it easier to recover from ransomware. In the following sections, we will look at other security tools designed to protect against viruses and ransomware.
Enable Microsoft Defender Ransomware Protection with Controlled Folder Access
A separate security feature is available in the built-in Microsoft Defender Antivirus to protect users from malicious software. Controlled Folder Access (CFA) is part of Windows Defender Exploit Guard and is positioned as a ransomware prevention tool.
Controlled Folder Access feature tracks changes to protected folders. If an untrusted app tries to modify files in protected folders, it is blocked and the user is notified.
In Windows 10/11, Controlled Folder Access is disabled by default. Open the Windows Security app -> Virus and Thread Protection -> Manage ransomware protection.
Enable the option Controller Folder Access.
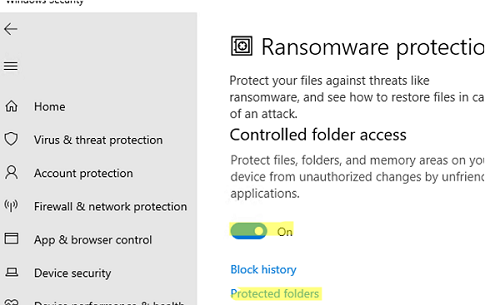
By default, Controlled Folder Access only protects the default folders in a user’s profile (Documents, Pictures, Music, Videos, and Desktop). To add more folders, click Protected Folders and add new paths.
You can add trusted applications in the Allow an app through folder section.
You can also enable Controlled Folder Access and add protected folders and trusted apps using PowerShell:
Set-MpPreference -EnableControlledFolderAccess Enabled
 Add-MpPreference -ControlledFolderAccessProtectedFolders "C:\Share"
 Add-MpPreference -ControlledFolderAccessAllowedApplications "C:\Program Files (x86)\Notepad++\notepad++.exe"
In an Active Directory domain, you can use GPO to enable and configure ransomware protection with Microsoft Defender CFA (Computer configuration -> Administrative templates -> Windows components -> Windows Defender Antivirus -> Windows Defender Exploit Guard -> Controlled folder access).
How to Block Viruses and Ransomware Using Software Restriction Policies (AppLocker)?
Windows has several built-in mechanisms to prevent third-party programs from running on users’ computers: Windows Defender Application Control (WDAC), AppLocker, Software Restriction Policies (SRP), etc.
Software Restriction Policies are most commonly used in corporate environments. These policies allow you to create rules that will only allow certain types of executable files (programs) to be run.
For example, a typical SRP rule might be as follows:
- Allow any executable file to run from the specified folders:
%Windir%,C:\Program Files,C:\Program Files x86 - Deny the execution of any other files.
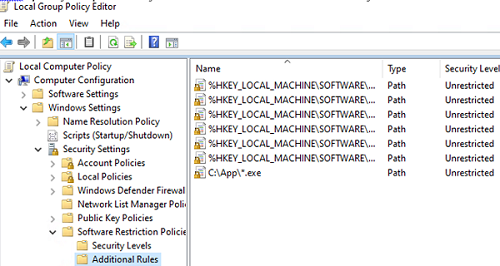
SRP policies are configured under the following GPO section: Computer Configuration -> Windows Settings -> Security Settings -> Software Restriction Policies -> Additional Rules.
Go to the Security Levels section, click Disallowed, and select Set as default to put SRP in whitelist mode (deny everything except what is allowed).

Then go to the Additional Rules section and create New Path Rules.
By default, SRP policies allow executable files from system directories to be run:
%HKEY_LOCAL_MACHINE\SOFTWARE\Microsoft\Windows NT\CurrentVersion\SystemRoot%
 %HKEY_LOCAL_MACHINE\SOFTWARE\Microsoft\Windows\CurrentVersion\ProgramFilesDir%
In addition, add the rules for the following paths
%HKEY_LOCAL_MACHINE\SOFTWARE\Microsoft\Windows\CurrentVersion\CommonFilesDir%
 %HKEY_LOCAL_MACHINE\SOFTWARE\Microsoft\Windows\CurrentVersion\CommonFilesDir (x86)%
 %HKEY_LOCAL_MACHINE\SOFTWARE\Microsoft\Windows\CurrentVersion\CommonW6432Dir%
 %HKEY_LOCAL_MACHINE\SOFTWARE\Microsoft\Windows\CurrentVersion\ProgramFilesDir (x86)%
 %HKEY_LOCAL_MACHINE\SOFTWARE\Microsoft\Windows\CurrentVersion\ProgramW6432Dir%
Also, specify the path to any executables in other directories that you want to allow to run.
Update the GPO settings on the computer.
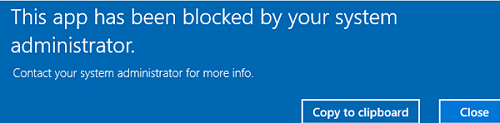
If you now try to run the executable from a different directory, you will get an error.
This app has been blocked by your system administrator.
Protect Shared Folders from Ransomware with FSRM on Windows Server
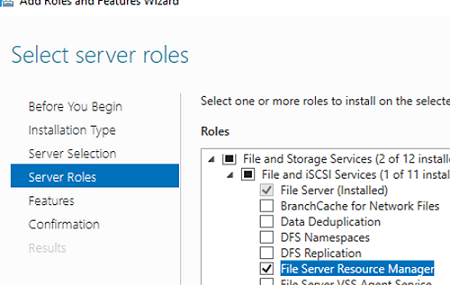
You can use File Server Resource Manager (FSRM) as one element of protection against viruses and ransomware on a file server running Windows Server. You can block the possibility of creating files on the file server with extensions different from the allowed file types.
Install the server role using PowerShell or from Server Manager:
Install-WindowsFeature FS-Resource-Manager -IncludeManagementTools
The idea of ransomware protection in this case is to predefine the groups of files that are allowed to be created in a shared network folder. FSRM already has predefined file groups for different file types.
Create a new All Files group and enter *.* in the Files to include field.

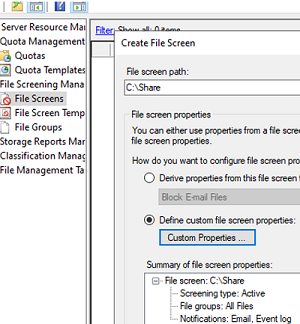
Apply the restriction to your share folder (File Screens -> Create File Screen). Specify the local path to the folder and select Custom Properties. Choose:
Screening type: Active
File Groups: All files
You can configure notifications when prohibited file types are created using the Email Notification and Event Log tabs.
Now create an exception for that path (File Screens -> Create File Screen Exceptions). Select the file types allowed to be stored in the shared network folder.
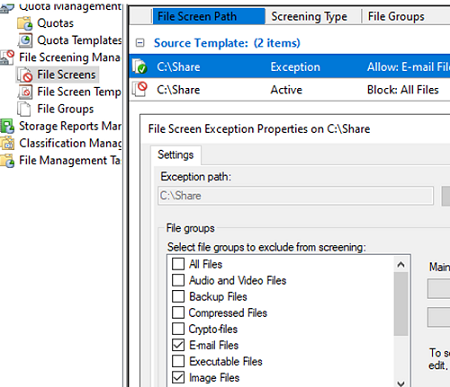
Now the FSRM will block the creation of any files other than those with the allowed file extensions.
Protecting Files from Ransomware Attacks with VSS Snapshots
Ensure that VSS shadow snapshots are enabled on user computers to minimize the impact of a ransomware attack. You can restore the files to their VSS shadow copy if the ransomware has penetrated the user’s computer and encrypted the files.
This requires:
- Enable the Volume Shadow Copy Service (VSS) on all computers;You can enable the service by using the Group Policy. Open the GPMC.msc console, navigate to -> Computer Configuration->Windows Settings->Security Settings->System Service -> Volume Shadow Copy, set the Automatic startup.
- Copy the vshadow.exe file from the Windows SDK to the
windir%\system32\directory on users’ computers (How to use GPO to copy a file to users’ computers?); - Use the GPO to deploy a Scheduler task that periodically runs the PowerShell script that takes snapshots for all volumes:
$HDDs = GET-WMIOBJECT –query "SELECT * from win32_logicaldisk where DriveType = 3"
 foreach ($HDD in $HDDs) {
 $Drive = $HDD.DeviceID
 $vssadminEnable ="vssadmin.exe Resize ShadowStorage /For=$Drive /On=$Drive /MaxSize=10%"
 $vsscreatess = "vshadow.exe -p $Drive"
 cmd /c  $vssadminEnable
 cmd /c  $vsscreatess
}
If the ransomware has encrypted all of the user’s documents on the hard drive, you will be able to extract them from the shadow copy:
- List available snapshots:
vssadmin.exe list shadows - Mount snapshot by ID:
vshadow -el={6bd123ac-4a12-4123-8daa-fabfab777c2ab},Z:
With the security tools built into Windows, you can significantly increase the level of protection your computer and your data have against viruses and ransomware attacks.