ClamAV is an open-source antivirus. It is used to detect viruses, trojans, and malware. It is mostly used on Linux platforms to scan user directories accessible over FTP or Samba, website directories, or emails on mail servers (as an MTA agent).
In this article, we will show how to install, configure and use the ClamAV on a host running a CentOS or RHEL Linux distros.
Installing ClamAV on CentOS/RHEL
ClamAV is not available in basic Linux repos, so you need to use the EPEL repository to install it on your host:
# yum install epel-release -y
After you have installed the repository, you can proceed with the installation of ClamAV packages. To install it, the yum package manager is used (or dnf on CentOS 8):
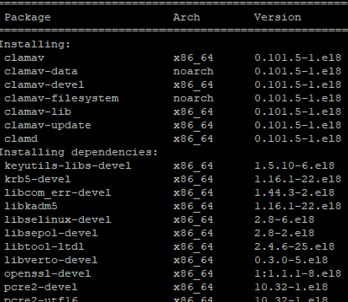
# yum -y install clamav-server clamav-data clamav-update clamav-filesystem clamav clamav-scanner-systemd clamav-devel clamav-lib clamav-server-systemd
Basic Configuration of ClamAV in Linux
To set up your own ClamAV configuration, delete the default configuration in the /etc/clam.d/scan.conf.
# sed -i -e "s/^Example/#Example/" /etc/clamd.d/scan.conf
Then open the configuration file:
# nano /etc/clamd.d/scan.conf
And uncomment the following line:
LocalSocket /run/clamd.scan/clamd.sock
You can also uncomment the lines with the settings you need. For example, you can enable logging or configure the maximum number of connections.
The /etc/clamd.d/scan.conf file contains quite a detailed description of all settings.
To update the anti-virus signature databases for ClamAV, you need to use the freshclam. Backup your current configuration file:
# cp /etc/freshclam.conf /etc/freshclam.conf.bak
Then run this command:
# sed -i -e "s/^Example/#Example/" /etc/freshclam.conf
And update your antivirus definitions:
# freshclam
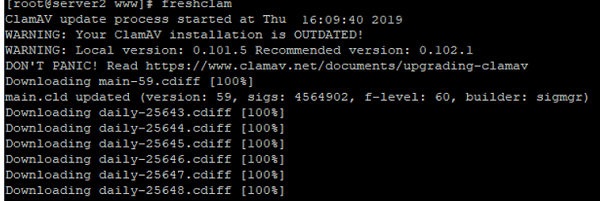
During the update, you may see some errors if you cannot download any updates. Freshclam will automatically find a mirror to download the updates successfully.
To make freshclam automatically check for updates, you may run it with -d parameter:
# freshclam -d — thus, it will check for updates every 2 hours.

To run it easier, create a service file for freshclam:
# nano /usr/lib/systemd/system/freshclam.service
And add the following contents to it:
[Unit]
Description = freshclam
After = network.target
[Service]
Type = forking
ExecStart = /usr/bin/freshclam -d -c 4
Restart = on-failure
PrivateTmp = true
RestartSec = 10sec
[Install]
WantedBy=multi-user.target
Reload the systemd daemon:
# systemctl daemon-reload
Then you can start your service and add it to startup:
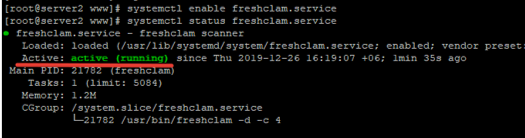
# systemctl start freshclam.service
 # systemctl enable freshclam.service
 # systemctl status freshclam.service
Like you did for freshclam, create a service for ClamAV. The configuration file already exists, but you will have to change its name:
# mv /usr/lib/systemd/system/clamd\@.service /usr/lib/systemd/system/clamd.service
To make it more convenient, we have deleted \@.
Also, change the configuration in the file:
[Unit]
Description = clamd scanner daemon
After = syslog.target nss-lookup.target network.target
[Service]
Type = forking
ExecStart = /usr/sbin/clamd -c /etc/clamd.d/scan.conf
# Reload the database
ExecReload=/bin/kill -USR2 $MAINPID
Restart = on-failure
TimeoutStartSec=420
[Install]
WantedBy = multi-user.target
Then you can run the antivirus service or enable it:
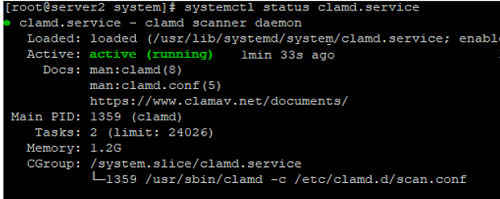
# systemctl start clamd.service
 # systemctl enable clamd.service
How to Scan for Viruses with ClamAV?
After you have configured the ClamAV antivirus service, you can scan any server directory for viruses (scanner mode). To scan the specified directory for viruses, use the following command:
# clamscan --infected --remove --recursive /var/www/
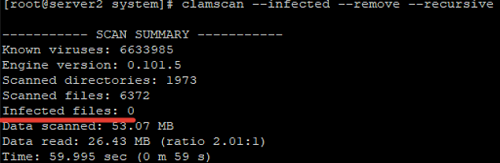
With these parameters, the antivirus will immediately delete the infected files. If you want to move suspicious files to a separate directory, run the scan using the —move parameter:
# clamscan --infected --recursive --move=/tmp/clamscan /var/www
This command will scan all contents of the specified directory and move suspicious files to /tmp/clamscan.
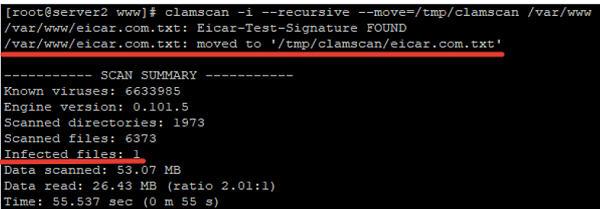
As we can see, the infected file has been moved to the specified directory:

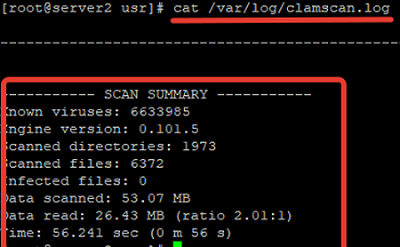
You can also add the —log=/var/log/clamscan.log parameter to write all information about the scanning process in the log file you have specified:
If you want to exclude some of the directories from scanning, use the —exclude-dir parameter:
# clamscan -i --recursive --move=/tmp/clamscan --log=/var/log/clamscan.log --exclude-dir="/var/www/administrator" /var/www
To scan for viruses regularly, you can configure a cron job with the settings you want.
There is a graphical frontend for the ClamAV antivirus called ClamTk.
3 comments
No, I agree to disagree with the author unwise procedure, described in this article, because of next:
1. Internet is from many years now, completely not secure place where you can just download ClamAV virus definitions.
A “Man in the middle” attack is already a everyday procedure used by British, US, German etc. spy agencies. They do not hesitate to intercept each connection they can and replace key Servers ( as Microsoft Update servers and many others ) with their own version of those, therefore you be better using database already provided with ClamAV instead of overwriting it with some “internet” version.
2. No, You do not need to run “freshclam” as service, neither “ClamAV” as service in order to run a scan. Complete procedure to use ClamAV is in just 2 lines:
yum -y install clamav
clamscan -r -i /
And that is all.
Oh. “Windows OS Hub” – come from somebody who supports the Spy agencies “most friendly” OS called Windows.
See – not that I do not understand national security and stuffs, but you just do not know how far behind any ethical norms had gone the thugs who are above the laws and justice.
obviously happy to install a virus scanner from the net, but paranoid enough to download a virus definition update from the same website. Screw logic, right? Also, without clamd / freshclamd he loses half of ClamAV’s functionality, but oh nevermind, because “western agencies go brrrr”. Yea, sure. Sad and hilarious at the same time…
*to not download
Sigh.