In this article, we’ll guide you through the process of performing a clean installation of Windows 11 (version 25H2) on your computer, including potential issues and nuances that may cause difficulties for beginners. We’ll cover all the steps, starting from obtaining the original Windows 11 installation image and continuing through installing the operating system with a Microsoft Account, a local account, with bypassing minimum system requirements, without an Internet connection, and other possible installation options.
How to Create a Windows 11 Bootable USB Stick
First, let’s download the official (!!!) Windows 11 installation image and create a bootable USB flash drive, from which the operating system will be installed.
The official Microsoft tool for obtaining the original Windows 11 installation image is the Media Creation Tool (MCT). Go to https://www.microsoft.com/en-us/software-download/windows11. Here you can:
- Download the Media Creation Tool – a tool that allows you to generate a Windows installation image and immediately write it to a bootable USB drive
- Download the Windows 11 installation ISO image file – used if you want to manually burn an installation image to a USB flash drive or install Windows 11 in a virtual machine (Installing Windows 11 in a VMware VM, in Hyper-V VM, or in Proxmox VM).
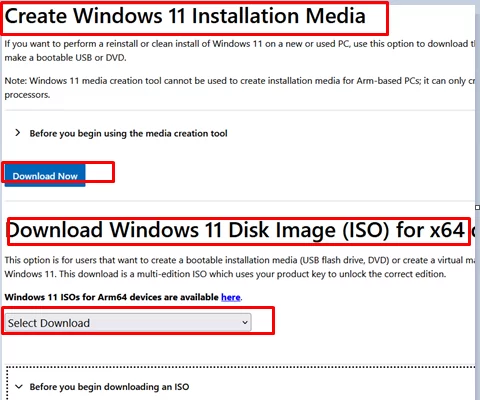
If you decide to download and burn a Windows 11 installation image using the Media Creation Tool, first download the tool and then run MediaCreationTool.exe. In the simple wizard that appears, select the system language, then specify the USB flash drive to which you want to write the Windows 11 image.
After completing the Media Creation Tool wizard, you will have a bootable Windows 11 USB drive that is ready to install on any computer.
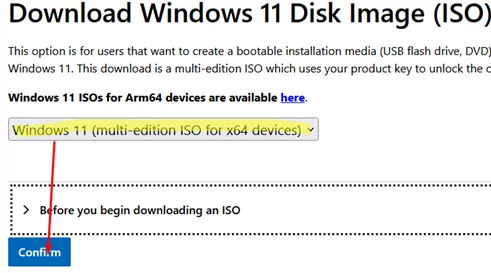
Also, you can download a 7 GB Windows 11 installation ISO image file from the MCT download page. Select Windows 11 (multi-edition ISO for x64 devices)from the drop-down list, and then the image language. Click Confirm -> 64-bit Download.
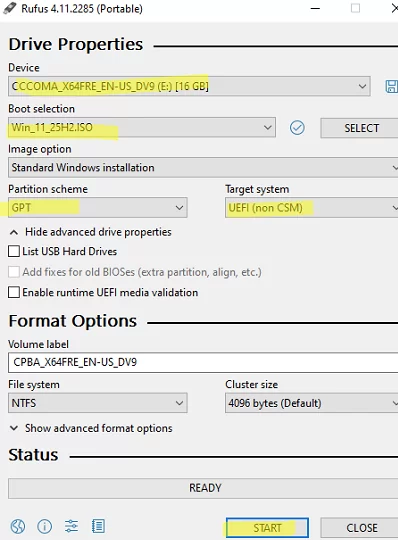
To write an ISO image of Windows 11 to a USB flash drive and make it bootable, you can use the third-party Rufus tool (https://rufus.ie/ru/). Download and run the utility. Select the USB drive where you want to write the Windows 11 installation image from the ISO file you have previously downloaded. Select GPT as the partition table and UEFI (non-CSM) mode for the target computer (recommended configuration for modern computers). Click Start to write the image to the flash drive.
If you received a Windows 11 installation ISO image from an alternative source, be sure (!!!) to verify its authenticity by checking the file’s checksum (hash) using tools like PowerShell’s Get-FileHash command, and compare the result with the official hash values provided by Microsoft. Installing an unofficial Windows build on your computer can compromise your security and privacy.
Clean Windows 11 Installation from the USB Drive
After preparing a bootable USB drive with the Windows 11 installation image, you can proceed with a clean installation of the operating system on a computer or laptop.
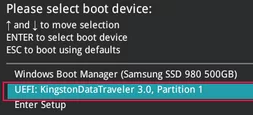
- Connect the USB drive to the computer, then power on or restart the computer.
- Immediately after turning on the computer, open the Boot Menu by pressing the specific key (it is specified on the boot POST screen). This is usually
F8,F9,F10,F11,F12, orEsc(depends on the device model and UEFI version). Or access the UEFI (BIOS) settings by pressingF1,F2orDel, and select your USB drive as the preferred boot device.
- If the computer boots from your USB drive, the message
Press any key to boot from CD or DVDwill appear. Press this key 😊 to continue the Windows 11 installation. - On the first Windows 11 Setup screen, select the required installation language and regional system settings (time format and time zone).
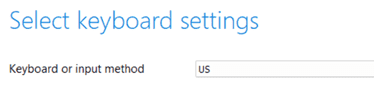
- Then select your keyboard layout
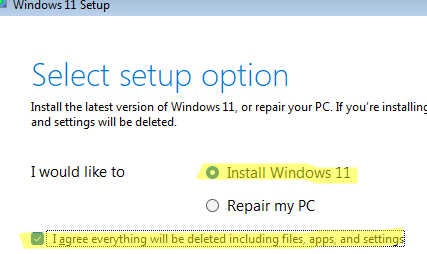
- Select that you want to perform a clean installation of Windows 11 and check the box indicating that you understand all contents of the computer, including settings, programs, and files, will be deleted.
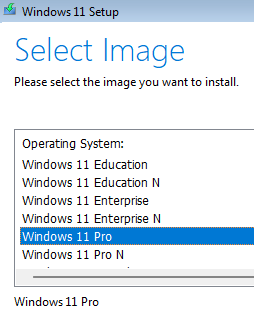
- Next, select the edition of Windows for installation.
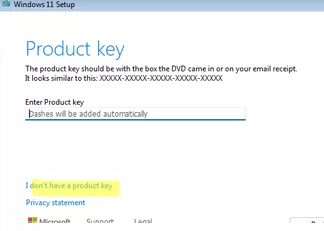
- Enter your Windows 11 product key. If you don’t have one, click “I don’t have a product key” to install Windows without one. You can specify the product key later, after the installation is complete.


In the system requirements for installing Windows 11, Microsoft has defined a number of minimum parameters that your computer must meet:
- Processor: 64-bit compatible CPU or SoC, minimum 2 cores, running at 1 GHz or faster, with support for SSE4.2 and POPCNT instructions
- RAM: 4 GB
- Disk: at least 64 GB
- UEFI with Secure Boot support (recommended)
- Motherboard security chip TPM 2.0 (Trusted Platform Module)
If the computer hardware doesn’t meet one or more of the minimum Windows 11 system requirements, the installer will display an error.
This PC doesn’t currently meet Windows 11 system requirements.
The list below shows system options that don’t meet the minimum Windows 11 hardware requirements.
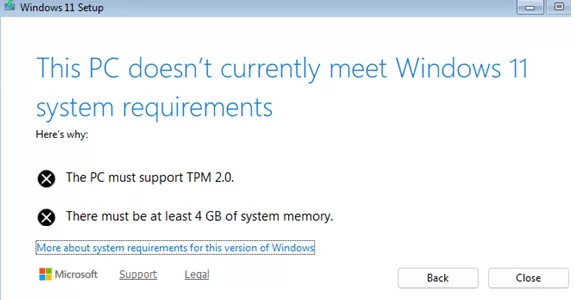
You can upgrade your computer to meet the system requirements (for example, add RAM, enable UEFI), or you can ignore the system requirements and continue installing Windows 11 on an unsupported computer. The post at the link explains how to install Windows 11 on unsupported hardware, ignoring TPM, UEFI, RAM, and other checks.
Next, you will see a list of local drives on your computer to which you can apply the Windows 11 image. In my case, there is only one disk with an unallocated space, which is 50 GB in size. To continue the installation process, select the unallocated space and click Next. The Windows installer will automatically create the necessary system partitions.
In your case, this page may show multiple disks and the partitions on them. Identify the disk (partition) to which you want to install the operating system. Delete or clean up any old partitions, if necessary.
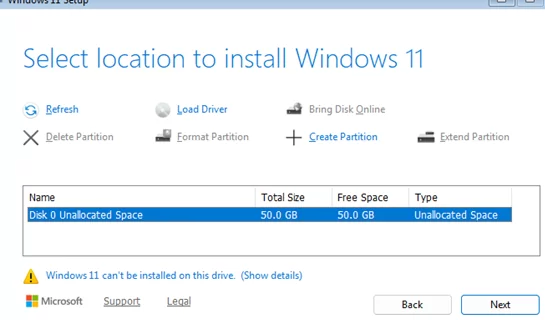
- If the Windows installer cannot detect the local disks, it may be because the necessary drivers for the disk controller are missing, or if the disk is not physically connected to the computer. Here is how you can load the necessary device drivers in WinPE (Windows Preinstallation Environment).
- Windows cannot be installed on a disk with an MBR partition table in UEFI mode. on a disk that is formatted using the MBR partitioning scheme. You will need to delete the partition table or convert it from MBR to GPT using the mbr2gpt.exe tool.
At the final step, confirm that you want to perform a clean installation of Windows 11 without keeping your previous data. 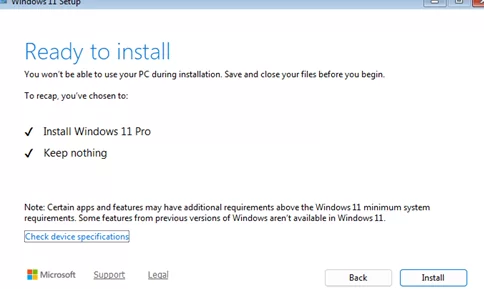
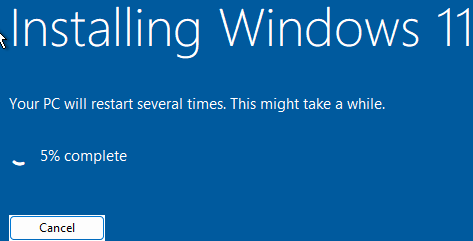
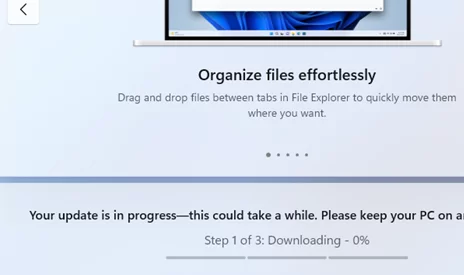
The Windows 11 installation process will begin, which typically takes about five minutes. During this time, your computer will restart.
Configure Windows 11 Settings During OOBE
After installing the Windows 11 image, the Out of Box Experience (OOBE) setup wizard will launch the first time the computer powers on.
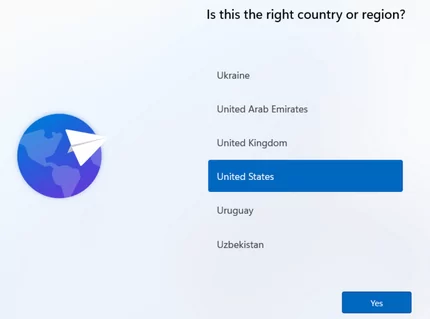
- Select your country/region.
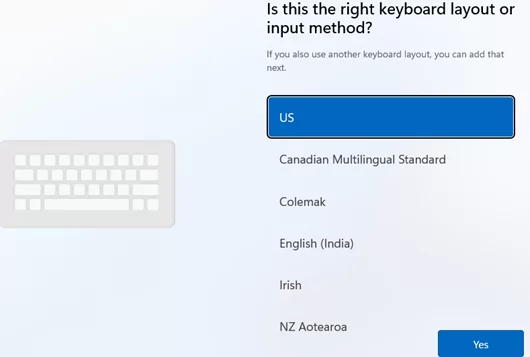
- Select the default keyboard layout
- If necessary, add additional keyboard layouts (languages).
- Select a Wi-Fi network and enter the password to connect a computer to the Internet. Or use an Ethernet connection.
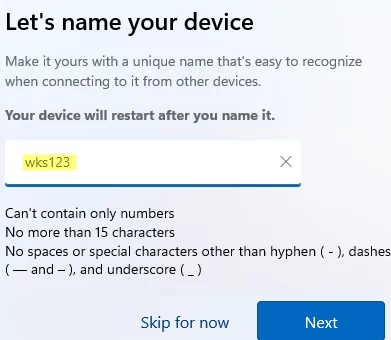
- Set the computer name (
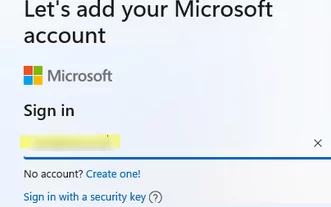
hostname) - Sign in to your Microsoft account (MSA) or create a new account if you don’t have one yet. Set a PIN to log into your MSA account on this computer. Those who would prefer not to use a Microsoft online account can find instructions for installing Windows with a local account below.
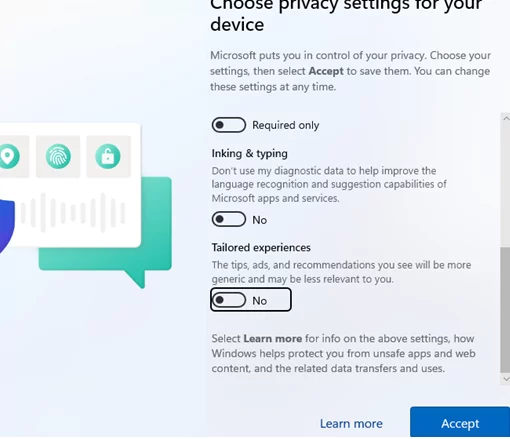
- It is necessary to specify the telemetry settings, determining how much data will be collected by Microsoft. I prefer to disable all of the options.
- Next, the system will automatically check for and install available updates via Windows Update.
- The Windows 11 desktop will then be displayed.
- Select your country/region.
Install Windows 11 with Local User Account
Currently, the easiest way to install Windows 11 25H2 with a local account appears to be as follows:
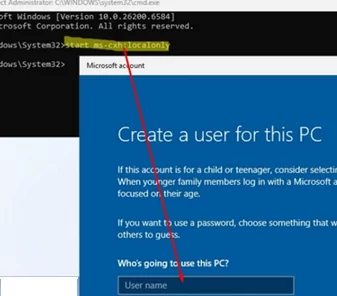
- Press
Shift+F10(orFn+Shift+F10for some laptops) on the Windows Out-of-Box Experience (OOBE) screen. - Run the command from the opened command prompt:
start ms-cxh:localonly - A screen for creating a local Windows account will appear.
All the current methods for installing Windows 11 with a local account are detailed in the article at the link.
How to Set Up Windows 11 without an Internet or Network
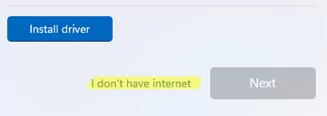
To complete the installation, Windows 11 25H2 requires a network connection to the Internet. This is necessary for the user to sign in to their Microsoft online account and link the device to it.
If your computer is not connected to the internet or is in an isolated environment, the button to continue the Windows 11 installation process will be grayed out and unavailable.
To set up Windows 11 without an Internet connection, open a command prompt window by pressing Shift+F10, and then run the following command:
oobe\bypassnro
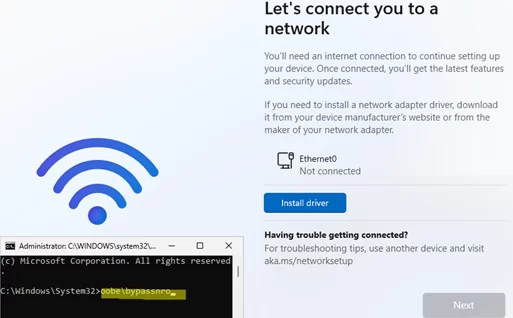
After restarting the computer, the I don’t have Internet button will appear on the network connection screen. Click this button to continue setting up Windows 11 without connecting to a network. Then create a local account instead of using an MSA account.
The clean installation of Windows 11 is now complete. You may now proceed with configuring your Windows 11 environment and installing the necessary programs.
- Starting with Windows 11 24H2, BitLocker automatically encrypts all local drives on compatible computers with a Trusted Platform Module (TPM) and Secure Boot.
- How to search for and manually install drivers for unknown devices in Windows.
- Use the WinGet package manager to install software on a Windows computer
- How to install only specific Microsoft Office apps using ODT
- Activate Windows and check its activation status