This article shows how to create a new virtual machine on a VMware ESXi host and install a guest operating system from an ISO image. Let’s see how to create a virtual machine from the vSphere Client web interface or by using PowerShell commands.
Create a Virtual Machine with VMware Web Client
Suppose you’ve already installed a new ESXi host, the free VMware Hypervisor, or deployed a full-featured vCenter solution, and now you need to create virtual machines on it. To install a guest operating system in a virtual machine on your ESXi host, you must upload an ISO file that contains the installation image of the required OS version.
- Open the ESXi host web interface (Host Client or vSphere Client) or the vCenter console;
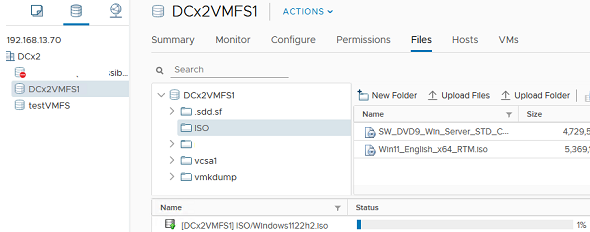
- Go to the Storage section and select a datastore to upload an ISO file to. Click Browse Files;
- You will see a list of files and folders on the datastore;
- Create a new folder called ISO, open it, click Upload Files, and select an ISO image file from your computer that you want to upload;

Then you can create a new virtual machine:
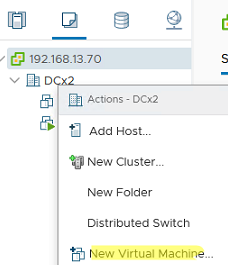
- Select New Virtual Machine (or Create/Register VM depending on your ESXi/vCenter version);
- Specify a VM name;
- Select the datastore where you want to create virtual machine files;
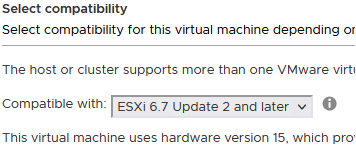
- Choose an ESXi Virtual Machine hardware version. If there are no specific compatibility requirements, always use the highest virtual hardware version available;
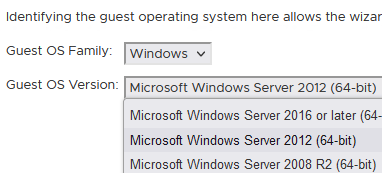
- Then specify the guest operating system family and version. This determines which image will be mounted during the installation of VMware Tools and some of the additional features of the VM. If the OS version you want to install on a VM is not listed, select the closest one;
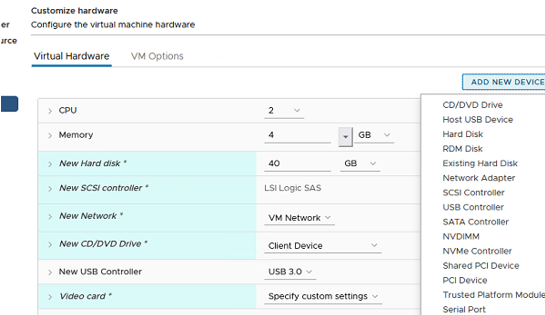
- The next step is to allocate the virtual machine’s available computing resources. Specify the number of cores (vCPU) and RAM to allocate to your virtual machine. Specify the size of your virtual machine’s hard drive (you can increase or reduce the size of your VMware VM’s virtual hard disk later) and the virtual disk controller type (
LSI Logic SASis used by default), select the type of a virtual network adapter (in most cases it is better to use the defaultE1000adapter) and a virtual network to place the VM’s network adapter in; - In the virtual hard disk settings, you can specify how you want to allocate space for hard disk files on the storage (Disk provisioning). You can use either Thick disks (all disk space is allocated when creating) or Thin disks (a virtual disk file has a minimum size and grows as it fills with data in the guest OS);
- If you want to add additional virtual devices (network adapters, disks, controllers, a virtual USB controller, a TPM module, COM ports, RDM disks, pass through a physical USB device, etc.), click Add new device and specify its settings. The default virtual hardware set is typically sufficient to run a virtual machine in the basic configuration.
- Click Finish to create a new VM.

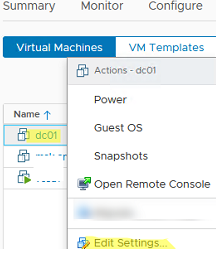
Your virtual machine will appear in the list of registered VMs. You must mount the ISO file to start installing the guest OS in the VM:
- Click the VM and select Edit Settings;
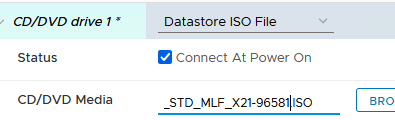
- Find a CD/DVD drive in the list of hardware. Select Datastore ISO File instead of Client Device;
- Click Browse and specify the path to your ISO file containing the OS installation image;
- Check the Connect at power on option to mount the ISO when the VM starts. Save the changes.
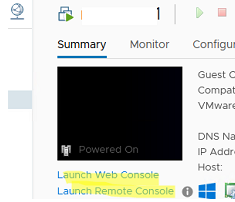
Then start your virtual machine: Power -> Power on (or click on the green Play button). 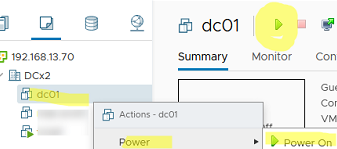
To connect to a virtual machine console and start an OS installation, select Open Remote Console (Launch Web Console). The virtual machine console will appear, where you can continue with the guest OS installation.
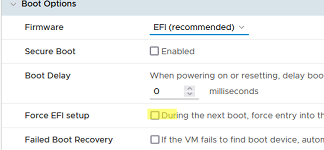
If you want to open the BIOS/UEFI settings at VM boot (for example, to change the boot order), open the VM options, go to VM Options -> Boot options, and enable Force EFI Setup (During the next boot, force entry into the EFI setup screen) or configure Boot Delay. Here you can switch between the EFI and BIOS firmware modes or enable the Secure Boot.
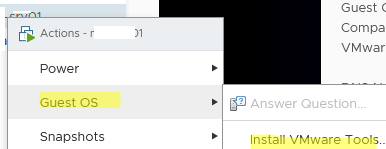
After installing the guest OS, it is recommended to install VMware Tools in it (it is a set of drivers and services for VMware virtual machine): Actions -> Guest OS -> Install VMware Tools.
Creating Virtual Machines on VMware ESXi Using PowerShell
You can use VPowerShell to create a virtual machine on VMware ESXi hosts. Install the PowerCLI PowerShell module on your computer:
Install-Module -Name VMware.PowerCLI
Connect to your ESXi or vCenter host:
Set-PowerCLIConfiguration -Scope AllUsers -InvalidCertificateAction Warn
 Connect-VIServer <vCenter_FQDN_or_ESXi_hostname_or_IP>
The New-VM cmdlet is used to create a virtual machine.
New-VM -Name TestVM1 –VMHost esxi01.woshub.com -Datastore ISCSI_DC01 -DiskGB 40 -DiskStorageFormat Thin -MemoryGB 8 -NumCpu 2 -NetworkName 'VM Network'
If you want to add a virtual floppy or CD drive, add the following options:
-Floppy -CD
You can specify the guest OS version with the option:
-GuestId rhel4_64Guest
If you want to create a new virtual machine from a template and customize the OS following the configured scenario, add these options:
-Template WS2022_Template -OSCustomizationSpec Cust_WS2022
Remember to close the PowerCLI session when you are finished:
Disconnect-VIServer -Server $ESXIHost -Confirm:$false