The Stunnel tool can be used as a proxy service to create a secure TLS tunnel for client-server network apps that do not support encryption themselves. In some cases, it is preferable to use this tool to secure remote access to a single app (service) rather than implementing a full-featured VPN solution.
Let’s look at how to use stunnel to create secure access between the client and the server. In this example, the server is a Windows host with an IIS web server running an unencrypted HTTP site. The task is to restrict access to this website from clients with certificate authentication and to enable traffic encryption.
Configuring Stunnel Server on Windows
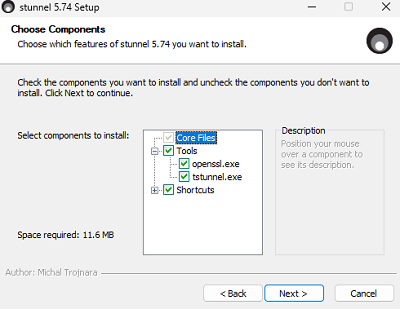
Download the Stunnel installer for Windows from https://www.stunnel.org/downloads.html and install it with the default settings, including openssl.
The next step is to generate keys and certificates for the CA, server, and clients. Open a command prompt and navigate to the directory:
cd "c:\Program Files (x86)\stunnel\bin"
Generate CA key:
openssl genpkey -algorithm RSA -out ca.key
Create a CA certificate:
openssl req -new -x509 -key ca.key -out ca.crt -subj "/O=woshubLTD/OU=IT/CN=CA_webserver1.com"
Create a private key for the server:
openssl genpkey -algorithm RSA -out server.key
Create a certificate signing request (CSR):
openssl req -key server.key -new -out server.csr
Use the root CA to sign the server certificate.
openssl x509 -req -in server.csr -CA ca.crt -CAkey ca.key -CAcreateserial -out server.crt -days 365 -subj "/O=woshubLTD/OU=IT/CN=server_webserver1.com"
Now, create a private key for the client:
openssl genpkey -algorithm RSA -out client.key
Generate a request for a client certificate:
openssl req -key client.key -new -out client.csr
Sign the client certificate:
openssl x509 -req -in client.csr -CA ca.crt -CAkey ca.key -CAcreateserial -out client.crt -days 365 -subj "/O=woshubLTD/OU=IT/CN=client1_webserver1.com"
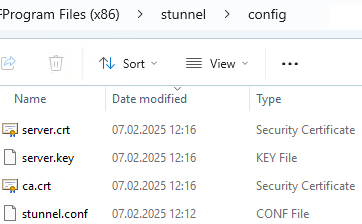
On the web server, copy the ca.crt, server.crt, and server.key files to the C:\Program Files (x86)\stunnel\config folder.
Edit the stunnel.conf file (you can clear the default settings) and add the following configuration:
; Write logs to stunnel.log
debug = info
output = stunnel.log
; Strong encryption settings. We assume that both devices have modern CPUs that support AES hardware acceleration. If such encryption settings cause server performance degradation under heavy traffic, you can simplify them.
options = CIPHER_SERVER_PREFERENCE
options = NO_SSLv2
options = NO_SSLv3
options = NO_TLSv1
sslVersion = TLSv1.2
sslVersion = TLSv1.3
ciphers = ECDHE-RSA-AES256-GCM-SHA384
; names (paths) to certificate files
cert = server.crt
key = server.key
CAfile = ca.crt
; This section contains the configuration of the service that the client will access via Stunnel.
[ITPoral]
; This is the IP address and port on which the Stunnel instance should listen for connections.
accept = 192.168.158.144:443
; or accept = 443
; The IP address and port of the service to which the connection should be redirected. In our case, this is a local HTTP site.
connect = 127.0.0.1:80
; or connect = 80
; Always check the remote computer's client certificate. Clients without a certificate will not be able to connect to the service.
verify=2
Open the specified port in Windows Defender Firewall to allow incoming connections. You can create a firewall rule with PowerShell.
New-NetFirewallRule -DisplayName "ITPoral_stunnel_443" -Direction Inbound -LocalPort 443 -Protocol TCP -Action Allow
Run Stunnel.exe and check the GUI logs to ensure your configuration does not contain errors. The graphical interface allows quick re-read the configuration file and immediately view error logs, which makes debugging easier.
1 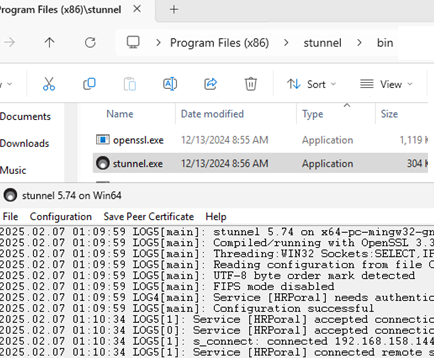
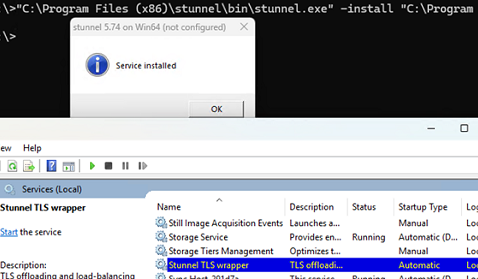
Close the stunnel.exe GUI by clicking Terminate in the menu, then start stunnel as a Windows service. Run the command:
"C:\Program Files (x86)\stunnel\bin\stunnel.exe" -install "C:\Program Files (x86)\stunnel\config\stunnel.conf"
The Stunnel TLS wrapper service will be created. Start it:
Start-Service wrapper
The stunnel process listens on port 443 once it is started.
Stunnel Client Configuration Example on Windows
Then, install stunnel from the same distribution on the client Windows device. Then copy the ca.crt, client.crt, and client.key files from the server to the C:\Program Files (x86)\stunnel\config folder.
Add the following to the stunnel.conf configuration file:
[ITPoral]
; Run Stunnel in the client mode.
client = yes
; Specify the IP address and TCP port through which your service will be accessible to your clients.
accept = localhost:8080
; the address of the stunnel server to redirect connections to
connect = 192.168.158.144:443
; certificate paths
CAfile = ca.crt
cert = client.crt
key = client.key
; Certificates must be checked explicitly when establishing a connection.
verify=2
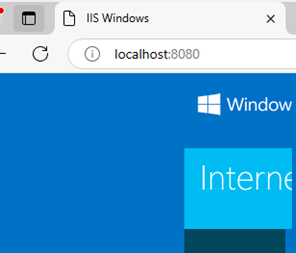
Save the configuration file. First, run Stunnel manually and check the logs for errors. Now, when you access the address localhost:8080 from the browser, Stunnel will redirect the connection to the remote server.
Get-Content client.key, client.crt | Set-Content client.pem
In this case, only specify the following in the stunnel configuration file:
cert = client1.pem
If everything is working properly, you can run stunnel on a client as a service.
stunnel.exe -install

To revoke certificates (for example, compromised ones), add the CRLpath option to the stunnel server configuration. Specify the path to the folder where the revoked certificates (Certificate Revocation Lists) in PEM format are stored.
You can also use the CApath option to specify the location of the folder containing the allowed certificates.