To send e-mail through an SMTP server from PowerShell scripts, you can use the built-in Send-MailMessage cmdlet. Its major drawback is that it can only use Basic SMTP authentication and doesn’t support modern authentication methods, including OAuth and Microsoft Modern Authentication. When you run the Send-MailMessage command in new versions of the PowerShell Core 7.x, you receive the following warning:
WARNING: The command 'Send-MailMessage' is obsolete. This cmdlet does not guarantee secure connections to SMTP servers. While there is no immediate replacement available in PowerShell, we recommend you do not use Send-MailMessage at this time. See https://aka.ms/SendMailMessage for more information.

By default, Microsoft disables Basic Auth for all new Azure tenants. In this post, we’ll look at how to send email from your Exchange Online/Microsoft 365 tenant using the Microsoft Graph API and PowerShell.
Configure Permissions to Send Email with Microsoft Graph API
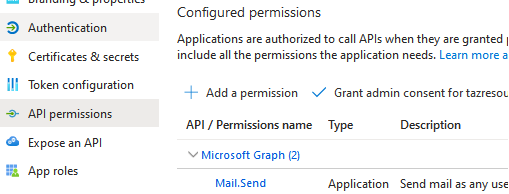
Before you can get an Azure token and authenticate from your PowerShell script, you need to create a new application in Entra ID tenant (Azure Active Directory -> App registration -> New registration). Then grant Mail.Send permission to the application (API Permissions -> Add a permission -> Microsoft Graph -> Application permissions -> Mail.Send).
By default, your application can send an email on behalf of any mailbox in the Exchange Online tenant. You can use the Application Access Policy to restrict the list of email addresses that your application can send emails on behalf of.
Connect to Exchange Online using PowerShell (Connect-ExchangeOnline), create an Exchange distribution group, and add the accounts you want to be able to send email from:
New-DistributionGroup -Name "azappSendasAllowed" -Type "Security" -Members @("sender@woshub.com")
Set-DistributionGroup -Identity azappSendasAllowed -HiddenFromAddressListsEnabled $true
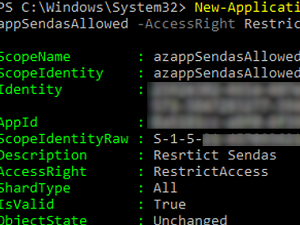
Now create a policy and bind it to your Azure AppID:
New-ApplicationAccessPolicy -AppId "xxxxxxx-xxxx-xxxx-xxxx-xxxxxxxxxxxx" -PolicyScopeGroupId azappSendasAllowed -AccessRight RestrictAccess -Description "Resrtict SendAs Policy"
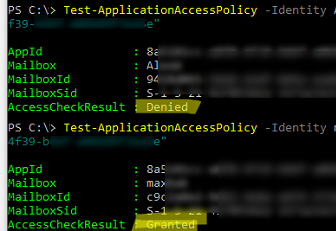
You can now check which addresses your application is allowed to send email on behalf of:
Test-ApplicationAccessPolicy -Identity AlexW@woshub.com -AppId "xxxxxxx-xxxx-xxxx-xxxx-xxxxxxxxxxxx"
 Test-ApplicationAccessPolicy -Identity MaxB@woshub.com -AppId "xxxxxxx-xxxx-xxxx-xxxx-xxxxxxxxxxxx"
Depending on the access status, the above command will return Denied or Granted.
Sending Email via Exchange Online Using Invoke-RestMethod
You can use the sendMail REST API method to send an email through Exchange Online/Microsoft 365. To call the method, use the built-in Invoke-RestMethod PowerShell cmdlet.
To send an email using the Microsoft Graph API, you must authenticate with Entra ID (Azure) and get a token.
$AccessSecret= "3333333333333333333333333333333333333333333"
 $AzureAppID = "xxxxxxx-xxxx-xxxx-xxxx-xxxxxxxxxxxx"
 $tenantID="1234567-1234-1234-1234-123456789012"
Now connect to the Graph API and perform an authentication:
$tokenBody = @{
   Grant_Type    = "client_credentials"
   Scope         = "https://graph.microsoft.com/.default"
   Client_Id     = $AzureAppID
   Client_Secret = $AccessSecret
}
$tokenResponse = Invoke-RestMethod -Uri "https://login.microsoftonline.com/$tenantID/oauth2/v2.0/token" -Method POST -Body $tokenBody
$headers = @{
   "Authorization" = "Bearer $($tokenResponse.access_token)"
   "Content-type" = "application/json"
}
You are now ready to send an email:
$MailFrom = "sender@woshub.com"
$MailTo = "maxb@woshub.com"
$URLsend = "https://graph.microsoft.com/v1.0/users/$MailFrom/sendMail"
$BodyJsonsend = @"
{
   "message": {
   "subject": "Test email from Microsoft Graph API",
   "body": {
      "contentType": "HTML",
      "content": "This email is sent via <br>
      Microsoft GRAPH API<br>"
   },
   "toRecipients": [
      {
      "emailAddress": {
      "address": "$mailto"
          }
      }
   ]
   },
   "saveToSentItems": "true"
}
"@
Invoke-RestMethod -Method POST -Uri $URLsend -Headers $headers -Body $BodyJsonsend
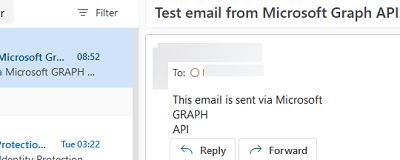
Check that the email was successfully delivered to the user’s Exchange mailbox.
Using Send-MgUserMail Cmdlet from Microsoft.Graph Module
Using the Invoke-RestMethod cmdlet to send an email means that you have to generate the entire email object in JSON format. To make the process easier, you can try using the Send-MgUserMail cmdlet from Microsoft.Graph module instead.
Install the Microsoft.Graph module and import it into your PowerShell session:
Install-Module Microsoft.Graph
 Import-Module Microsoft.Graph
We will use a certificate to authenticate in the Microsoft 365 (Exchange Online) tenant:
$certThumbprint = "9CF05589A4B29BECEE6456F08A76EBC3DC2BC581"
$AzureAppID = "xxxxxxx-xxxx-xxxx-xxxx-xxxxxxxxxxxx"
$tenant="woshub.onmicrosoft.com"
Connect-MgGraph -TenantId $Tenant -ClientId $AzureAppID -CertificateThumbprint $certThumbprint
Next, we create a simple email with an HTML body and an attached file:
$MailFrom = "sender@woshub.com"
$MailTo = "maxb@woshub.com"
$msgBody = “This is <br> test <br> Graph API mailer <br>”
$Attachment = "C:\logs\mytestapp.log"
$AttachmentContentBytes = [System.IO.File]::ReadAllBytes($Attachment)
$AttachmentBase64 = [System.Convert]::ToBase64String($AttachmentContentBytes)
$Message = @{
   Subject = "Hello World from GraphAPI"
   Body = @{
      ContentType = "HTML"
      Content = $msgBody
      }
   ToRecipients = @(
      @{
         EmailAddress = @{
         Address = $MailTo
         }
       }
    )
    Attachments = @(
   @{
      "@odata.type" = "#microsoft.graph.fileAttachment"
      Name = (Split-Path $Attachment -Leaf)
      ContentType = "application/octet-stream"
      ContentBytes = $AttachmentBase64
     }
  )
}
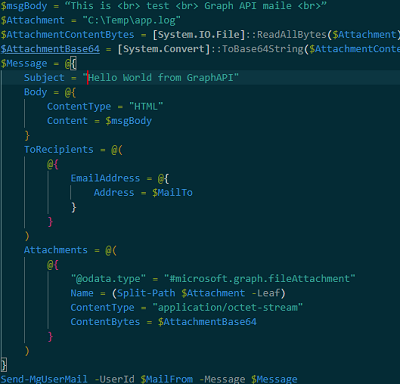
You can use this command to send an e-mail message:
Send-MgUserMail -UserId $MailFrom -Message $Message
2 comments
There are many bells and whistles in the Microsoft 365 environment, yet basic everyday tasks are still harder to pull off than using custom or 3rd party solutions. Password Expiration reminders and app deployment are just a few things that are unnecessarily complicated in Microsoft 365.
Thanks for your write-up. I was able to use this information for a weekly training session I have with junior admins. 5 stars!