This post covers creating and managing a network bridge connection on a Windows desktop computer (laptop). Operating at the data link layer (L2) of the OSI model, a network bridge transparently connects two or more network segments, allowing them to function as a single network. NIC bridging is supported in all versions of Windows and requires no additional third-party software.
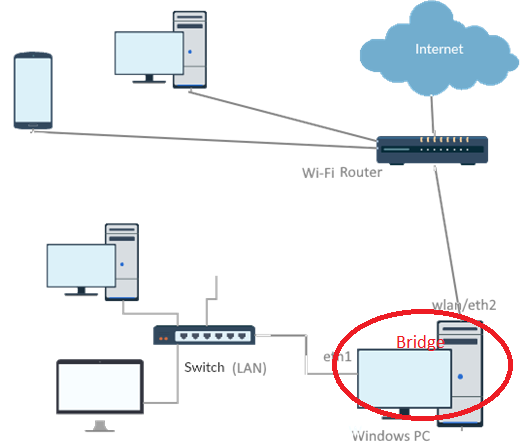
In this example, we have a Windows computer with two network interfaces connected to two network segments. The WLAN adapter is connected to a Wi-Fi network (a wireless router with Internet access), and the Ethernet adapter is connected to an isolated LAN (through a switch). We will bridge the wireless adapter with the Ethernet NIC. Using a network bridge on a Windows computer, you can transparently connect two networks, and all clients from an isolated network (LAN) will be able to access resources on the external network and access the Internet through the Wi-Fi router.
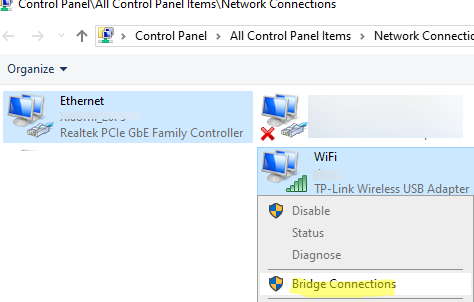
Two network interfaces can be bridged in Windows using the classic Network Connections control panel (ncpa.cpl). Select two (or more) network adapters, right-click, and select Bridge Connections from the menu.
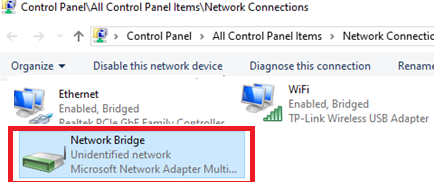
A new interface named Network Bridge with Microsoft Network Adapter Multiplexor Driver will appear in the network connections list.
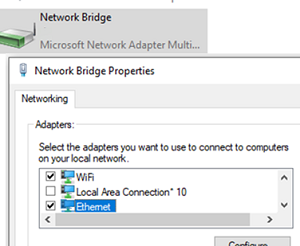
An error may occur when bridging network adapters:
An unexpected error occurred while configuring the Network Bridge.
In this case, open the bridge properties and check the physical network adapters you want to bridge.
After that, the properties of all network adapters participating in the bridge (including TCP/IP settings) will no longer be available for modification, and the Bridged status will appear in the NIC descriptions. A network bridge can contain more than two NICs with different media types.
Now, if the DHCP server is enabled on the router, all clients on the isolated LAN will receive IP addresses from the external network scope (clients must be enabled to obtain IP addresses automatically from DHCP, or if IP addresses must be set manually from a required network segment.). This is how you can transparently connect two network segments using a network bridge.
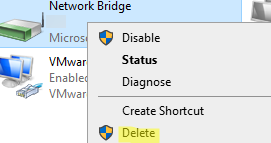
To delete a network bridge, click on it and select Delete.
Previous versions of Windows could only create a bridged network connection from the GUI. When attempting to run the netsh bridge install command, the following error occurred:
Not supported.
Please go to the Network Connections folder to install.
In Windows 11 22H2, after the installation of the 2023-09 cumulative update, it is possible to create a bridged network connection from the CMD by using the netsh command:
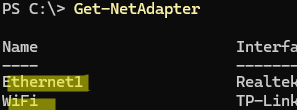
Run the PowerShell command to get network interface names in Windows:
Get-NetAdapter
List network adapters that can be added to the bridge:
netsh bridge show adapter
To bridge two network interfaces, specify their names in the following command:
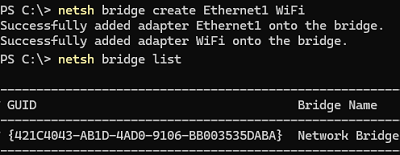
netsh bridge create Ethernet1 WiFi
Once the bridge is created, get its GUID:
netsh bridge list
Add or remove a network adapter from the bridge:
netsh bridge add <Adapter_Name> to <bridge_guid>
 netsh bridge remove <Adapter_Name> from <bridge_guid>
Remove the bridge connection:
netsh bridge destroy <bridge_guid>
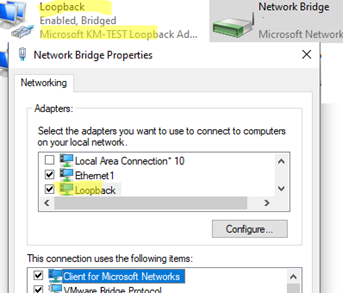
When Ethernet and Wi-Fi adapters are combined in a bridge, the bridge will not function properly if both NICs are simultaneously disconnected from the network, and then reconnected. As a workaround, you can add an additional network interface to the network bridge that is never disconnected. The easiest way to do this is to create a dummy Microsoft loopback adapter (this device is called Microsoft KM-TEST Loopback Adapter in modern Windows versions). To create a loopback adapter, use the Device Manager snap-in or the devcon command line tool:
./devcon.exe -r install $env:windir\Inf\Netloop.inf *MSLOOP



1 comment
As soon as I create the bridge, I lose connectivity to my Wi-Fi network… as in no more internet access or ability to http to the router. I cannot ping or resolve any URLs or external addresses, but I can see what is on my ethernet LAN. I do get a DHCP supplied IP and the Gateway and DNS addresses are correct for my network. Odd that I can get an IP address over Wi-Fi from the router which is the DHCP server but cannot ping the router as I could without creating the bridge.
Microsoft Windows [Version 10.0.22631.4541]