Squid is probably the most known and popular open-source caching proxy server. The squid proxy server supports a lot of caching protocols (ICP, HTCP, CARP, WCCP), and allows to proxy HTTP, HTTPS, FTP, etc. traffic. Squid is easily scalable, you may use it to filter content or limit bandwidth per user or site, it supports user authentication (including Active Directory LDAP authentication). In this article, we’ll show how to install a Squid proxy server on Linux.
Installing Squid Proxy Server on Linux
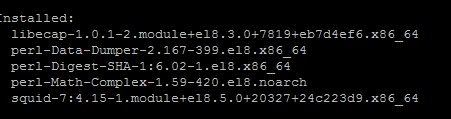
Install the Squid package on a host using your package manager. Depending on your Linux version, use one of the following commands:
- Oracle, Rocky Linux, CentOS, Fedora, or Red Hat Enterprise Linux:
# dnf install -y squid - SUSE Linux Enterprise Server:
# zypper install squid - Ubuntu or Debian:
# apt-get install squid
If you want to implement user authentication in Squid, install one more package:
- RHEL/CentOS/Fedora:
# dnf -y install httpd-tools - Debian/Ubuntu:
# sudo apt install apache2-utils
Enable Squid in Linux using systemd, run the service, and check its status:
# systemctl enable squid
# systemctl start squid
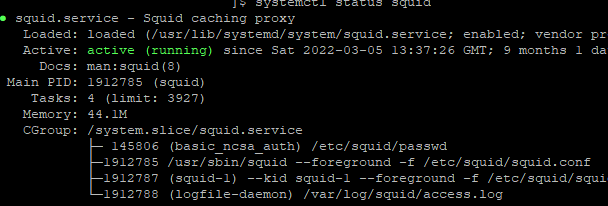
# systemctl status squid
To list all options squid is built with:
# squid –v
Squid Cache: Version 4.15
Service Name: squid
This binary uses OpenSSL 1.1.1k FIPS 25 Mar 2021. For legal restrictions on distribution see https://www.openssl.org/source/license.html
configure options: '--build=x86_64-redhat-linux-gnu' '--host=x86_64-redhat-linux-gnu' '--program-prefix=' '--prefix=/usr' '--exec-prefix=/usr' '--bindir=/usr/bin' '--sbindir=/usr/sbin' '--sysconfdir=/etc' '--datadir=/usr/share' '--includedir=/usr/include' '--libdir=/usr/lib64' '--libexecdir=/usr/libexec' '--localstatedir=/var' '--sharedstatedir=/var/lib' '--mandir=/usr/share/man' '--infodir=/usr/share/info' '--libexecdir=/usr/lib64/squid' '--datadir=/usr/share/squid' '--sysconfdir=/etc/squid' '--with-logdir=/var/log/squid' '--with-pidfile=/var/run/squid.pid' '--disable-dependency-tracking' '--enable-eui' '--enable-follow-x-forwarded-for' '--enable-auth' '--enable-auth-basic=DB,fake,getpwnam,LDAP,NCSA,PAM,POP3,RADIUS,SASL,SMB,SMB_LM' '--enable-auth-ntlm=SMB_LM,fake' '--enable-auth-digest=file,LDAP' '--enable-auth-negotiate=kerberos' '--enable-external-acl-helpers=LDAP_group,time_quota,session,unix_group,wbinfo_group,kerberos_ldap_group' '--enable-storeid-rewrite-helpers=file' '--enable-cache-digests' '--enable-cachemgr-hostname=localhost' '--enable-delay-pools' '--enable-epoll' '--enable-icap-client' '--enable-ident-lookups' '--enable-linux-netfilter' '--enable-removal-policies=heap,lru' '--enable-snmp' '--enable-ssl' '--enable-ssl-crtd' '--enable-storeio=aufs,diskd,ufs,rock' '--enable-diskio' '--enable-wccpv2' '--enable-esi' '--enable-ecap' '--with-aio' '--with-default-user=squid' '--with-dl' '--with-openssl' '--with-pthreads' '--disable-arch-native' '--disable-security-cert-validators' '--with-swapdir=/var/spool/squid' 'build_alias=x86_64-redhat-linux-gnu' 'host_alias=x86_64-redhat-linux-gnu' 'CFLAGS=-O2 -g -pipe -Wall -Werror=format-security -Wp,-D_FORTIFY_SOURCE=2 -Wp,-D_GLIBCXX_ASSERTIONS -fexceptions -fstack-protector-strong -grecord-gcc-switches -specs=/usr/lib/rpm/redhat/redhat-hardened-cc1 -specs=/usr/lib/rpm/redhat/redhat-annobin-cc1 -m64 -mtune=generic -fasynchronous-unwind-tables -fstack-clash-protection -fcf-protection' 'LDFLAGS=-Wl,-z,relro -Wl,-z,now -specs=/usr/lib/rpm/redhat/redhat-hardened-ld' 'CXXFLAGS=-O2 -g -pipe -Wall -Werror=format-security -Wp,-D_FORTIFY_SOURCE=2 -Wp,-D_GLIBCXX_ASSERTIONS -fexceptions -fstack-protector-strong -grecord-gcc-switches -specs=/usr/lib/rpm/redhat/redhat-hardened-cc1 -specs=/usr/lib/rpm/redhat/redhat-annobin-cc1 -m64 -mtune=generic -fasynchronous-unwind-tables -fstack-clash-protection -fcf-protection' 'PKG_CONFIG_PATH=:/usr/lib64/pkgconfig:/usr/share/pkgconfig'
Configuring the Squid Caching Proxy Server
By default, squid is using the/etc/squid/squid.conf configuration file.
$ sudo cp /etc/squid/squid.conf /etc/squid/squid.conf.original
 $ sudo chmod a-w /etc/squid/squid.conf.original
You can later return to the original configuration file or use it as a directive reference.
Edit the squid configuration file:
$ sudo mcedit /etc/squid/squid.conf
At the beginning of the Squid configuration file, an access control list is specified that defines the IP addresses (subnets) of the clients allowed to connect to the proxy server.
For example, you want to allow access only to clients from your local network. Add the following directive:
acl localnet src 192.168.50.0/24
You may comment other acl localnet lines.
The directive allowing access for this network is set below in the configuration file:
http_access allow localnet
By default, Squid accepts user connections on port TCP/3128. You may change the port number in http_port. I will change the squid listening port to 4555:
http_port 4555
If you want to use the proxy server for caching, configure a cache directory:
cache_dir ufs /var/spool/squid 5120 32 256
20480– is the cache size in MB32– is the number of first-level directories for the cache,256are the second-level directories
To create a folder structure for the squid cache on a disk, run the command below:
$ squid -z
To authenticate users in squid, we will use simple basic authentication. First of all, create a file to store user names and passwords:
$ sudo touch /etc/squid/passwd && sudo chown squid /etc/squid/passwd
To add a new user to the file, run this command:
$ sudo htpasswd -c /etc/squid/passwd username1
When adding the next users, you don’t need to use -c option.

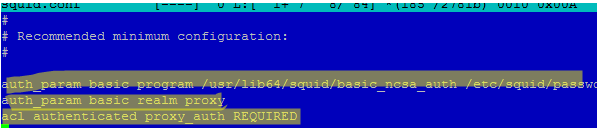
Then add the following lines to the beginning of squid.conf file:
# use basic auth and password file
auth_param basic program /usr/lib64/squid/basic_ncsa_auth /etc/squid/passwd
# the number of concurrent connections
auth_param basic children 5
auth_param basic realm Squid Basic Authentication
# session length without re-entering login and password
auth_param basic credentialsttl 8 hours
auth_param basic casesensitive off
acl auth_users proxy_auth REQUIRED
http_access allow auth_users
Different Linux distros may have different paths to the basic_ncsa_auth file:
- /usr/lib64/squid/basic_ncsa_auth (Oracle, Rocky Linux, RHEL, CentOS)
- /usr/lib/squid/basic_ncsa_auth (Debian, Ubuntu, Kali Linux)
auth_param basic program /usr/lib64/squid/basic_ldap_auth -R -b "dc=woshub,dc=com" -D "squid_srv@woshub.com " -w "<user password>" -f "sAMAccountName=%s" <AD domain controller IP address>
The disadvantage of basic authentication is that the password is transmitted as text encrypted with Base64 (it is easily decrypted, see an example in the article Send emails using telnet with SMTP authentication). Thus, it is more secure to use Kerberos Active Directory authentication in Squid. If you don’t have AD, you may configure HTTP Digest authentication in Squid. But this is beyond the scope of this article.
Allowing and denying rules are set using http_access directives at the end of the squid config file. For example, to allow access for authenticated users only:
http_access allow localhost
http_access allow authenticated
http_access deny all
Squid allows you to block specific websites. Create a file with a list of banned sites:
$ sudo vi /etc/squid/blocked_sites
Add a list of websites you want to deny access to:
facebook.com
twitter.com
instagram.com
Then add the following lines to the squid configuration file:
acl blocked_sites dstdomain "/etc/squid/blocked_sites"
http_access deny blocked_sites
After making changes to the squid configuration file, check it for syntax errors:
$ sudo squid -k parse
If there are no errors, you can apply new squid configuration options (you don’t need to restart a daemon):
$ sudo squid -k reconfigure
Allow connection to the proxy server port in your firewall (in our example, it is TCP 4555). If you are using firewalld, add an allow rule as follows:
# firewall-cmd --zone=public --add-port=4555/tcp
 # firewall-cmd --reload
If your Linux server is hosted by an external provider (AWS, Azure, Oracle Cloud, etc.), remember to add an allowing rule for port TCP/4555 to the corresponding Security Group.
Check that Squid is listening on the port specified in the http_port directive:
$ netstat -tulnp
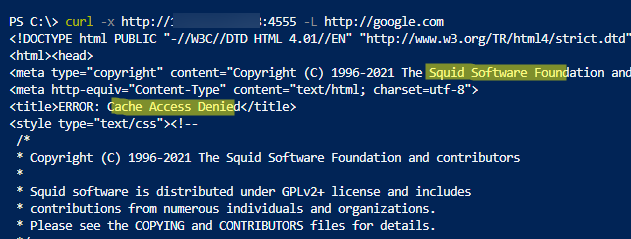
Using curl, you can check the availability of your squid proxy server:
$ curl -x http://xx.xx.xx.xx:4555 -L http://google.com
If the authentication required/ Access Denied error appears, submit a username and password to access squid:
$ curl -x http://xx.xx.xx.xx:4555 --proxy-user proxyuser1:NDMk23C3jvm -I http://google.com
To check squid logs in real-time, use the command:
$ sudo tail -f /var/log/squid/access.log
If your browser shows the error: The proxy server is refusing connections and there is the TCP_DENIED/403 4041 CONNECT line in the access.log, check your ACLs.
If a user has been successfully authenticated, the squid log will contain the line TCP_TUNNEL/200 39 CONNECT woshub.com:80 proxyusername HIER_DIRECT/xx.xx.xx.xx or TCP_MISS/200.
It remains to set the proxy server settings in browsers on users’ computers. Set the IP address (name) of the Squid host and port in the browser settings. You configure proxy settings on Windows computers via GPO.
1 comment
Do a fully updated Negotiate (Kerberos/NTLM) guide for 2023 please