This article explains how to manually load network adapter drivers in Windows PE (Preinstallation Environment) or WinRE (Recovery Environment), initialize networking, configure a static IP address and preferred DNS server, and map a network drive.
If you need to access local network or internet resources from the WinPE environment, you will likely find that your network adapter driver is missing from the boot image, making network access not possible.
Let’s suppose that you booted your computer into WinPE from a LiveCD image or a Windows installation USB flash drive. In the second case, press the Shift+F10 key combination directly on the installation screen to open the command prompt. Ensure that this lightweight Windows image is unable to detect network adapters.
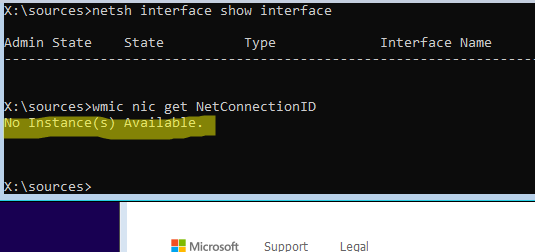
netsh interface show interface
or
wmic nic get NetConnectionID
The second command returned No Instance(s) Available, indicating that either the computer has no network adapter, or a suitable driver could not be found.
How can you verify the presence of network adapters and identify their specific models on a computer from the WinPE environment?
Use the built-in WbemTest tools to find information about your computer’s hardware from the WinPE environment. Run the program, connect to the root\cimv2 namespace, and click the Query button. Then execute the following WMI query:
select * from Win32_PNPEntity where (description like '%ether%') or (description like '%network%')
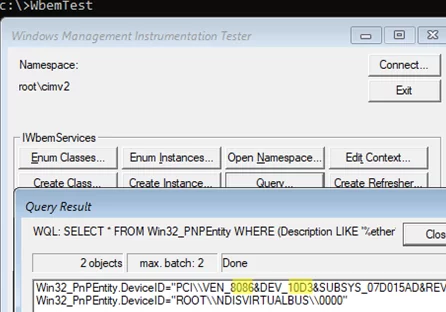
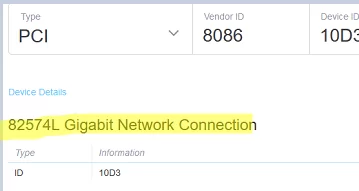
In my case, I found a network adapter with the ID VEN 8086 and DEV 10D3 on the computer. You can identify the model of the network adapter by its vendor and product ID (see ‘How to identify unknown hardware in Windows‘). By querying devicehunt.com with this data, we identified the network adapter as “Intel 82574L Gigabit Network Connection“.
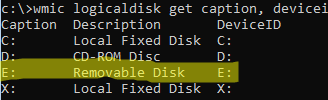
Download the network adapter drivers from the vendor’s website and extract them to a folder on a USB flash drive. The driver directory must contain INF, CAT, and SYS files. Plug the USB stick into the computer. Run the following command to find out which drive letter has been assigned to it:
wmic logicaldisk get caption, deviceid, description
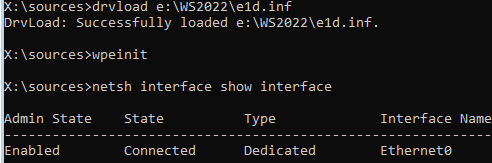
Now, you can use the built-in drvload command to load a driver from an INF file in the WinPE environment.
drvload e:\ws2022\e1d.inf
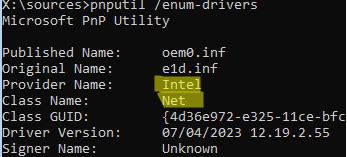
Ensure that the Intel network driver has been loaded into the WinPE environment memory.
pnputil /enum-drivers
Then initialize the network:
wpeinit
or
wpeutil InitializeNetwork
Run the command again and check the results:
netsh interface show interface
The Ethernet0 network adapter is now available in the WinPE environment.
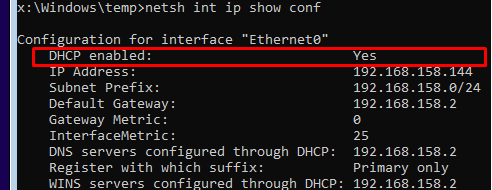
By default, the network interface is configured to automatically obtain an IP address from an available DHCP server ( DHCP enabled = Yes ).
netsh int ip show conf
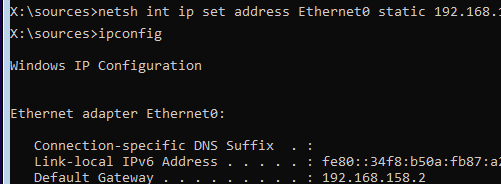
You can configure a static IP address and preferred DNS server manually:
netsh int ip set address Ethernet0 static 192.168.18.123 255.255.255.0 192.168.18.2
 netsh int ipv4 add dnsserver name=Ethernet0 addr=192.168.18.2 index=1
To reset the Ethernet0 adapter settings so that it automatically obtains an IP address from DHCP:
netsh interface ipv4 set address Ethernet0 source=dhcp
 wpeinit
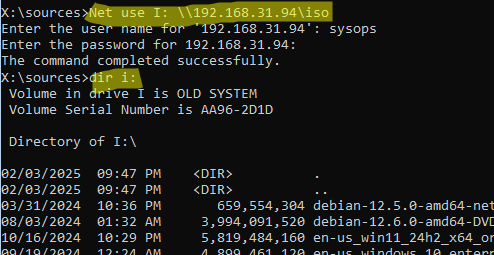
You can map a shared network folder from a remote computer to a drive letter using the standard net use command:
net use I: \\192.168.39.91\ISO
By default, the WinPE environment has a firewall enabled, which restricts remote access to the device. The built-in firewall also blocks ICMP ping responses. To enable remote access to the WinPE environment, disable the firewall by running the following command:
wpeutil disablefirewall

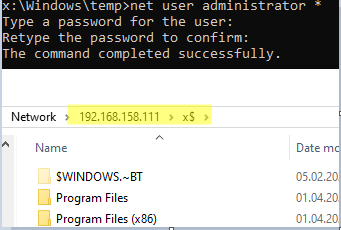
In order to connect to the WinPE environment remotely, you will need to reset the built-in administrator password. Run the command to set a new password.
net user administrator *
The device that booted in WinPE will now be accessible via the network.
If you back up the system state using the wbadmin command, you can list the available image versions in the network folder:
wbadmin get versions -backuptarget:\\<server>\<share>
In this post, we covered how to enable and configure the network in the Windows PE environment. This allows you to access network resources and the internet. For example, you can use it to update the definitions of an offline antivirus scanner. This approach also enables you to install Windows over the network on computers that don’t support PXE boot, or to restore a system from an image stored in a network folder.