When you install Microsoft Office 2021, 2019, 2016. or Microsoft 365 Apps for Business (ex-Office 365), you cannot choose to install individual Office apps, change a path to the installation directory, choose a language, or change any other settings. The full Office package is always installed (all apps from the Microsoft Office suite are installed at once). You cannot choose to install only certain apps or change any settings from the Office installer interface. Once installed, you can’t use the Change button in Programs and Features to uninstall Office programs that you don’t need.
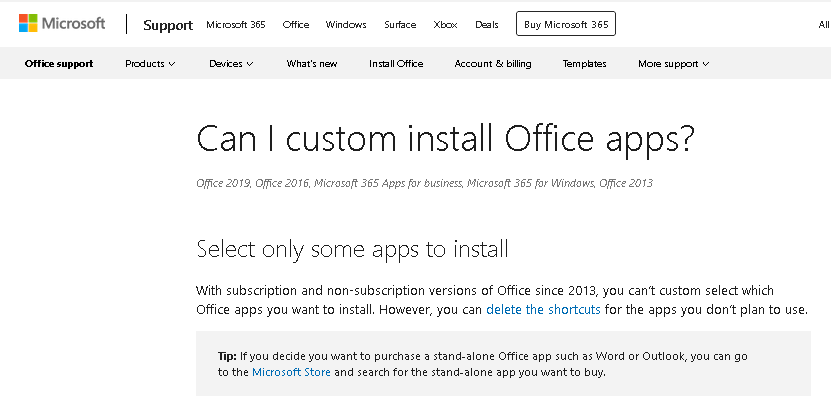
Office help on the Microsoft website states that you cannot selectively install individual apps in Office 2021/2019/2016/Microsoft 365 for Windows/Microsoft 365 Apps for business (link), and that it is recommended that you install individual Office apps from the Microsoft Store rather than using desktop apps. But it is not true.
With subscription and non-subscription versions of Office since 2013, you can’t custom select which Office apps you want to install. However, you can delete the shortcuts for the apps you don’t plan to use.
Configure Office Installation Options with ODT (Office Deployment Tool)
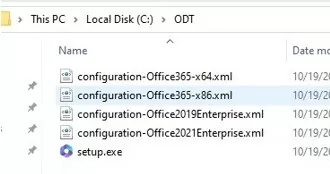
You can use the Microsoft Office Deployment Tool (ODT) to selectively install only certain Office apps (for example, only Word, Excel, or Outlook). Download and extract the Office Deployment Tool (https://www.microsoft.com/en-us/download/details.aspx?id=49117) to a local directory (for example, C:\ODT).
ODT allows you to install Microsoft Office programs on your computer according to the settings in the XML file that you have configured (typically used to deploy Office in a corporate environment). In the XML file, you can specify which Office 2021, Office 2019, or Office 365 applications you want to install or uninstall, add the localization language, and set various app settings.
The ODT folder already contains several examples of such XML files for Office 2021 (configuration-Office2021Enterprise.xml), Office 2019 (configuration-Office2019Enterprise.xml), and Office 365 (configuration-Office365-x86.xml, configuration-Office365-x64.xml). You can edit these files manually, but it is much more convenient to generate the required XML file with the custom Office installation settings on https://config.office.com/ (Office Customization Tool).
Suppose, I only want to install Word, Excel. and Outlook from the Office 2019 package.
- Click Create a new configuration;
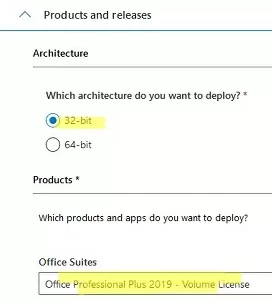
- Select your architecture (32-bit) and product (Office Professional Pro Plus – Volume License);
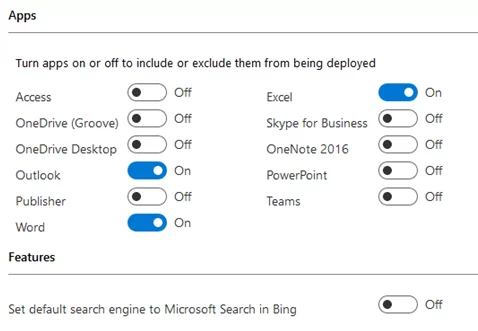
- From the list of programs, select only the ones you want to install. I have only selected Outlook, Word, and Excel;Note that Groove is OneDrive for Business, and Skype for Business is Lync.
- Next, select the Office languages you want to install, the source of the installation files (this could be the Office CDN or a shared folder on your file server.), whether to remove previous MSI versions of Microsoft Office;Modern versions of Office 365, Office 2019, and Office 2021 are installed using the Click-to-Run (C2R) Installer, rather than using an MSI package like previous versions of Office. Click to Run is a delivery method for Microsoft products where all files are downloaded to your computer from the Internet (Microsoft CDN).
- In the Licensing and Activation section, you can check to automatically accept the EULA, specify MAK or KMS license key to activate Office. If you install MS Office on an RDS server, you must use the Shared Computer Activation mode;
<Property Name="SharedComputerLicensing" Value="1" />
- You can configure additional options for Office programs in the Application Preferences section (we have skipped this step);
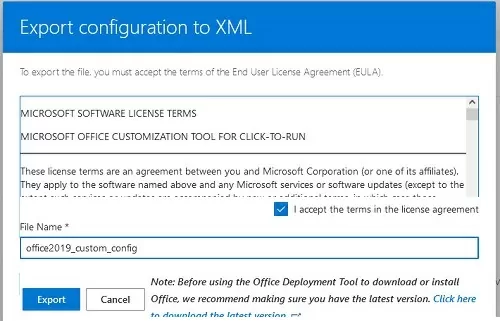
- Once all the settings have been defined, click Export. Specify the XML configuration and download it to your computer.
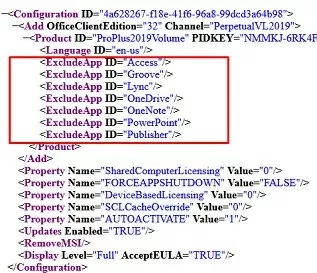
Move the XML file (office2019_custom_config.xml) to the ODT directory. The XML file contains the following lines, indicating that the ODT exclude the following apps then deploying Office on a computer.
<ExcludeApp ID="Access" />
<ExcludeApp ID="Groove" />
<ExcludeApp ID="OneDrive" />
<ExcludeApp ID="OneNote" />
<ExcludeApp ID="PowerPoint" />
<ExcludeApp ID="Publisher" />
<ExcludeApp ID="Lync" />
<ExcludeApp ID="Teams" />
<ExcludeApp ID="Bing" />
The Office Customization Tool website only allows you to create XML files for volume editions of Office. If you are using a Home, Business or other retail Office edition, you will need to enter the product ID manually. Popular Retail Office edition ProductIDs are listed in the table:
| Office Edition | ProductID |
| Micrtosoft 365 Business Retail | O365BusinessRetail |
| Micrtosoft 365 Home Pre Retail | O365HomePremRetail |
| Office 2019 Home Student Retail | HomeStudent2019Retail |
| Office 2019 Home Business Retail | HomeBusiness2019Retail |
| Office 2019 Personal | Personal2019Retail |
| Office 2019 Professional | Professional2019Retail |
| Office 2019 Standard Retail | Standard2019Retail |
| Office 2019 Pro Plus Retail | ProPlus2019Retail |
| Micrtosoft 365 Home Pre Retail | O365HomePremRetail |
| Micrtosoft 365 Pro Plus Retail | O365ProPlusRetail |
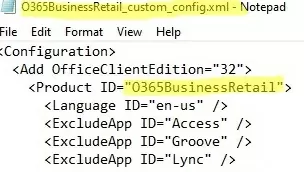
Edit the XML as follows. Replace the second and third lines with:
<Add OfficeClientEdition="32">
   <Product ID="O365BusinessRetail">
In this example, I want to install Office 365 Business Retail (replace O365BusinessRetail with the product ID that you want to use).
Custom Install Only Specific Apps in Office 2021/2019 or Office 365
Open the command prompt as administrator. If you selected to get the installation files from a CDN in the XML file, run the following command to download Office 2019 from the CDN (the files will be downloaded from the Internet) and install Office immediately based on the settings in your XML file:
cd c:\odt
 Setup.exe /configure office2019_custom_config.xml
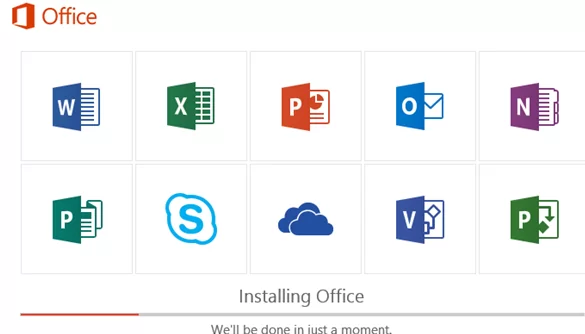
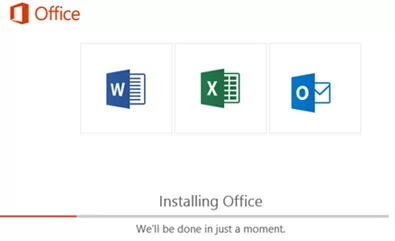
Office will be installed. the C2R installer window will display the icons of the installed Office apps that you have selected (in my example, only Word, Excel, and Outlook are installed).
As a result, only Word, Excel, and Outlook will be installed on your computer. If you want to install another app, for example, Teams, just remove the line <ExcludeApp ID="Teams”/> from your XML file. Save the file and apply the ODT using the same command:
Setup.exe /configure o365_custom_configuration.xml
If you want to install Office from a local drive or a shared network folder on your server, you must download the Office distribution installation files (about 3 GB) to your computer:
Setup.exe /download office2019_custom_config.xml
To install Office from a shared network folder (instead of downloading files from a CDN on the Internet), you must set the option in the XML. Replace:
<Add OfficeClientEdition="32" Channel="PerpetualVL2019">
with:
<Add OfficeClientEdition="32" Channel="Current" SourcePath="\\mun-fs01\install\office" AllowCdnFallback="FALSE">
In addition, you can enable the logging of the Office installation:
<Logging Level="Standard" Path="C:\ODT\"/>
Uninstall Individual Office App from Windows
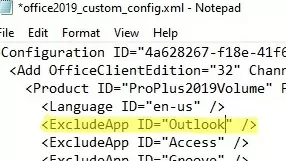
This XML file can be used to remove a specific app from an Office installation. For example, to uninstall Outlook, add this line to the XML file:
<ExcludeApp ID="Outlook" />
Save the file and run the command:
Setup.exe /configure office2019_custom_config.xml
The Office application that you have excluded will be removed from your computer.
20 comments
This was very helpful and it worked for me.
This is too complex for my users. Individual checklists were fine for decades. Now you have to go through rigamarole to stop apps you don’t need from installing. Not progress
Thank you but this article does not mention if this procedure would work for a home user. On the Office Customization Tool XML generator page, under “which products and apps do you want to deploy?” there is no “Microsoft 365 PERSONAL” choice, there is only “microsoft 365 apps for enterprise” and “microsoft 365 apps for business” – so the question is – would this procedure work for “Microsoft 365 PERSONAL”? What would the exact “Product ID” be in such a case?
On the following microsoft page “List of Product IDs which are supported by the Office Deployment Tool for Click-to-Run” it says “If you use the wrong product ID, you can’t activate Office.”
For anyone interested in the above procedure I would recommend a few hours of google search results for “Office Deployment Tool” first before doing anything. NO-ONE seems to have updated their published ODT procedures for 2021. Recommended: use quotes in your google search: “microsoft 365” “personal” “Office Deployment Tool” “product id”
SHAME ON micro$$$oft for forcing 3 GB of installations on a home computer when the end user only needs Word & Excel – it is an arrogant corporation that is NOT customer-oriented. I agree, less customization is NOT software “progress.”
BIG TIME!!! To this day. SHAME on them. I’m leaving micro$$$$$$$$$oft for linux and this is just one of the few reasons. See you never Billy!
You can find this in ODT templates. There should be “”
Edit:
O365ProPlusRetail
I have 365 personal (in a family plan), picked Microsoft 365 Apps for Business and it worked fine for me
And what happen with the updates. My feeling is that afdter the uupdate cycle comes then the full package is updated and you get installed on your computer the full lost of office apps.
I did the steps to generate the configuration file and started the app passing the configuration.xml as argument but still it installed everything, here’s my config file:
sht looks like u have to nuke windows again to remove the spyware
“” ‘Setup.exe’ is not recognized as an internal or external command,
operable program or batch file.””
That’s the message returned by CMD as it refuses to run the command. Any Help?
it should be .\setup
Ben, I received that error msg too. It’s because you’re not in the directory where your setup and config files are located. Change your directory with this command: “cd C:\Users\User\Desktop\ODT” Of course change the path to wherever the setup and config files reside. Once you’re in the right directory the command should work. Good luck!
Quite helpful, but does skip over a lot of steps that the average user might not know they need to do
SAIDU J.S.K.
I was taught only yesterday on how to install office 2016, 365 and 2019. but I have still not got the exact simple procedure for installing each of them. Can you please help me with DETAILED, simple, short and straight forward procedure for the installation of each?
This was Brilliant and worked for me! Thanks a lot.
This is amazing and easy tu use after all. Once you seti everything up, you can replicate by one click.
I found problem with pultiple users on the same machine. This scenerio is working for actually logged in user, every one else gets deployed all the apps anyway.
I have downloaded the office 2021 setup file (OfficeSetup.exe) for home and business (personal) and have its legitimate product key. But – for now – only want to install excel. I have the office deployment tool. But I can’t follow the above instructions. I don’t know how to adapt the first few lines of the configuration tool for my case. What does this mean: “If when creating an XML file you specified that the installation files are obtained from CDN, run the following command to download Office 365 from CDN”. What is the “CDN”? In the configuration file : How do I specify i want to install 2021; where do I put my product key?
just go to config.office.com
great information it’s works 100% for me thanks