Windows OS Hub
  • Windows
    • Windows 11
    • Windows 10
    • Windows Server 2025
    • Windows Server 2022
    • Windows Server 2019
    • Windows Server 2016
  • Microsoft
    • Active Directory (AD DS)
    • Group Policies (GPOs)
    • Exchange Server
    • Azure and Microsoft 365
    • Microsoft Office
  • Virtualization
    • VMware
    • Hyper-V
    • Proxmox
  • PowerShell
  • Linux
  • Home
  • About

Windows OS Hub

  • Windows
    • Windows 11
    • Windows 10
    • Windows Server 2025
    • Windows Server 2022
    • Windows Server 2019
    • Windows Server 2016
  • Microsoft
    • Active Directory (AD DS)
    • Group Policies (GPOs)
    • Exchange Server
    • Azure and Microsoft 365
    • Microsoft Office
  • Virtualization
    • VMware
    • Hyper-V
    • Proxmox
  • PowerShell
  • Linux

 Windows OS Hub / Windows 11 / Remove a Specific Device from the Safely Remove Hardware List on Windows

October 16, 2024

Remove a Specific Device from the Safely Remove Hardware List on Windows

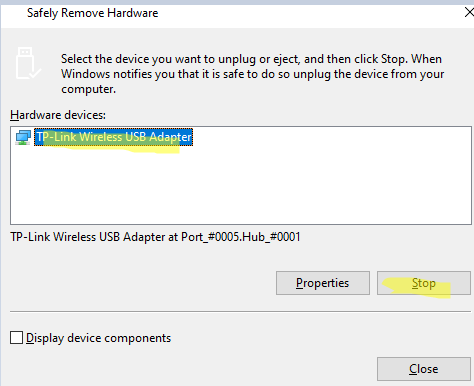
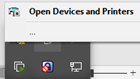
The “Safely Remove Hardware and Eject Media” menu in the system tray might contain devices the user never intends to remove. These include USB network adapters, Type-C-connected monitors, SATA/SSD drives (displayed as removable media), USB sound cards, mouse devices, etc. An administrator can remove any device from the Safely Remove Hardware dialog.

Removable devices show in Safely Remove Hardware list in system tray

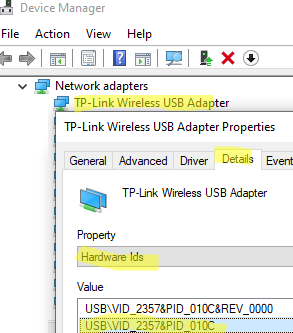
  1. Open the Device Manager (devmgmt.msc)
  2. Open the properties of the device you want to hide (TP-Link Wireless USB Adapter in this example)
  3. Go to the Details tab -> find the Hardware IDs property and copy the device ID. For example, USB\VID_2357&PID_010C Device Manager: get USB device ID
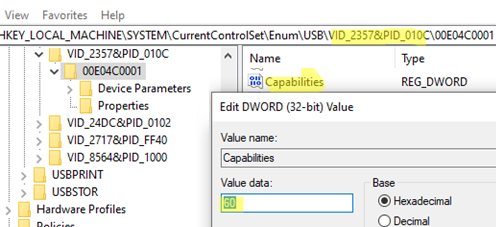
  4. Open the registry editor and go to HKEY_LOCAL_MACHINE\SYSTEM\CurrentControlSet\Enum\USB
  5. Find and expand the registry key of your USB device
  6. Set the value of the Capabilities parameter to 60 (Hex) disable safely removal capabilities for a device in registry
  7. If the device reg key has multiple nested subkeys, change the value of the Capabilities parameter in each of them.
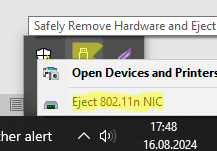
  8. This will remove this USB network adapter from the Safely Remove list in the tray.

Remove a specific USB device from Safely Remove Hardware

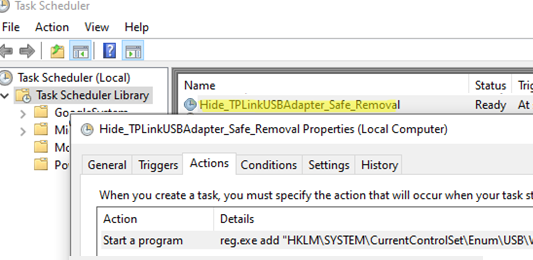
However, after a device restart, the value of the Capabilities registry parameter reverts to its original value. To automatically hide this device, create a scheduled task that changes this registry value at startup.

Create a new job using the Task Scheduler graphical snap-in (taskschd.msc) or with the following command (replace the path to the registry key with your path):

schtasks /create /tn "Remove_TPLinkUSBAdapter_Safe_Removal" /sc ONSTART /ru SYSTEM /rl HIGHEST /tr "reg.exe add 'HKLM\SYSTEM\CurrentControlSet\Enum\USB\VID_2357&PID_010C\00E04C0001' /v Capabilities /t reg_dword /d 0x00000060 /f"

The specified device will now be automatically removed from the Safely Remove list.
Scheduled task to stop USB devices from being in "Safely remove" list

If you want to safely remove and unplug this USB device, run the command:

RunDll32.exe shell32.dll,Control_RunDLL hotplug.dll

This dialog can be used to safely stop the device if necessary.

Safely remove device in Windows

It is also possible to completely hide the Safely Remove icon from the system tray.
0 comment
4
Facebook Twitter Google + Pinterest
Windows 10Windows 11
previous post
Disable BitLocker Automatic Drive Encryption in Windows 11
next post
How to Install Node.js and NPM (Package Manager) on Windows

Related Reading

Create a Custom Windows Image with Pre-installed Apps

February 28, 2024

Upgrading to Windows 11 on Unsupported Hardware

March 6, 2024

Configuring RemoteApps Hosted on Windows 10/11 (without Windows...

January 25, 2025

How to Assign (Passthrough) a Physical GPU to...

June 11, 2024

Disable BitLocker Automatic Drive Encryption in Windows 11

October 16, 2024

Enable Hyper-V on Windows 10/11 Pro and Home...

August 12, 2024

Fix: Your IT Administrator Has Limited Access to...

March 22, 2024

Get Started with Docker on Windows (WSL2) without...

September 4, 2024

Leave a Comment Cancel Reply

join us telegram channel https://t.me/woshub
Join WindowsHub Telegram channel to get the latest updates!

Recent Posts

  • Failed to Open the Group Policy Object on a Computer

    June 2, 2025
  • Remote Desktop Printing with RD Easy Print Redirection

    June 2, 2025
  • Disable the Lock Screen Widgets in Windows 11

    May 26, 2025
  • Configuring Windows Protected Print Mode (WPP)

    May 19, 2025
  • Map a Network Drive over SSH (SSHFS) in Windows

    May 13, 2025
  • Configure NTP Time Source for Active Directory Domain

    May 6, 2025
  • Cannot Install Network Adapter Drivers on Windows Server

    April 29, 2025
  • Change BIOS from Legacy to UEFI without Reinstalling Windows

    April 21, 2025
  • How to Prefer IPv4 over IPv6 in Windows Networks

    April 9, 2025
  • Load Drivers from WinPE or Recovery CMD

    March 26, 2025

Follow us

  • Facebook
  • Twitter
  • Telegram
Popular Posts
  • How to Allow Multiple RDP Sessions on Windows 10 and 11
  • How to Run Program without Admin Privileges and Bypass UAC Prompt
  • Fix: BSOD Error 0x0000007B (INACCESSABLE_BOOT_DEVICE) on Windows
  • Fixing ‘The Network Path Was Not Found’ 0x80070035 Error Code on Windows
  • How to Delete Old User Profiles in Windows
  • How to Install Remote Server Administration Tools (RSAT) on Windows
  • How to Backup and Copy Local Group Policy Settings to Another Computer
Footer Logo

@2014 - 2024 - Windows OS Hub. All about operating systems for sysadmins


Back To Top