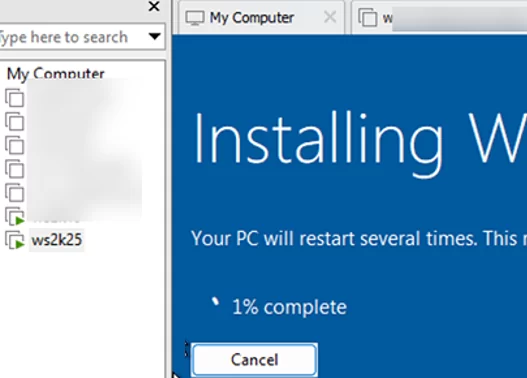
After installing VMware Workstation on a desktop computer running Windows 11/10, you might experience extremely slow performance and unstable operation of the Windows guest operating system in virtual machines. Interestingly, virtual machines with Windows 10 or 11 guests generally perform well, while VMs running Windows Server 2019 or 2022 tend to be significantly slower during operations. The simple installation of a Windows Server guest in a virtual machine can take several hours to complete.
Poor performance of Windows guests in VMware Workstation can be caused by several factors.
First, examine the vmware.log file stored in the VM directory to analyze the slow performance of a virtual machine in a VMware environment.
Note the following information entries in the VM log:
2025-02-14T12:03:45.874Z In(05) vmx MsgHint: msg.loader.mitigations.wsAndFusion
2025-02-14T12:03:45.874Z In(05))+ vmx You are running this virtual machine with side channel mitigations enabled. Side channel mitigations provide enhanced security but also lower performance.
2025-02-14T12:03:45.877Z In(05)+ vmx
2025-02-14T12:03:45.877Z In(05) vmx To disable mitigations, change the side channel mitigations setting in the advanced panel of the virtual machine settings. Refer to VMware KB article 79832 at https://kb.vmware.com/s/article/79832 for more details.
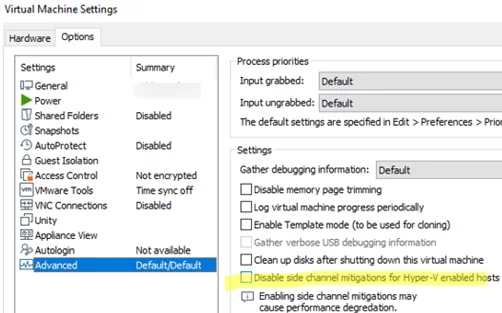
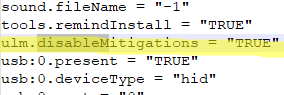
This indicates that the VM has side-channel attack protection enabled (typical vulnerabilities of this class are Spectre and Meltdown), which restricts third-party processes (including virtual machines) from accessing protected kernel (host) memory. Side channel mitigation is enabled by default for all VMs on Windows hosts with Virtualization Based Security (VBS) enabled. This protection can be disabled in the VMware Workstation GUI (VM Properties -> Options -> Advanced -> enable the Disable side channel mitigations for Hyper-V enabled hosts option) or in the VMX configuration file of the VM by adding the parameter:
ulm.disableMitigations="TRUE"
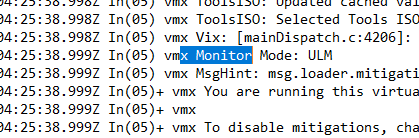
If this does not resolve the poor VM performance issue, look for another line in the vmware.log:
2025-02-14T12:03:45.877Z In(05) vmx Monitor Mode: ULM
This indicates that VMware Workstation is running in User Level Mode (ULM). ULM mode causes VMs on the hypervisor to run in user mode instead of kernel mode. In this mode of running a VM on VMware Workstation, the guest OS performance will be severely degraded, resulting in significant slowdowns during almost any action. If the Windows host has Hyper-V hypervisor capabilities installed, VMware Workstation will automatically run the virtual machine in ULM mode.
In this case, the only way to solve the problem is to disable the Hyper-V virtualization features in the host OS. This allows the Virtual Machine Monitor (VMM) component to directly access the virtualization instruction set of the physical CPU, bypassing the additional Windows Hypervisor Platform API layer.
Verify that the host is allowed to run Hyper-V capabilities:
BCDEdit /enum| select-string "hypervisorlaunchtype"
The hypervisorlaunchtype Auto in the output means that the Windows boot loader can run Hyper-V virtualization platform components.
Disable the Hyper-V hypervisor from launching at boot time:
bcdedit /set hypervisorlaunchtype off

Reboot the computer and check to see if the performance of your Windows Server virtual machine in VMware has improved.
- Hyper-V virtual machines
- WSL2 (Windows Subsystem for Linux 2)
- Windows Sandbox
- Credential Guard and Device Guard
WSL2 is not supported with your current machine configuration.
Please enable the "Virtual Machine Platform" optional component and ensure virtualization is enabled in the BIOS.
Enable "Virtual Machine Platform" by running: wsl.exe --install --no-distribution
Error code: Wsl/Service/CreateInstance/CreateVm/HCS/HCS_E_HYPERV_NOT_INSTALLED

To allow the execution of Hyper-V components, use the command:
bcdedit /set hypervisorlaunchtype auto
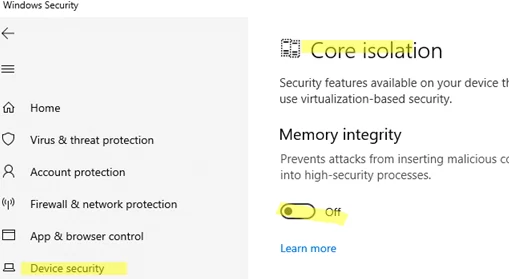
Disabling core isolation in Windows settings can also improve VM performance in some cases. (Windows Security -> Device Security -> Core Isolation details -> Memory Integrity). Of course, this means that Windows becomes less protected, potentially exposing the system to security vulnerabilities.
Most modern CPUs support Power Throttling mode. The idea is that the operating system can limit CPU usage for background processes to save power and extend battery life. Power Throttling mode might cause slow performance of VMware processes on computers with 12th, 13th, and 14th generation Intel CPUs on computers running Windows 11 24H2.
To prevent Windows from using the power throttling mechanism to limit CPU usage for the main VMware Workstation process, run the following command
powercfg /powerthrottling disable /path “C:\Program Files (x86)\VMware\VMware Workstation\x64\vmware-vmx.exe”
Verify that the vmware-vmx.exe process is added to the exclusion list.
powercfg /powerthrottling list

Windows will not attempt to manage power settings for the processes you specify. In this case, VMware Workstation workloads will always run in maximum performance mode.