You can enable and configure the same corporate screensaver on all computers in the Active Directory domain. In this post, we will show how to enable a slideshow screensaver with images containing information security rules for users.
Enable and Configure Screensaver Settings on Windows
The first thing you need to do is configure the screen saver settings on the reference Windows computer. Later, we will export the screensaver settings from this computer and apply them to other domain computers using a GPO.
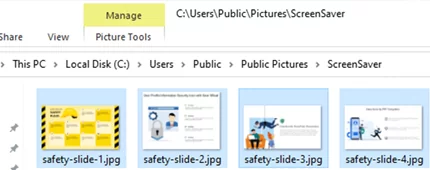
We have prepared several JPG files with images that need to be shown to users on the screensaver. Go to the C:\Users\Public\Pictures folder (public profile files available to all users), create a folder ScreenSaver, and copy your screensaver JPG files to it.
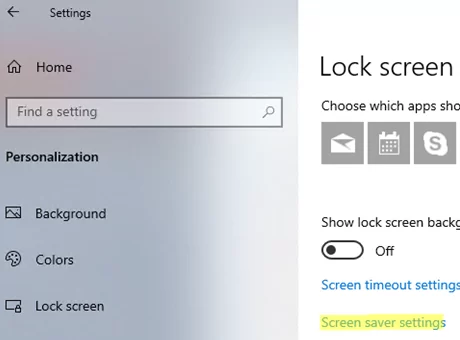
Go to Settings -> Personalization -> Lock Screen (or run the command: ms-settings:lockscreen ) and click Screen Saver Settings.
Select Photos as your screensaver and click Settings (for quick access to the screen saver settings, run the command: control desk.cpl,,@screensaver ). Specify the path to the source folder containing your images. 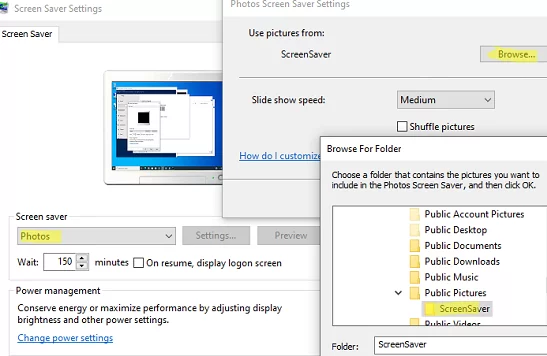
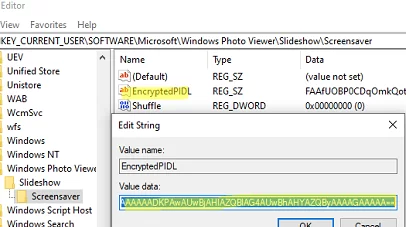
The following section of the registry contains the screensaver settings HKEY_CURRENT_USER\SOFTWARE\Microsoft\Windows Photo Viewer\Slideshow\Screensaver. The path to the directory containing the images is specified in encrypted form (Base64) in the EncryptedPIDL registry parameter. Copy the value of the EncryptedPIDL parameter (this value will be used later when you create a GPO with the screensaver settings).
Deploy Screensaver Settings with Group Policy
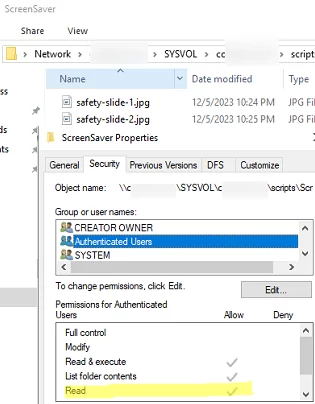
Copy JPG image files to a shared network folder that can be read by all users. You can use the SYSVOL directory on a domain controller to store image files (in this example \\woshub.loc\SYSVOL\woshub.loc\scripts\ScreenSaver UNC path is used ). Check that the Authenticated User group has read permissions on this folder.
Now you must configure Group Policy to copy image files to users’ computers and enable Windows screensaver.
- Open the domain Group Policy management snap-in (
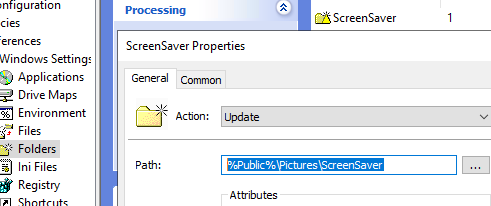
gpmc.msc), create a new GPO and link it to the OU containing the target user accounts; - Edit the GPO and navigate to User Configuration -> Preferences -> Windows Settings -> Folders. Create a new item: New -> Folder. Specify the value
%Public%\Pictures\ScreenSaver(this GPP item will create the ScreenSaver folder in the public user profile);
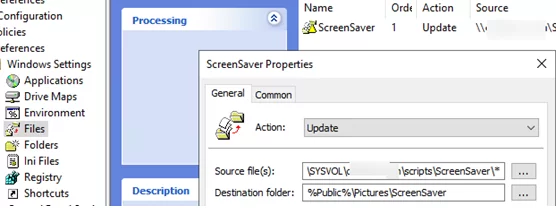
- Now go to the Files section and create a GPP rule that copies all files from
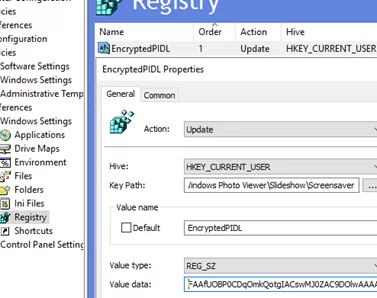
\\woshub.loc\SYSVOL\woshub.loc\scripts\ScreenSaver\*to%Public%\Pictures\ScreenSaver. Use*in the source path to copy all files. - Then navigate to the Registry section and select New -> Registry item. Create a new registry parameter with the following settings:Hive:
HKEY_CURRENT_USER
Key path:SOFTWARE\Microsoft\Windows Photo Viewer\Slideshow\Screensaver
Value name:EncryptedPIDL
Value type:REG_SZ
Value date: Copy the EncryptedPIDL parameter value from the reference computer.Go to the Common tab and enable the Remove the item when it is no longer applied option.Find out more about using the GPO to deploy registry settings to computers. - Then navigate to User Configuration -> Policies -> Administrative Templates -> Control Panel -> Personalization. Enable the policy Force specific screen saver, and specify
PhotoScreensaver.scras its value (by default, Photoscreensaver.scr uses the C:\Users\Public\Pictures\Sample Pictures directory as the source of images for the slide show). - Specify the computer idle time in seconds after which the screensaver automatically turns on in Screen Saver Timeout. To automatically lock and password-protect your computer screen, you can also enable the Password Protect Screen option. To lock the screen saver settings, select the Prevent changing screen saver option.
 Go to the Common tab and enable the Remove the item when it is no longer applied option.
Close the Group Policy Management console and update the GPO settings on the client computers (gpupdate /force). Check that the corporate screen saver, which is in the form of a slide show of pictures, is activated when the computers are not in use.
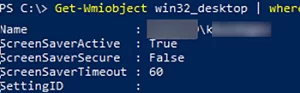
Use the PowerShell command to view the screen saver settings for the current user:
Get-Wmiobject win32_desktop | where name -match $env:USERNAME
ScreenSaverActive : True
ScreenSaverSecure : False
ScreenSaverTimeout : 60
7 comments
domain users are not allowed to create anything from C:\ so how would your script work?
You can use another folder in the user’s profile, or create a specific folder on all domain computers using GPO/
Group Policy Preference (User Configuration -> Preferences -> Windows Settings -> Folders).
Through the GPO you can set NTFS permissions for this folder (Computer Configuration -> Policies -> Windows Settings -> Security Settings -> File System).
Great work thank you a lot.
Thanks.
I copied the reg file just exported to the server, and double click it to ‘merge’ it into the registry before going to the Registry wizard.
I tried but couldnot work for me
you are triggering task Job to copy screen saver images in C:\Screen . and force specific screen saver GPO PhotoScreensaver.scr takes images samples from User\Picture\sample picture. how does both statement relates ?
First of all, many thanks for your guide.
I wanted to share my experience that I continued with a method that could be easier from the stage of creating a bat file.
I added the net use S /delete command in the bat file to delete the S drive mapping after the process.
Configuring Scheduled Task Item using Group Policy in your directory
I skipped the regedit steps from the title.
I combined all the photos in SCR format from the slideshow menu with the irfanview application.
I showed this file as the default screen saver by transferring the relevant SCR file to users’ local directories with a bat script.