Most modern Windows apps require the .NET Framework to be installed. For example, the latest Windows 25H2 build and Windows Server 2025 come with .NET Framework 4.8.1 pre-installed. However, some legacy applications require .NET Framework 3.5, 2.0, or 1.0 to be installed for compatibility reasons. In this article, we’ll walk you through how to install .NET Framework 3.5 on Windows 11/10 and Windows Server 2025/2022/2019/2016.
Installing .NET Framework 3.5 on Windows 11 and 10
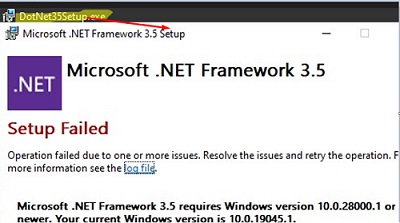
- Starting with Windows 11 build 26H1 (version 10.0.28000.1) and in future Windows 11 releases, the .NET Framework 3.5 can only be installed using the offline installer DotNet35Setup.exe (can be downloaded from the Microsoft website: https://go.microsoft.com/fwlink/?LinkID=2337635 ). In previous Windows versions, an error would appear when attempting to use the offline installer.

- In Windows 11 25H2 and earlier versions, as well as in Windows 10, .NET Framework 3.5 is installed as a built-in Windows feature, as described below.
Check whether the .NET Framework 3.5 (includes .NET 2.0 and 3.0) is installed on your computer. Open a PowerShell console as an administrator and run the command:
Get-WindowsCapability -Online -Name NetFx3
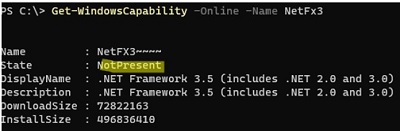
In my case, .NET 3.5 is not installed (State=NotPresent).
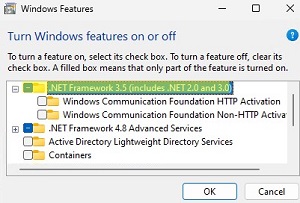
To add the .NET Framework 3.5 feature on Windows 11 or 10, use the classic Control Panel ‘Turn Windows Features on or off‘ applet (this functionality has not been ported to the modern Settings app):
- Run the command
optionalfeatures.exe - In the list of components, select .NET Framework 3.5 (includes .NET 2.0 and 3.0), click OK.

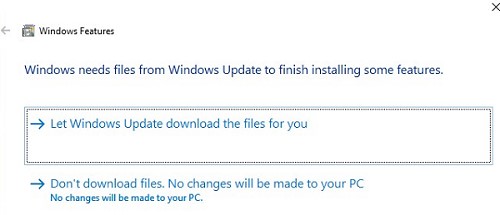
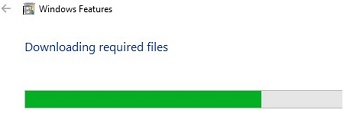
- If your computer is connected to the internet, select Let Windows Update download the files for you in the next dialogue.

- Windows will download and install the latest .NET Framework 3.5 binary files from Microsoft Update servers.

You can also install .NET Framework 3.5 from the command line:
- Using DISM:
DISM /online /Enable-Feature /FeatureName:"NetFx3" - Or with PowerShell:
Enable-WindowsOptionalFeature -Online -FeatureName "NetFx3"
Offline Install of .NET Framework 3.5 on Windows via CMD
If the computer is not connected to the internet or is on an isolated network, installing .NET Framework 3.5 will fail with an error:
Windows couldn’t complete the requested changes.
The changes couldn’t be completed. Please reboot your computer and try again
Error code: 0x8024402C

In this case, you can manually install the .NET Framework 3.5 components offline using your Windows installation image. To do this, you will need an installation USB flash drive or an ISO image file with your Windows build (how to check the version of Windows in an ISO image file).
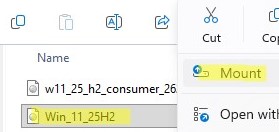
Connect your media with the Windows installation image to a computer. Right-click the ISO image file and select Mount to assign it a virtual DVD drive letter (or use the PowerShell command: Mount-DiskImage -ImagePath "C:\ISO\Windows11-25h2.iso"
To install .NET Framework 3.5 offline from a Windows installation image, run the following DISM command:
DISM /online /enable-feature /featurename:NetFX3 /All /Source:E:\sources\sxs /LimitAccess
/Online– perform the installation against the running operating system (not an offline image)./enable-feature /featurename:NetFX3 /All– install all components of the .NET Framework 3.5./Source:E:\sources\sxs– the path to the SXS directory on the Windows installation media (in my example, the Windows distribution ISO image was assigned the drive letterE:)/LimitAccess– don’t try to connect to the Windows Update online servers to download installation files.
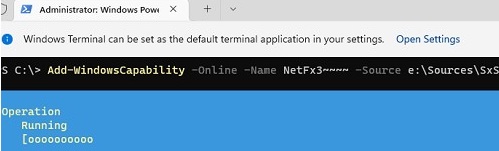
Here is a similar PowerShell command:
Add-WindowsCapability -Online -Name NetFx3~~~~ -Source E:\Sources\SxS
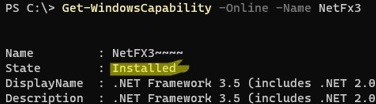
To make sure that the .NET Framework is successfully installed, run the command:
Get-WindowsCapability -Online -Name NetFx3~~~~
Name         : NetFX3~~~~
State        : Installed
DisplayName  : .NET Framework 3.5 (includes .NET 2.0 and 3.0)
Description  : .NET Framework 3.5 (includes .NET 2.0 and 3.0)
DownloadSize : 72822163
InstallSize  : 496836410
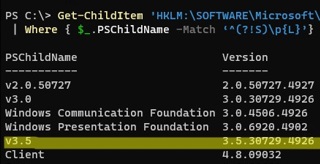
Get-ChildItem 'HKLM:\SOFTWARE\Microsoft\NET Framework Setup\NDP' -Recurse | Get-ItemProperty -Name version -EA 0 | Where { $_.PSChildName -Match ‘^(?!S)\p{L}’} | Select PSChildName, version
How to Install .NET Framework 3.5 on Windows Server
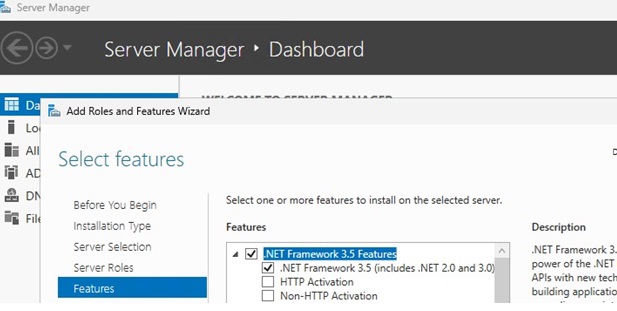
On Windows Server 2025, 2022, 2019, 2016, and 2012 R2, you can install NET Framework 3.5 via the Server Manager GUI: Add roles and features -> Features -> .NET Framework 3.5 Features -> .NET Framework 3.5 (includes .NET 2.0 and 3.0).
To install the .NET Framework 3.5 silently with a delayed reboot, use the following command:
DISM /Online /Enable-Feature /FeatureName:NetFx3 /All /NoRestart /quiet
The .NET 3.5 source files for your version of Windows Server will be downloaded from Windows Update servers. For this installation method to work, make sure that:
- Your Windows Server host must have direct internet access. The proxy and firewall settings should not restrict access to the Windows Update servers.
- Your host is not configured to receive updates from the local Windows Update (WSUS) server. Check your current Windows Update settings using the Group Policy result report (
rsop.msc) or directly in the registry.Use PowerShell to check the registry value of the UseWUServer parameter:
Get-ItemProperty -Path "HKLM:\SOFTWARE\Policies\Microsoft\Windows\WindowsUpdate\AU" -Name "UseWUServer" | select -ExpandProperty UseWUServer
If the parameter value is set to1, it means your host is configured to receive Windows updates from the local WSUS server. In this case, you will receive error 0x800F0954 when attempting to install .NET 3.5. Change the registry parameter to0or remove it to connect directly to the Microsoft Windows Update servers.
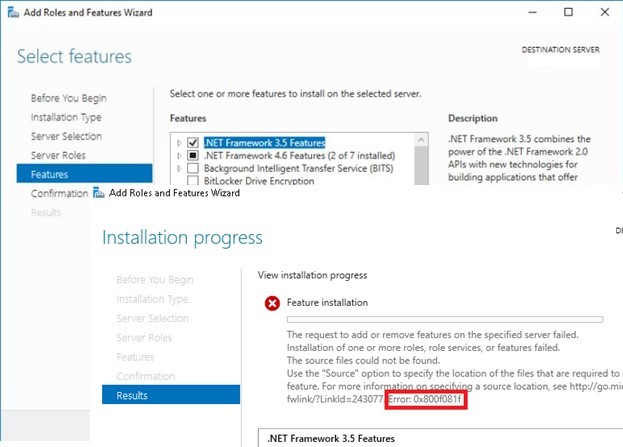
If the server has no direct internet access, attempting to install .NET Framework 3.5 via Server Manager on Windows Server will result in error 0x800F081F (The source files could not be found), 0x800F0950, 0x8024402c, 0x800F0906, or 0x800F0907 (depending on the version of Windows Server).
Although the .NET Framework 3.5 is listed as a feature of Windows Server 2025/2022/2019/2016/2012R2, its binary files are missing from the Windows component store (Features on Demand concept). This is done to reduce the size of the operating system image on the disk. You can check if the .NET Framework 3.5 source files are available in the local component store of Windows Server by using the command:
Get-WindowsFeature *Framework*

As you can see, the status of the NET-Framework-Core feature is Removed.
For offline installation of the .NET-Framework-Core 3.5 (without Internet access), obtain the matching Windows. Mount the ISO image containing the Windows Server distribution to a virtual drive (for example, drive D:). You can now add the .NET Framework 3.5 feature via the Server Manager graphical console.
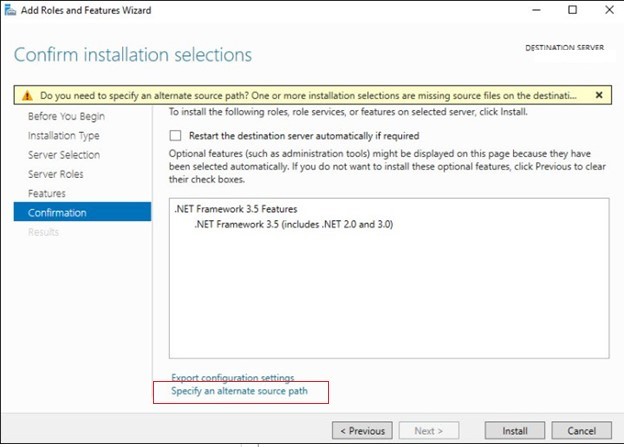
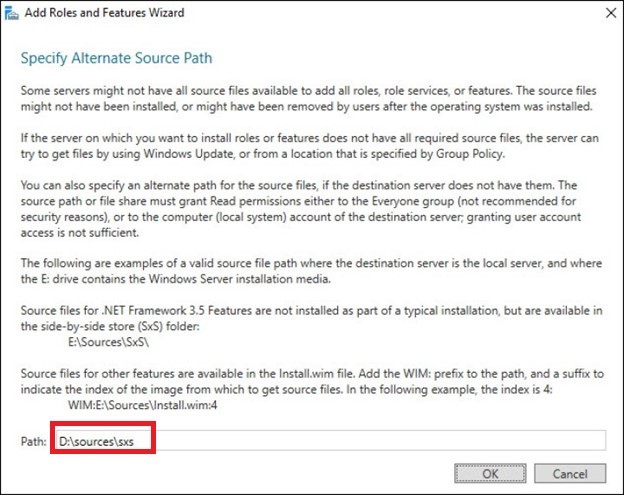
- As before, select the .NET Framework 3.5 feature, but before clicking Install, click the small link Specify an alternate source path at the bottom of the form.

- Specify the location of the Component Store (SXS) folder on your Windows Server distro image. If you mounted the ISO image as a virtual disk, the path may look like
D:\sources\sxs. It can also be a path to a shared network folder, where the distribution files have been copied (for example,\\fs1\iso\ws2022\sources\sxs). Then click OK.
It is much easier to perform an offline installation of the .NET Framework 3.5 features by running an elevated command prompt or PowerShell console and executing the command:
Dism.exe /online /enable-feature /featurename:NetFX3 /All /Source:D:\sources\sxs /LimitAccess
D:\ is the drive containing the Windows Server source files. The LimitAccessparameter prevents DISM from connecting to Windows Update servers to receive feature binary files. Only the local source files in the specified folder are used.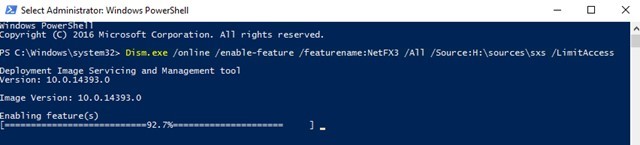
To install the Windows Server feature using PowerShell, use the Add-WindowsFeature command:
Add-WindowsFeature NET-Framework-Core -Source d:\sources\sxs
After the component installation is completed, a server restart is not required.
You can also manually copy two CAB files named microsoft-windows-netfx3... from the \sources\sxs folder of your Windows Server installation image. In this case, to install .NET 3.5, just run the command:
dism /online /Add-Package /PackagePath:C:\distrib\net35\microsoft-windows-netfx3-ondemand-package~31bf3856ad364e35~amd64~~.cab.
Configure .NET Framework 3.5 Offline Installation Options via GPO
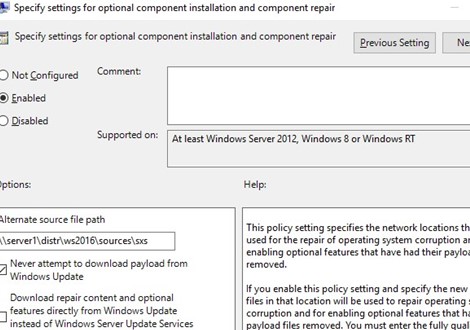
Even when using WSUS, you can use the ‘Specify settings for optional component installation and component repair’ Group Policy option (Computer Configuration -> Administrative Templates -> System) to configure specific settings for installing Windows components from a local source or Windows Update.
edit.msc). In an Active Directory environment, you can create a GPO for all computers/servers using the GPMC console (gpmc.msc).Here, you can specify that, during the installation or repair of Windows components, source files should always be downloaded from the Windows Update servers (Internet) rather than from the local WSUS server (the “Download repair content and optional features directly from Windows Update instead of Windows Server Update Services” option).
You can also specify the path to the shared folder with Windows Server components (or WIM file) to be used during the offline installation via the ‘Alternate source file path‘ option.
- Specify the path to the shared network folder in the UNC format (
\\fs01\distr\ws22\sxs) (here you can specify multiple UNC paths separated by semicolons:\\fs01\ws22\sxs;\\man02\ws22\sxs;\\fs03\sxs) - It is also possible to specify a WIM file as a source:
WIM:\\fso1\distr\ws22\install.wim:2(in this case,2is the index of your edition of Windows Server image in the WIM file. You can list the available Windows Server editions in a WIM file using a command:DISM /Get-WimInfo /WimFile:"\\server\distr\ws22\install.wim")
Common .NET Framework 3.5 Installation Errors in Windows
Below are the most common .NET installation errors on Windows:
0x800F0818– indicates that the Windows installation ISO image you are using does not match the version (build) of Windows installed on a computer.0х80072F8F– the computer cannot access the Microsoft Update Servers to download the necessary components.0x80072EE6– the computer’s local Windows Update settings are preventing access to Microsoft’s online update services (open the registry keyHKLM\SOFTWARE\Policies\Microsoft\Windows\WindowsUpdateand check whether theWUServervalue is configured or theDoNotConnectToWindowsUpdateInternetLocationsregistry entry is enabled).0x800F081F– the computer has Internet access, but is configured to receive updates from a local WSUS server.
- Export the current Windows Update settings from the HKLM\Software\Policies\Microsoft\Windows\WindowsUpdate registry key to a REG file:
reg export HKLM\Software\Policies\Microsoft\Windows\WindowsUpdate c:\WindowsUpdateRegFile.reg - Delete this key (
Remove-Item -Path HKLM:\Software\Policies\Microsoft\Windows\WindowsUpdate -Recurse) and restart the WU service:net stop wuauserv & net start wuauserv - Run the .NET 3.5 installation from the web:
DISM /Online /Enable-Feature /FeatureName:NetFx3 /All - After the installation is complete, return the previous Windows Update settings: import the reg file (
reg import c:\WindowsUpdateRegFile.reg) and restart the Windows Update service again
23 comments
If you encounter problems installing .NET 3.5 (source could not be found error), install this update:
https://support.microsoft.com/kb/3005628
Thank you.
It was very useful article.
thank you , it helped me
the request to add or remove features on the specified server failed installation on one or more roles, role services or features failed. error:0x800f0907
I was troubleshoot all the given process getting same issue
Pls give me the solution asap
Thx for very useful article!
Thanks….Really it help me
Thanks….it helpfull
The issue exists even after doing that.
Microsoft Windows [Version 6.3.9600]
(c) 2013 Microsoft Corporation. All rights reserved.
C:\Windows\system32>dism /online /enable-feature /featurename:NetFX3 /all /Sourc
e:C:\Windows\WinSxS /LimitAccess
Deployment Image Servicing and Management tool
Version: 6.3.9600.17031
Image Version: 6.3.9600.17031
Enabling feature(s)
[===========================66.2%====== ]
Error: 0x800f081f
The source files could not be found.
Use the “Source” option to specify the location of the files that are required t
o restore the feature. For more information on specifying a source location, see
http://go.microsoft.com/fwlink/?LinkId=243077.
The DISM log file can be found at C:\Windows\Logs\DISM\dism.log
C:\Windows\system32>dism /online /enable-feature /featurename:NetFX3 /all /Sourc
e:C:\Windows\WinSxS /LimitAccess
You are use wrong Source parameter. Instead pointed on files in C:\Windows\WinSxS, you must specify path to winsx folder on USB/ ISO / mounted iso file with Windows 2012 distribution.
For example:
Dism.exe /online /enable-feature /featurename:NetFX3 /All /Source:E:\sources\SxS /LimitAccess
thank you so much. it solved my problem
Thank you for this. Solved my problem. Cheers!
Hi,
I would like to know, can we use any powershell or DISM commands to enable ‘Specify settings for optional component installation and component repair’ under Group policy editor in order to install NetFx3 from online.
Kindly assist me, I am looking for automate this process.
if you have a problem with install .NET 3.5:
follow these comands with powershell:
Get-WindowsFeature *Framework*
Install-WindowsFeature Net-Framework-Core -source d:\sources\sxs
In one of your screenshots above you note D:/Source but it should be D:/Sources
I upgraded 5 servers to 2012r2 from 2008r2….production….
Could not get 3.5 to install.
Found a reference server that had same windows version but was in a different domain, and had 3.5 installed.
The windows update/group policy changes did not work for me.
so ran:
net use z: \\%IP%\c$ /user:%domain%\%username%
dism /online /enable-feature /featurename:netfx3 /all /LimitAccess /source:z:\windows\winsxs
Hello, I wrote a Powershell script for the above registry method Which seems to work best for me. see below:
https://github.com/ctejeda/PowerShell-Modules/blob/master/Force-Install.NET-Framework
Followed the steps and restarted Server 2016 in advanced troubleshoot mode (command prompt) and the following command worked for me:
dism /image:d:\ /enable-feature /featurename:netfx3 /source:e:\sources\sxs
d:\ = system drive – may be different on your system, verify first by changing to the drive letter and running dir
e:\sources\sxs = folder on Server 2016 installation ISO
Damn dude I wanna hug you for this, worked as a charm thanks
Very helpful. The DSIM CMD helped me on a box with no internet access. I pointed it to another 2012 R2 box that already had it and it worked like a charm.
Thank you for your Valuable information which helped to resolve my issue too.
[…] 환경에서도 작업하고 있습니다. 여기에 설명 된 절차를 따랐습니다 […]
Thank you so much. Useful article.