After you add a computer or a user account to an Active Directory security group, the new access permissions or the new GPOs are not applied immediately. To update the group membership and apply the assigned permissions or Group Policies, you need to restart the computer or perform a logoff and logon (for the user). This is because AD group memberships are only updated when the Kerberos ticket is issued, which happens when the system boots or when a user is authenticated at logon.
If you cannot immediately restart the computer or log off the user, you can update the account’s AD group membership by using the klist.exe tool. This utility allows you to reset and renew a computer’s or user’s Kerberos tickets.
You can list the domain security groups that the current user is a member of with the command:
whoami /groups
or GPResult:
gpresult /r /scope user

The list of groups the user is a member of is displayed in the “The user is a part of the following security groups” section.
Update Computer Group Membership and Kerberos Ticket Without Reboot
You can list the security groups that this computer is a member of with the command
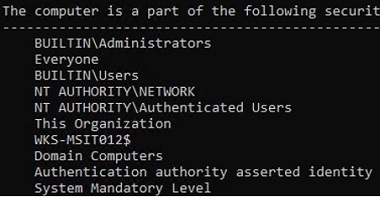
gpresult /r /scope computer
The computer is a part of the following security groups
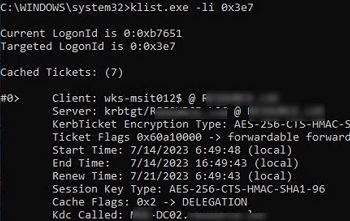
You can list cached Kerberos tickets received by the computer, as well as the date they were received and the time of the next renewal.
klist.exe -li 0x3e7
Now add the computer to the AD security group (using the ADUC snap-in or with PowerShell: Add-AdGroupMember -Identity grAVExclusionPC -Members wks-mns21$ )
To clear the computer’s Kerberos ticket cache and update the computer’s AD group membership, run the command (for Windows 7 and Windows Server 2008R2)
klist -lh 0 -li 0x3e7 purge
Or for Windows 11/10/8 and Windows Server 2022/2019/2016:
klist –li 0x3e7 purge
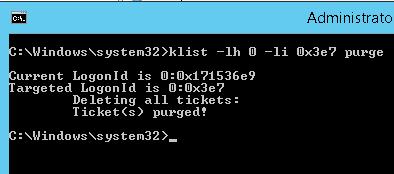
Deleting all tickets:
Ticket(s) purged!
Update the Group Policy settings using the gpupdate /force command. All Group Policies assigned to the AD group through Security Filtering will then be applied to the computer without a reboot.
You can use the command to check when a computer has received new Kerberos tickets:
klist -li 0x3e7 tgt
After running the command and updating the policies (you can update the policies with the gpupdate /force command), all Group Policies assigned to the AD group through Security Filtering will be applied to the computer.
klist -li 0: 0x3e7 purge command, you can get an error: “Error calling API LsaCallAuthenticationPackage”:Current LogonId is 0:0x3d2de2
Targeted LogonId is 0:0x3e7
*** You must run this tool while being elevated, and you must have TCB or be a local admin.***
klist failed with 0xc0000001/-1073741823: {Operation Failed}
The requested operation was unsuccessful.
In this case, you will need to run the command line on behalf of NT AUTHORITY\SYSTEM and purge your computer Kerberos ticket cache in that console:
psexec -s -i -d cmd.exe –run cmd on behalf of Local System using the psexec.exe tool
klist purge – reset computer ticket
gpupdate /force – update GPO
This method of updating computer group membership is the only working option for updating GPO settings on clients connecting to your network via VPN, where the user logs in using cached domain credentials.
Reload User Groups Membership without Logging Off
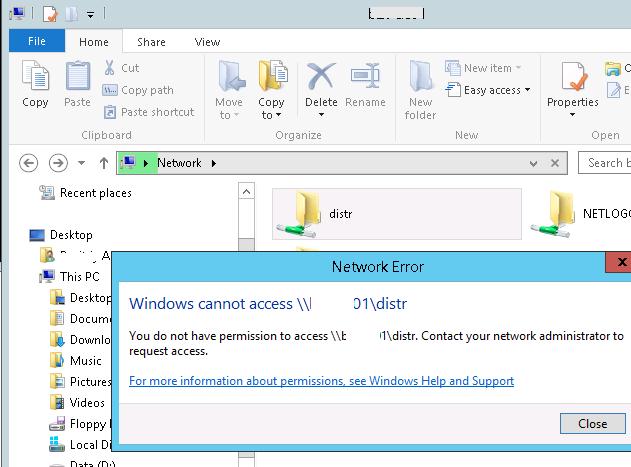
Another command is used to update the assigned Active Directory security groups in the user session. For example, you have added a user to a security group that grants access to a shared folder. The user won’t be able to access this network folder without logging off and on again.
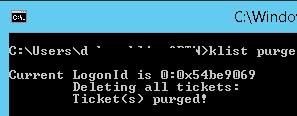
You must reset a user’s Kerberos ticket cache if you want to update the list of assigned security groups for that user. Open an unprivileged command prompt in a user session (do not run cmd in administrator mode). Run the command:
klist purge
Current LogonId is 0:0x5e3d69
Deleting all tickets:
Ticket(s) purged!
To see the updated list of groups, you will need to open a new command prompt using runas (so that the new process will be created with the new security token).
List the user’s groups:
whoami /groups
Get-WmiObject Win32_LogonSession | Where-Object {$_.AuthenticationPackage -ne 'NTLM'} | ForEach-Object {klist.exe purge -li ([Convert]::ToString($_.LogonId, 16))}
For the user to be able to connect to the shared network folder, you must restart the File Explorer shell with a new token. (with a new security group)
- Open the command prompt;
- End the current user’s File Explorer process:
taskkill /f /im explorer.exe - Start a new Explorer process using your account credentials. You can use the
%USERDOMAIN%\%USERNAME%environment variables or specify the domain and user name manually. For example:runas /user:woshub\jsmith explorer.exe - Enter your account password;

- File Explorer will then restart with a new access token and you will be able to access the network folder with the permissions of the new security group.

In the previous method, you must explicitly specify the password of the user to refresh the security groups in Windows File Explorer. If this isn’t possible, you can try a workaround.
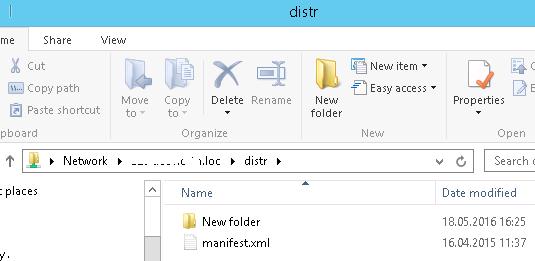
Suppose a user was added to an AD group to access a file server shared folder. Try to access it by its short name (NETBIOS) or FQDN((!!! this is important). For example, \\lon-fs1.woshub.loc\Install. But not by IP address.
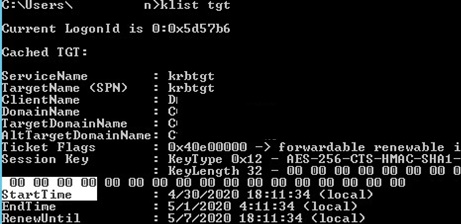
At this point, a new Kerberos ticket will be issued to the user. You can check if your TGT ticket has been updated:
klist tgt
(see Cached TGT Start Time value)
A shared folder that has been granted access through the AD security group should open without the user logging off.
Run the whoami /groups command to ensure that the user has received a new TGT with an updated list of security groups without re-login.
Once again, we would like to remind you that this method of updating security group membership will only work for services that support Kerberos. For services with NTLM authentication, a computer reboot or user logoff is required to update the token.
14 comments
Nice Post…Interestingly enough you can also kill the explorer process….then create a new task with “runas /user:username@domain explorer”. Then you can use all your mappings as per usual.
On my domain only works this for a network drive:
@echo off
net use M: /d /y
gpupdate /force
net use M: \\10.11.12.233\Archivos /persistent:Yes
explorer.exe M:
The reason this works is because your connection of the mapped drive effectively creates a logon session on the remote fileserver. Then the memberships are re-evaluated by -that- server and it allows the connection, even if your local system hasn’t yet recognised the new membership.
Sure. Anyways not always works without reboot the computer. Sometimes (and I do not know why) it is necesary reboot the client computer for update the internal permissions on NAS folders.
For a service ID (instead of a user ID), does “klist purge” work refresh the AD group membership ? A service ID is used for running a Windows service and no logon/logoff is allowed.
Hello,
On a Windows Server 2016 in a Windows Server 2012 R2 Active Directory. Each command is use in an administrative shell
– The server is in the group “test computer group”
– gpresult /r –> Server is confirmed in the group
– In active directory, removes the server of the group
– Force AD resync and wait 5 min (to be sure resync is ok)
– gpresult /r –> Server is still in the group (normal)
– klist -li 0:0x3e7 purge –>
LogonId est 0:0x3bbed
Suppression de tous les tickets :
ticket(s) supprimé(s) !
– gpupdate /force –> Update without error
– gpresult /r –> Server is still in the group (huh ?)
– Reboot of the server
– gpresult /r –> Server is confirmed not in the group (Normal)
So, are there some configuration items to point why this procedure doesn’t work on my servers ?
This stopped working for me as well. I’m confident it was working a few months ago in a different AD environment. Strange.
This does not work for me. I can see the new group memberships via a new cmd prompt using runas and with whoami /groups, however until Explorer is restarted and using runas to start a new explorer process, the user is never seen to be a member of the new groups.
I’ve always known this to be expected behavior, users on VPN simply have no way to get an updated kerberos token pulling their new group memberships without the suggestions above. However I have just experienced something I cannot understand. I am finding that in my environment, if I add a user to a new AD group that binds permissions to a file share, the user is able to log off and back on, reconnect the VPN, and somehow it’s magically working without performing any of the steps above. Further when inspecting “whoami /groups”, the token for the new group IS NOT THERE! How on earth is this working this way? This conflicts with everything I know.
[…] How to Refresh AD Groups Membership without Reboot/Logoff? (Windows OS Hub) […]
klist command is slightly wrong…. you need to give high/low id part.
to purge local system, the command “klist -li 0x3e7 purge” works as expected (miss off the 0: bit)
you should see some part of the output “Targeted LogonId is 0:0x3e7”
[…] https://woshub.com/how-to-refresh-ad-groups-membership-without-user-logoff/ […]
klist -lh 0 -li 0x3e7 purge
Purge the computer account kerberos tickets