VMware vSphere Hypervisor is a free, powerful, and reliable hardware hypervisor for server and workstation virtualization from market leader VMware. In this article, we’ll show you how to download, install, and configure VMware vSphere Hypervisor, create a virtual machine, and install a guest operating system.
Free VMware Hypervisor: Restrictions and Limitations
You can install VMware vSphere Hypervisor on a host that meets the following hardware requirements:
| Minimum | Recommended | |
| CPU | 1 processor, 2 cores | Two processors, with four or more cores per CPU |
| Memory | 4 GB | 8 GB or higher |
| Network | One 1Gbit/s network adapter | Two 1Gbit/s network adapters |
| Local Storage (SATA/SAS) | One 10 GB drive | RAID 1 with two 10 GB drives |
The VMware vSphere Hypervisor installation ISO image is quite small (630 MB) and contains only the most important drivers mainly for branded servers. Top vendors often release their own hypervisor distributions with their additional drivers. Separate ISOs with ESXi images from HPE, Dell, IBM, and Cisco are available from the VMware website.
Before downloading the ESXi image, check that your server hardware is supported in the VMware Hardware Compatibility Guide (https://www.vmware.com/resources/compatibility/search.php). Be sure to check the CPU (must have Intel VT-x or AMD RVI support), network card, and hard disk controller.
The list of hardware that is not supported in ESXi 8.0 is described in the article – Devices deprecated and unsupported in ESXi 8.0 (88172) https://kb.vmware.com/s/article/88172.
Here are the main limitations of the free vSphere Hypervisor in comparison to the full version of VMWare ESXi:
- The official VMWare support is not provided;
- You cannot allocate more than 8 virtual processors/cores (vCPU) to one VM (by the way, the maximum number of vCPUs allowed for gen1 VMs is 64 in the free Windows Hyper-V Server);
- You cannot connect a host to the vCenter server;
- vStorage API is not available (you won’t be able to configure normal backup. For example, you can’t use free Veeam edition to backup your VMs);
- There can be more than 2 physical processors (sockets) on a server (there are no restrictions on the number of cores);
- All APIs are available in read-only mode (for example, you won’t be able to change any of the server or VM parameters via PowerCLI);
- The free vSphere Hypervisor key can be used to activate the license on 100 physical hosts.
However, the free version of vSphere Hypervisor allows you to use all CPU cores and RAM of a physical server without any restrictions. There are no limits on total RAM, processors, cores, or host or VM uptime. PCI VMDirectPath/ USB redirection features are also available.
How to Download VMware vSphere Hypervisor (ESXi)?
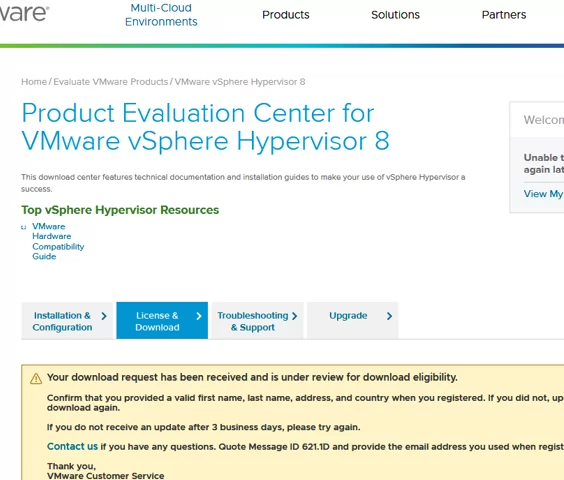
The latest version of the VMware vSphere 8 hypervisor can be downloaded from the following link https://customerconnect.vmware.com/evalcenter?p=free-esxi8. To do it, sign in to your VMWare account or create a new one.
Submit a request and wait for the license key for the free hypervisor and the VMware vSphere Hypervisor download link to appear. Be sure to save the license key.
How to Install VMWare vSphere Hypervisor (ESXi)?
Once you have downloaded the ISO image of the ESXi hypervisor, you will need to use the Rufus tool to burn it to a USB flash drive. Then connect the ESXi installation stick to the target server and boot from the media.
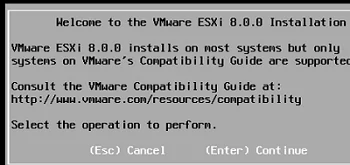
Installing ESXi is very simple:
- Confirm to start installing VMware ESXi 8.0.0 ;

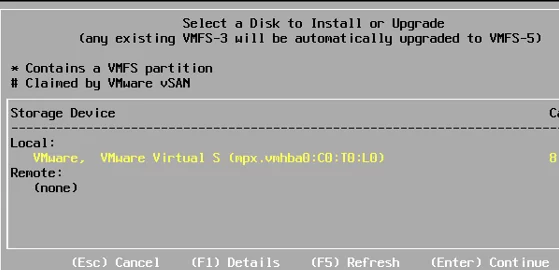
- Select the local drive or SD card where you want to install the VMWare operating system. A minimum 10 GB drive is recommended;
- Select the keyboard layout;
- Enter and confirm the root password (at least 7 characters);
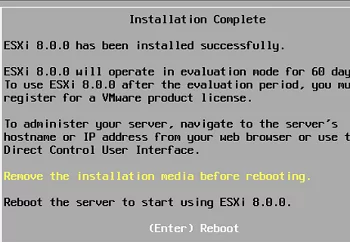
- After installation is complete, remove the installation flash drive and restart the host.
Unsupported CPU:
CPU_SUPPORT_ERROR: The CPU in this host is not supported by ESXI 8.0.0
You can ignore CPU compatibility in a non-production environment with the allowLegacyCPU=true option. You can enable this option by pressing Shift+O while booting ESXi and running the command:
<ENTER: Apply options and boot>
> cdromBoot runweasel allowLegacyCPU=true
VMware vSphere Hypervisor has been installed. If your ESXi host is connected to a network with a DHCP server, it will automatically receive an IP address, which you will see in the hypervisor console (called the Direct Console User Interface, DCUI). This IP address is used to manage the hypervisor from the web interface.
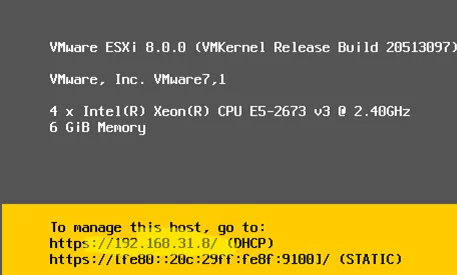
Press F2 and enter the user name (root by default) and password (you have set during installation) to manage VMware Hypervisor settings from the DCUI.
The DCUI graphical console will open for the initial configuration of the hypervisor.

Here you can set the following options:
- Configure Password — change root password;
- In the Configure Management Network section, you can configure management network adapters (in this example, there is only one network adapter on the server);
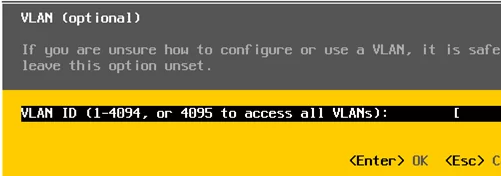
- You can specify the VLAN number, in which the server management interface is located;
- Configure IPv4 and IPv6 network interface. You can disable them, assign dynamic, or static IP addresses. In most cases, an IP address, a subnet mask, and a default gateway address are set manually on the VMWare ESXi hosts;
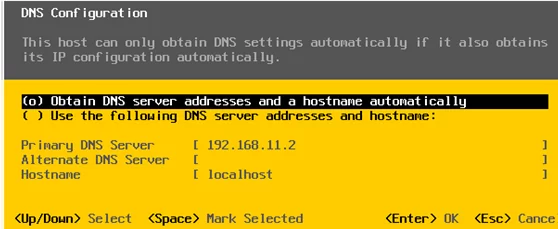
- DNS Configuration – here you can set the primary and secondary DNS servers and set the hostname;
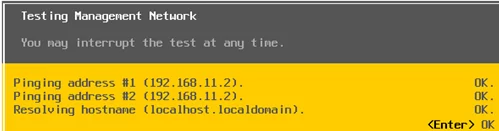
- In the Test Management Network section, you can test the network connectivity (using ICMP ping) and DNS name resolution. Usually, it is worth checking the availability of your gateway IP and servers in another network segment (you can specify the address of your DNS server);
Here are the results of the test:
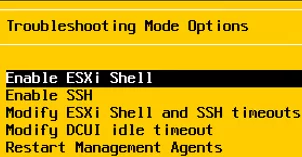
- In the Troubleshooting Mode section, you can: enable SSH on the VMware host, access ESXi Shell, configure timeouts, and restart ESXi management agents.You can use the SSH console to install the updates on the ESXi host.


The initial VMware vSphere Hypervisor configuration is now complete. You can connect to it through the web interface.
Configure VMware ESXi via Host Client Web Interface
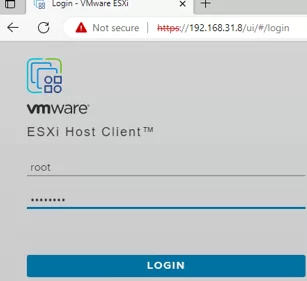
The ESXi Host Client web interface is the basic VMware Hypervisor management interface. To connect to the web interface, open a browser on your computer and enter the IP address of your ESXi host (which is displayed in the DCUI console) into the address bar. Sign in with root credentials.
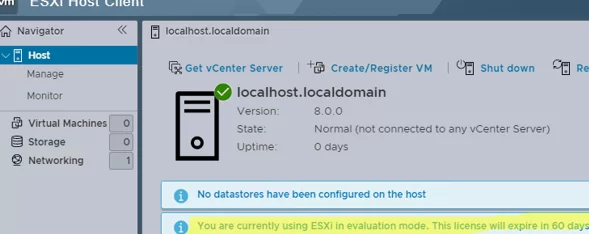
Note that the following message is displayed in the Host Client console:
You are currently using ESXi in evaluation mode. This license will expire in 60 days.
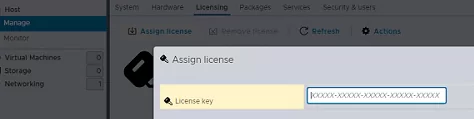
Activate the vSphere Hypervisor key/license you received from the VMware website: Manage -> Licensing -> Assign License.
You have activated a permanent (Expires: Never) hypervisor license with an unrestricted amount of RAM size for virtual machines. You can allocate up to 8 virtual CPUs (Up to 8-way virtual SMP) for each virtual machine.
Basic ESXi settings are located in the Manage section.
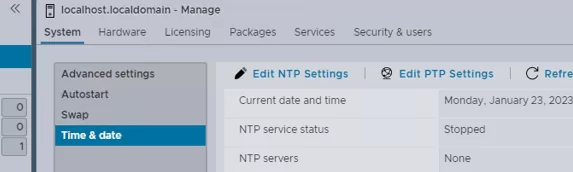
First, it is recommended to set the correct time. You can set the NTP connection setting under “Manage” -> “System” -> “Time&date” -> “Edit settings”. Or set the exact time here manually.
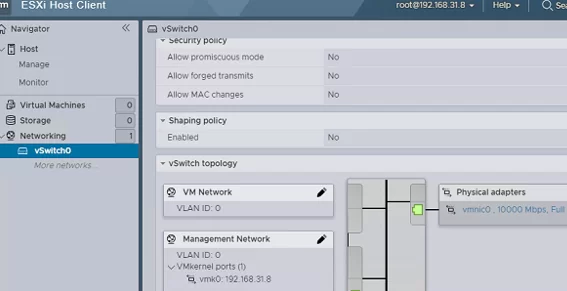
In the Networking section, you can manage virtual networks. One of the basic concepts in VMware Hypervisor is a virtual switch.
The vSphere Switch (or vSwitch) is a virtual device that transfers data between virtual machines on the ESXi host or outside through a physical NIC. There are two types of virtual switches:
- Standard Switch is a simple virtual switch logically located inside a physical server.
- Distributed Switch – a virtual switch that can be distributed to multiple physical hosts (not available in the free VMWare Hypervisor version, you can use it only in the Enterprise Plus edition of the VMWare vSphere).
After you install and run your hypervisor, there is a built-in virtual switch (vSwitch0), which includes a physical adapter (vmnic0), and two port groups: a service one (Management Network) to manage your hypervisor and a data network for VMs (VM Network). The vmk0 hypervisor management interface (vmkernel port) is added to the Management Network port group.
In most cases, one virtual switch on a stand-alone hypervisor will be enough. You have to create additional port groups if you want to isolate virtual machines from each other and use different VLAN settings for port groups.
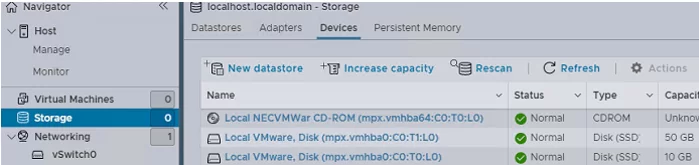
The next step is to create storage for the virtual machine files. ESXi allows you to use local disks or USB flash drives for VM storage (it is officially not recommended to use USB flash drives for VMFS), as well as external storage connected to the VMWare host via iSCSI, NFS, or Fiber Channel.
In this example, we will use the local disk storage. Go to Storage -> Devices and check what local drives are available (in some cases you need to click Rescan to detect it).
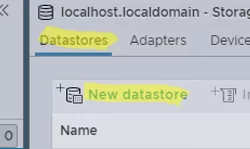
Then go to the Datastore tab and select New Datastore.
Specify a datastore name and select the device (drive) where to create it. VMFS is a VMware file system (you can also access the VMFS datastore from Windows and Linux).
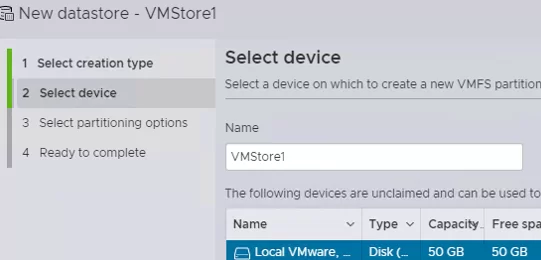
Choose that you will use the entire disk for the VMFS datastore.
Creating a Virtual Machine in VMWare Hypervisor
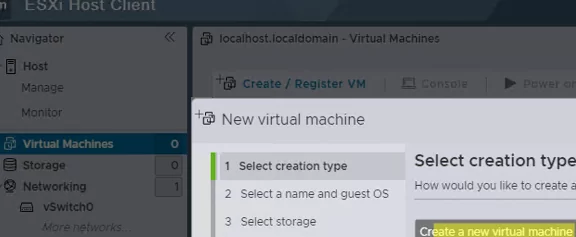
Now you can create and run virtual machines in VMware Hypervisor.
Select Virtual Machines -> Create / Register VM -> Create a new virtual machine in the web interface.
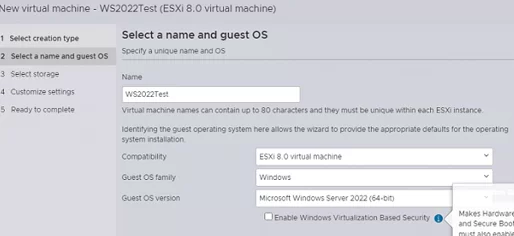
Specify a name for the virtual machine. Select the type and version of the guest operating system. In my example:
- Guest OS Family: Windows
- Guest OS Version: Microsoft Windows Server 2022 (64 bit)
Enable the “Windows Virtualization Based Security” checkbox if you want to make IOMMU, EFI, and Secure Boot available to the guest OS.
Select the datastore you created earlier, where the virtual machine’s configuration files and virtual hard disks will be stored.
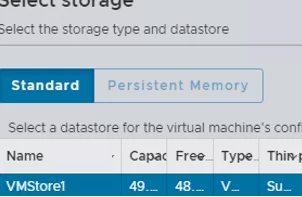
If there is not enough free space on the storage, a message will appear telling you to increase the size of the VMFS datastore.
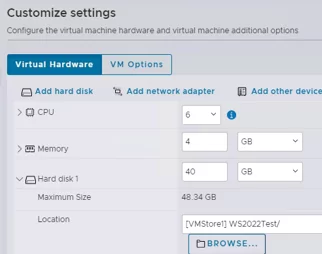
In the next step, the basic parameters of the virtual machine are configured: the number of CPUs, the RAM size, the size of the virtual hard disk, network adapters, CD/DVD drives, etc.
To connect a VM to the network, you need to place its virtual network adapter to the VM Network port group on the vSwitch0 (if you have not reconfigured anything).
You can change all VM settings afterward.
On the next screen, you will be asked to check and confirm all the settings of the virtual machine.
Now you need to install the operating system (the guest operating system) in the VMware virtual machine.
Upload the installation image (ISO file) with the OS distribution to the VMware datastore. Select your VMFS datastore under Storage and click Datastore Browser.
Create a new directory for your ISO images. Click Upload in the top left corner, select the ISO file you want to upload, and wait for the upload to complete.

Now open your virtual machine settings (“Edit Settings”).
Specify that you want to mount the image from the Datastore ISO file in the CD/DVD Drive section. Click the Browse button and select your ISO file. Enable the Connect and Connect at startup options.

Then just start the virtual machine (with the Power On button).
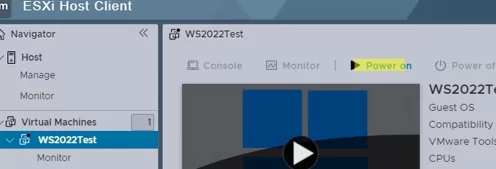
Click the Console tab to open the virtual machine console. The virtual machine will attempt to boot from the ISO image and begin installing the guest operating system.
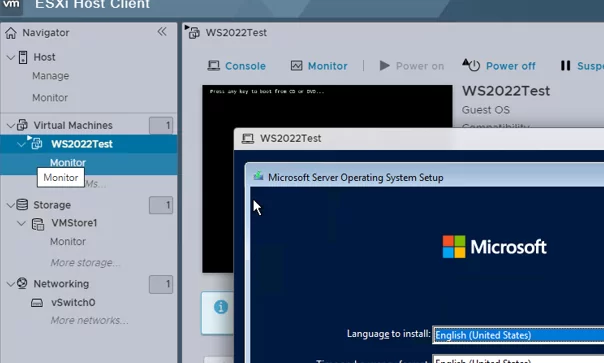
Continue and finish installing Windows in the VM.
Make sure to install the VMTools package (a set of drivers and services for a virtual machine) after the guest OS installation is complete. From the VM menu, select Guest OS -> Install VMware Tools.
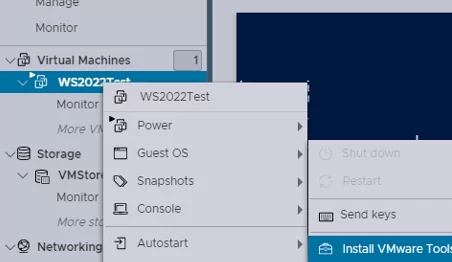
Open the virtual CD drive in the guest OS and run setup.exe.
It is hoped that this short overview article will be a good starting point for you to get started using the free VMWare vSphere Hypervisor.
4 comments
Excelent!! Thank you so much for this awesome guide.
Hope you have a nice a week.
😀
Thanks for the perfect guide.
Is with a VMware ESXi (free license) that possible to add a firewall rule to port forwarding for a virtual maschine?
As example:
incoming port => outgoing port
7777 => 7777 UDP
6500 => 6500 UDP
9999 => 9999 TCP
☁️️ Starting from 12 February 2024, Broadcom (which acquired the VMware business in 2022) will no longer proved free versions of VMware vSphere Hypervisor (ESXi 7.x and 8.x) marking them as EOGA (End of General Availability) – _https://kb.vmware.com/s/article/2107518 . Free versions of the ESXi Hypervisor widely used for home labs and small to medium-sized businesses (SMB).
🤷♂️ Taking into account the fact that Microsoft released the latest version of free Microsoft Hyper-V in 2019, and no further plans have been announced for it, for new small deployments as a free hypervisor, you must use Proxmox VE 👌 and there is virtually no alternative.
When we tried to install ESXi on a nested Hyper-V VM, we encountered several problems:
1) Enable nested virtualization for Hyper-V VM:
Set-VMProcessor -VMName test-esxi1 -ExposeVirtualizationExtensions $true
2) The ESXi installer does not see any network adapters:
No Network Adapters.
No network adapters were detected. Either no network adapters are physically connected to the system, or a suitable driver could not be located. A third-party driver may be required.
This can be fixed by adding the net-tulip driver to the ESXi image. (according https://woshub.com/add-drivers-vmware-esxi-iso-image/)
.\ESXi-Customizer-PS-v2.8.1.ps1 -iZip “C:\Ps\ESXi-6.0.0-20170604001-standard.zip” -vft -load net-tulip
3) Press TAB when booting the ESXi and add the following option:
ignoreHeadless=TRUE
This allows incompatible video adapter errors to be ignored:
“Shutting down firmware services…
Relocating modules and starting up the kernel…”
Then apply the permanent change:
Esxcfg-advcfg -k TRUE ignoreHeadless
4) Enable “MAC address spoofing” on Legacy network adapter to allow nested VM traffic.