The HelpDesk support team requested a PowerShell script to quickly capture a screenshot of a user’s desktop from a remote computer. The main requirement is that the HelpDesk employee may not be connected to the user’s computer using graphical remote support tools (SCCM, Remote Assistance, Remote Desktop Session Shadowing, etc.).
Capturing Desktop Screenshots Using PowerShell
Use the built-in .NET System.Windows.Forms class to get the user’s current screen. The following PowerShell script creates a local folder to store screenshot files, checks the current resolution of the graphical environment, and saves the screen contents to a PNG file.
$Path = "C:\ScreenCapture"
 # Make sure the directory for saving screenshots has been created, otherwise create it
 If (!(test-path $path)) {
 New-Item -ItemType Directory -Force -Path $path
 }
 Add-Type -AssemblyName System.Windows.Forms
 $screen = [Windows.Forms.SystemInformation]::VirtualScreen
 # Get current screen resolution
 $image = New-Object System.Drawing.Bitmap($screen.Width, $screen.Height)
 # Create a graphic object
 $graphic = [System.Drawing.Graphics]::FromImage($image)
 $point = New-Object System.Drawing.Point(0, 0)
 $graphic.CopyFromScreen($point, $point, $image.Size);
 $cursorBounds = New-Object System.Drawing.Rectangle([System.Windows.Forms.Cursor]::Position, [System.Windows.Forms.Cursor]::Current.Size)
 # Take a screenshot
 [System.Windows.Forms.Cursors]::Default.Draw($graphic, $cursorBounds)
 $screen_file = "$Path\" + $env:computername + "_" + $env:username + "_" + "$((get-date).tostring('yyyy.MM.dd-HH.mm.ss')).png"
 # Save the screenshot as a PNG file
 $image.Save($screen_file, [System.Drawing.Imaging.ImageFormat]::Png)
 # Freeing up memory
 $graphic.Dispose()
 $image.Dispose()
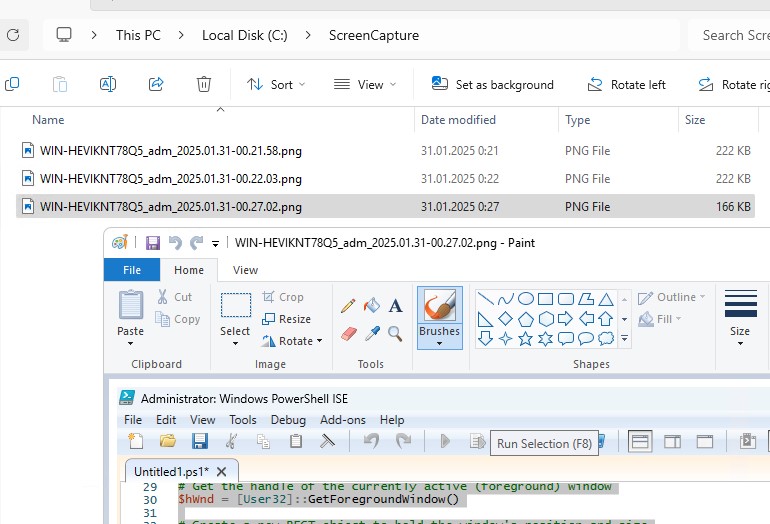
Run the PowerShell script and verify that a PNG file that contains an image of the current screen workspace has appeared in the specified directory (here you can specify the UNC path to the shared network folder). For convenience, the PNG file name includes a computer name, a user name, and the current date and time.
The script will also capture the mouse pointer position and show it in the screenshot.
To capture and save desktop screenshots every few seconds, you need to put the script code in a While loop:
while($true){
 { SCRIPT }
 sleep(60) # 60 sec pause
 }
To run this PowerShell script from the Task Scheduler or a BAT script file, use the following command (in this case, you don’t need to change the PowerShell execution policy settings):
powershell.exe -executionpolicy bypass -file c:\ps\CaptureScreenshot.ps1
You can use GPO to deploy a shortcut to this PowerShell script on users’ desktops and assign hotkeys to run it. Now, when an issue or error occurs in any app, the user can simply press the assigned hotkeys to capture a desktop screen and save it as a PNG file in the HelpDesk shared folder.
How to Take a Desktop Screenshot from a Remote User Session
This PowerShell script can be used to take a screenshot of a user’s desktop on a remote workstation or server.
To capture a desktop screenshot from a user session on an RDS host (or a Windows desktop computer that allows multiple concurrent RDP connections), first find the user session ID on the remote computer.
Run the command to list the logged user sessions on a remote computer:
qwinsta /server:nld-rds1
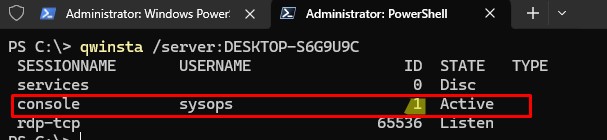
The user is logged in through the computer console (session 1) in this case
Copy the CaptureScreenshot.ps1 file to a folder on a file server. Edit the path in the file so that it saves screenshots to a shared folder. Grant the Authenticated Users or the Domain Users group write permissions to this shared folder.
$Path = \\nld-fs01\Screen\Log
You can now use the PsExec tool to run a PowerShell script to get a screenshot of a remote user’s session by their session ID ( in this example, it is ID 1 for the console/local session).
.\PsExec.exe -s -i 1 \\wks321 powershell.exe -executionpolicy bypass -WindowStyle Hidden -file "\\nld-fs01\scripts\CaptureScreenshot.ps1"
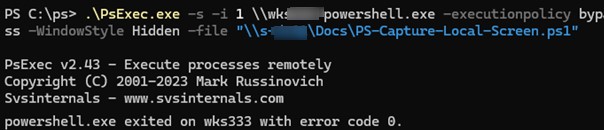
The line ‘powershell.exe exited on CompName with error code 0‘ indicates that the script ran successfully.
Now, HelpDesk team members can run this command from their computer, and a screenshot of the remote computer user’s desktop will appear in the specified shared folder.
PowerShell: Take a Screenshots of Active Window Only
The PS1 script described above takes a screenshot of all user monitors and saves it to a PNG file. You can only take a screenshot of the open (active) app window that the user is currently working in.
An updated CaptureScreenshotActiveWindow.ps1 script has also been uploaded to GitHub. It allows taking a screenshot of only the contents of the active program window in a user’s session.
5 comments
the script is really hellpfull
This captures the entire screen. Is there way to capture only a application window.
Requirements
1. Need to capture only a specific program window that is open.
2. What if there are multiple screens to the computer.
Thank you for sharing this useful script.
My problem is that taken screenshot is not correct (not full screen shown) if in display settings “Scale” set to 125%.
Please suggest solution.
Thank you
Works great from the command line.
I am invoking from the windows task scheduler via a bat file and the image captured is clear having no information. Any clue
Hello,
i ran this in my local network it works but only if the script is on local PC and print screen is saved in local PC
I cannot run script from a network share or even save printscreen to a network share
C:\PsExec.exe -s -i 1 \\192.168.1.246 powershell.exe -executionpolicy bypass -WindowStyle Hidden -file “\\192.168.1.231\SCREEN\screenshot2.ps1”
and in print script $Path = “\\192.168.1.231\SCREEN”
sharing security on folder its done on everyone