Unlike VMWare, Hyper-V has not got a built-in feature to clone virtual machines (cloning is available only in Virtual Machine Manager). To create a full copy of an existing VM, you will have to use the import and export features of Hyper-V. In this article, we’ll show how to clone a virtual machine in Hyper-V using import and export with the Hyper-V Manager GUI, PowerShell, and Windows Admin Center (WAC).
%WINDIR%\system32\sysprep\sysprep.exe /generalize /shutdown /oobe
The VM will be shut down and new SIDs will be generated at the next startup on both a source VM and its clone copy. Also, it is not recommended to clone a VM joined to the Active Directory domain.
Export and Import VMs in Hyper-V Manager
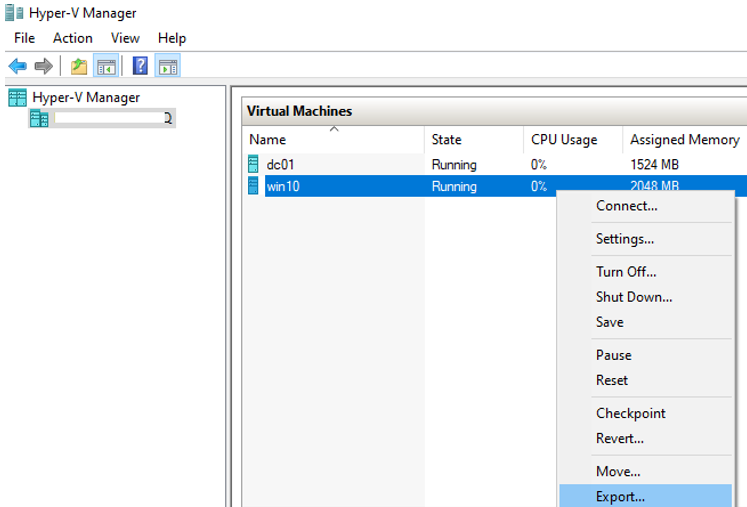
First, export a VM into a separate directory. Open the Hyper-V Manager console, right-click a VM and select Export in the context menu.
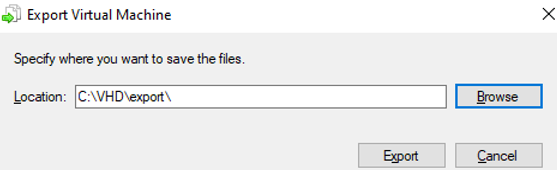
Specify the directory you want to export the virtual machine to.
The VM export status will be displayed in the VM state pane in your Hyper-V console.

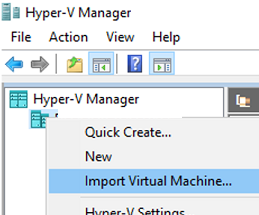
To import a VM, click a hostname in the Hyper-V Manager and select Import Virtual Machine.
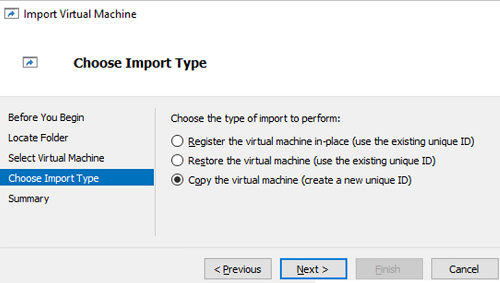
Then specify a path to the directory where folders with the imported VM files are located. When you import a VM in Hyper-V, you are offered 3 options of VM registration on the host:
- Register the virtual machine in-place (use the existing unique ID) — to register a VM in the directory containing the imported files (VM ID remains the same)
- Restore the virtual machine (use the existing unique ID) — to copy the VM files to another folder (original VM ID is retained)
- Copy the virtual machine (create a new unique ID) — to copy a VM to another directory and generate a new VM ID
If you try to import a VM with a duplicate ID, the following error occurs:
The operation failed because a virtual machine with the same identifier already exists. Select a new identifier and try the operation again.
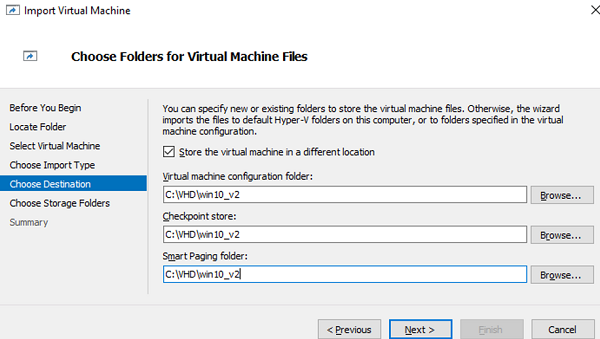
To create a VM clone with a new ID, we have selected the third option. The wizard prompts you to specify the folder you want to place the VM files. By default, the folders specified in the Hyper-V host settings are used.
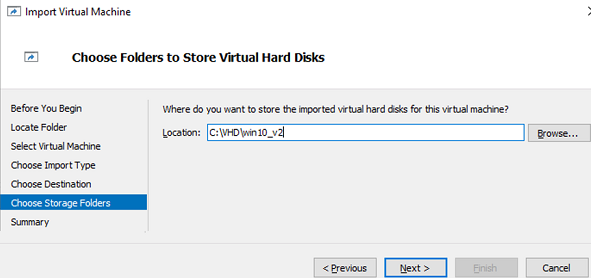
Then select the directory where the virtual disks of the virtual machine (vhdx files) will be stored.
Then a new cloned virtual machine will appear in your Hyper-V console.
How to Export, Import, and Clone Hyper-V VMs with PowerShell?
Let’s take a look at how to clone a Hyper-V virtual machine using export/import using PowerShell.
To export a VM, run the command below:
Export-VM -Name win10 -Path 'C:\VHD\export'

If you want to export a running VM, you can use the CaptuteLiveState option that determines how to export the VM memory. Three options are available:
CaptureSavedState– to export the memory (by default)CaptureDataConsistentState– to export a VM state from the Hyper-V Production CheckpointCaptureCrashConsistentState– don’t save the memory contents
Export-VM -Name win10 -Path 'C:\VHD\export' -CaptureLiveState CaptureCrashConsistentState
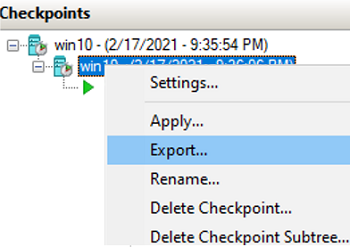
If you want to export the VM state from the specific checkpoint, specify its name.
First, display the list of checkpoints available for the VM:
Get-VMSnapshot -VMName win10
Then export the checkpoint by its name:
Export-VMSnapshot -Name “win10 - (6/17/2021 - 3:12:205 PM) Standard” -VMName win10 -Path 'C:\VHD\export'

After the VM is exported, you can import it. If you want to register the VM in place, run the following command:
Import-VM -Path "C:\VHD\export\win10\Virtual Machines\212cadd2-6543-bc2d-ca11-321ffa223f3b.vmcx"
In the Path option, specify the location of the VM configuration file (the VMCX file format replaced the XML format of VM configuration files in Hyper-V Server 2016). To copy a VM to another folder with the same ID, use the Copy option. To generate a new VM ID, use the GenerateNewId option:
Import-VM -Path "C:\VHD\export\win10\Virtual Machines\212cadd2-6543-bc2d-ca11-321ffa223f3b.vmcx" -VhdDestinationPath "C:\VHD\win10_2" -VirtualMachinePath "C:\VHD\win10_2"
VhdDestinationPath specifies the directory the VHDX files of the VM will be copied to, and VirtualMachinePath sets the directory of the VM configuration files. If the options are not set, VM files will be copied to the default directory specified in the Hyper-V host settings (C:\ProgramData\Microsoft\Windows\Hyper-V\Virtual Machines\).
SnapshotFilePath) and pagefile (SmartPagingFilePath).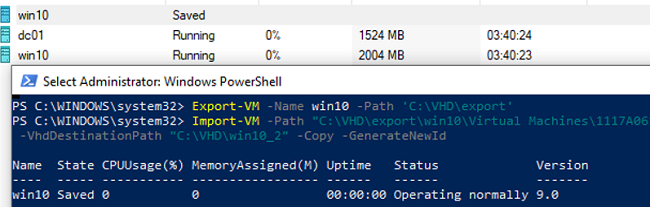
Note that the cloned VM has appeared in the Hyper-V console with the source VM name. Let’s rename it, but we need its VMID first:
get-vm | select VMNAME,VMId
As you can see, there are two VMs with the same name and different IDs on the host. Rename the VM with an ID that is different from the ID of the imported VM. Copy the ID of the new VM and rename it:
get-vm | Where-Object {$_.VMId -eq "9a9d3332-f332-a231-8abc-9221aab32287"} | Rename-VM -NewName win10_2

Then you can rename the virtual hard disk file as well:
Get-VHD -VMId 9a9d3332-f332-a231-8abc-9221aab32287| Select Path | Rename-Item -NewName win10_2.vhdx
 Remove-VMHardDiskDrive -VMName win10_2 -ControllerType SCSI -ControllerLocation 0 -ControllerNumber 0
 Add-VMHardDiskDrive -VMName win10_2 -ControllerType SCSI -ControllerNumber 0 -ControllerLocation 0 -Path "C:\VHD\win10_2\win10_2.vhdx"
Change the MAC address of your virtual adapter (you can specify a new static MAC address or configure getting the MAC address dynamically).
Set-VMNetworkAdapter -VMName win10_2 -DynamicMacAddress
 Start-VM -Name win10_2

Before connecting your new VM to the network, it is recommended to rename it and change its IP address to a new one (if you are using DHCP in your LAN, you can skip this step). Then you will be able to connect to your new VM via PowerShell Direct using the Invoke-Command or Enter-PSSession cmdlet:
Enter-PSSession -ComputerName win10_2 -Credential (Get-Credential)
 Rename-Computer win10_2
 Remove-NetIPAddress -InterfaceAlias “Ethernet” -AddressFamily IPV4
 New-NetIPAddress -IPAddress 192.168.13.71 -InterfaceAlias “Ethernet” -AddressFamily IPv4 -PrefixLength 24
 Restart-Computer
How to Clone Hyper-V Virtual Machines Using Windows Admin Center?
You can clone a Hyper-V VM directly without export and import in Windows Admin Center v2009 or newer.
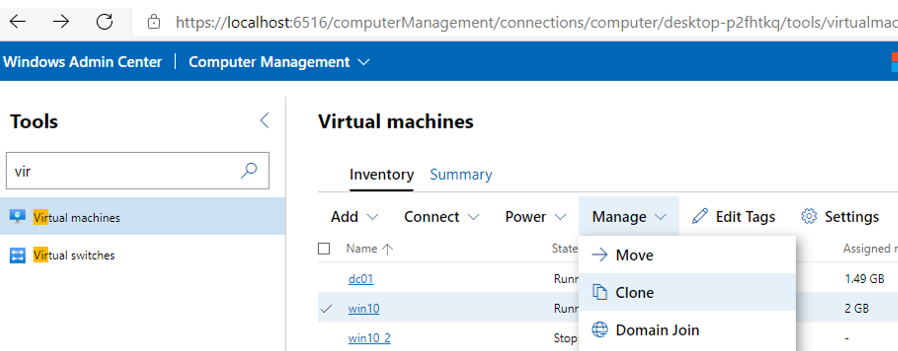
Run WAC, select the Virtual Machines section, and then click the VM -> Manage -> Clone.
Then specify the name of your new VM and select the directory where you want to place its files.
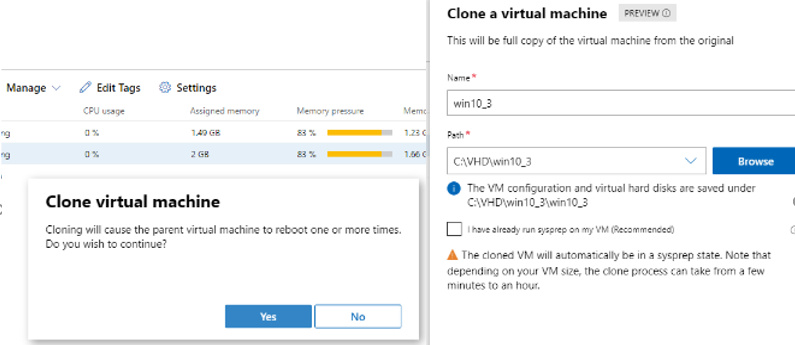
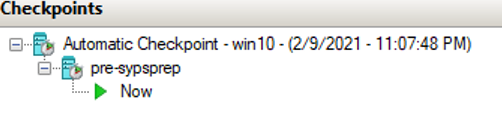
Note that there is the “I have already run Sysprep on my VM” option in the clone wizard. If you didn’t generalize the image using Sysprep and have not enabled this option, Hyper-V will create a snapshot of the source VM, run Sysprep, and clone it to a new VM (the source VM will be restarted several times and will not be available for use during the process). Then the source VM will be returned to its original state, and the snapshot will be removed.
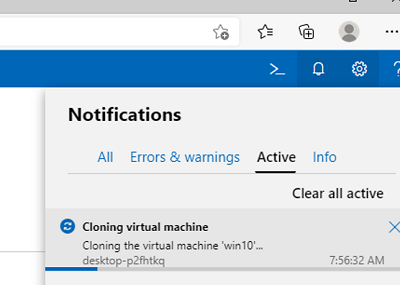
Wait till the VM is cloned. The new ID will be automatically assigned to a new VM.
2 comments
Hello
Thank you so much for this great set of detailed instructions with great screenshots. I tries it and it worked and I am very grateful. Thank you.
Thanks for the article! For
“Enter-PSSession -VMName win10_2” worked instead of “Enter-PSSession -ComputerName win10_2”