To build a fault-tolerant Active Directory infrastructure and to load balance client requests you need at least two domain controllers. Creating additional domain controllers at remote sites is also recommended. In this article, we’ll look at how to add an additional (secondary, third, and so on) domain controller to an existing AD domain.
Preparing Windows Server for Domain Controller Deployment
Deploy a new host (physical or virtual) running Windows Server. It is recommended that the same versions of Windows Server be used on all DCs in Active Directory. This is Windows Server 2019 in my example.
Start with the initial configuration of the new Windows Server host.
Use Server Manager or a PowerShell command to set the name of the domain controller that corresponds to your infrastructure (for example, mun-dc02):
Rename-Computer -NewName mun-dc02
Set a static IP address for the server and provide the DNS settings. As a preferred DNS server, type in 127.0.0.1 (for your DNS queries to run faster). Then enter the IP address of the nearest domain controller in the same AD site as the alternate DNS. You can use PowerShell to set IP and DNS settings in Windows:
Get-NetAdapter
 New-NetIPAddress -IPAddress 192.168.13.14 -DefaultGateway 192.168.13.1 -PrefixLength 24 -InterfaceIndex 6
 Set-DNSClientServerAddress -InterfaceIndex 6 -ServerAddresses ("127.0.0.1","192.168.10.14")
Set the time zone and make sure that the correct time has been set on the server.
Install the latest security updates (you can install updates from a local WSUS server or Windows Update). Another way that you can install Windows updates is by using the PSWindowsUpdate PowerShell module.
Then enable Remote Desktop (RDP) access, join your Windows Server computer to an Active Directory domain, and restart Windows:
Add-Computer -DomainName woshub.loc
 Restart-Computer -force
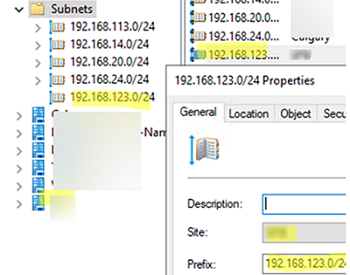
If you are deploying a DC for a new remote site, open the Active Directory Sites & Services console (dssite.msc), create a new site, and bind to it the IP client subnets to be served by your DC.
Install the Active Directory Domain Services (ADDS) Role on Windows Server
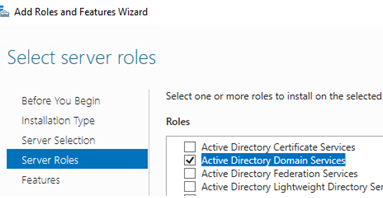
You can install the Active Directory Domain Services (ADDS) role on your Windows Server once you’ve prepared it. Open Server Manager, go to Manage -> Add Roles and Features -> Server Roles -> and check Active Directory Domain Services.
You can also install the ADDS role with PowerShell:
Install-WindowsFeature AD-Domain-Services –IncludeManagementTools -Verbose
Make sure that the AD Domain Services role has been installed:
Get-WindowsFeature -Name *AD-Domain*
Add a New Domain Controller to an Existing Active Directory Domain
After installing the ADDS role, you can promote your Windows Server host from a member server to a domain controller.
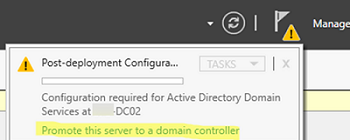
In the Server Manager console, click Promote this server to a domain controller.
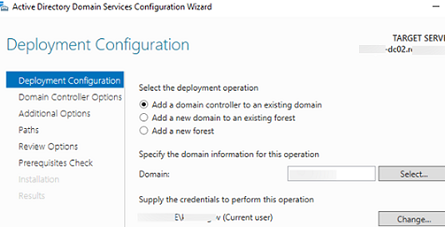
Then select Add a domain controller to an existing domain.
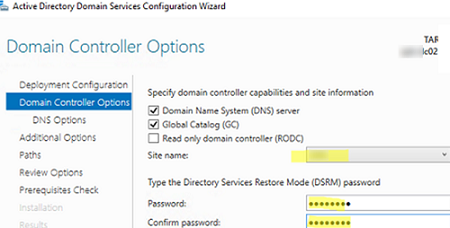
Select that you want to install a DNS server on this server and enable the Global Catalog role.
Then set the password for Directory Services Restore Mode (DRSM).
Enable the option if you plan to deploy a read-only domain controller. In this case, we won’t use this option because we need to deploy a normal (read/write, RW) DC.
Select the AD site where you would like to place the new DC (in our example, we have selected the MUN site that we have just created).
Please skip the DNS server delegation step.
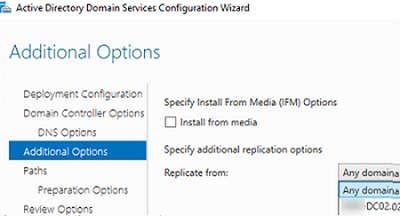
You can then select the closest domain controller to use for replicating the AD database to your new DC. In case you have all the DCs nearby and connected by fast links, select Any domain controller. Note that the initial replication of the directory and SYSVOL to the new DC may cause excessive load on the WAN links.
Then provide paths to the ADDS database (ntds.dit) and sysvol directories. The default paths will work fine in most cases:
C:\Windows\NTDSC:\Windows\SYSVOL
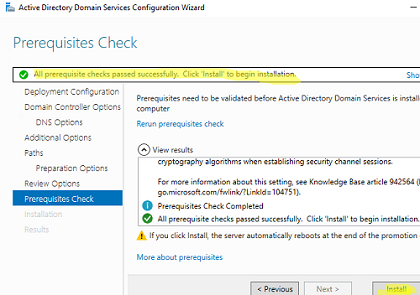
This is when the verification procedure should start. The following message should appear if you have met all the prerequisites:
All prerequisite checks passed successfully.
All that’s left to do now is click Install and promote your server to a DC.
Import-Module ADDSDeployment
 Install-ADDSDomainController -NoGlobalCatalog:$false -CreateDnsDelegation:$false -CriticalReplicationOnly:$false -DatabasePath "C:\Windows\NTDS" -DomainName "woshub.loc" -InstallDns:$true -LogPath "C:\Windows\NTDS" -NoRebootOnCompletion:$false -SiteName "MUN" -SysvolPath "C:\Windows\SYSVOL" -Force:$true
When the installation is complete, the server will automatically restart.
How to Check the New Domain Controller Health
After the installation of a new DC, you will need to check its status and the correctness of the replication in the Active Directory.
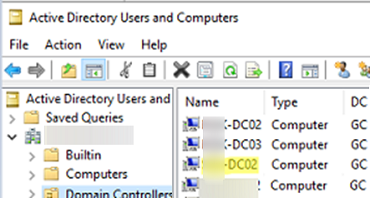
First, check that the new domain controller is listed under the Domain Controllers container in the ADUC console.
You can also use an AD PowerShell module to get information about your new DC:
Get-ADDomainController -Identity MUN-DC02
Here’s how you can check the status of replication between the domain controllers:
repadmin /showrepl *
 repadmin /replsummary
And get details on replication partners for a particular DC:
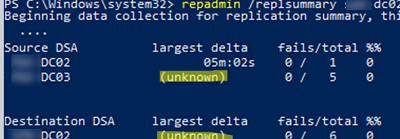
repadmin /replsummary mun-dc02
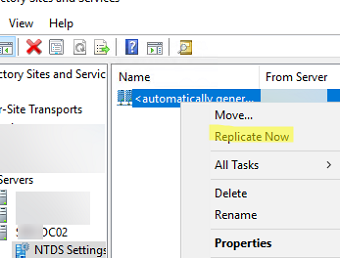
In my case, the largest delta value was unknown. This is usually because replication has not yet been completed. You can force the replication using the Active Directory Sites and Services console. To do this, expand your site, select your DC, expand NTDS Settings, then click on the link and select Replicate All.
Also, you can initiate a full replication with the command:
repadmin /syncall
Check that there are no replication errors.
Your new DC is now ready to serve clients and act as a logonserver for computers from IP subnets/sites connected to it.
Finally, I leave you with a few more links to articles that AD administrators will find useful:


1 comment
The two prerequisites to introducing the first 2019 or 2022 domain controller are that domain functional level needs to be 2008 or higher and older sysvol
use dcdiag / repadmin tools to verify health correcting all errors found before starting any operations