You can use the official Group Policy Templates (ADMX files) to centrally manage Google Chrome browser settings on computers in an Active Directory domain. In this article, we’ll show you how to install and configure Google Chrome browser settings on users’ computers via GPO.
Deploy Google Chrome on Domain Computers via GPO
You can use Group Policies to deploy programs to users’ computers.
- Download the Google Chrome installer in MSI format https://chromeenterprise.google/browser/download/#windows-tab
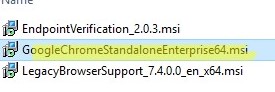
- Extract the GoogleChromeEnterpriseBundle64.zip archive and copy the
GoogleChromeStandaloneEnterprise64.msifile to the SYSVOL directory on the domain controller (\\woshub.com\SysVol\woshub.com\scripts);
- Open the Group Policy Management Console (
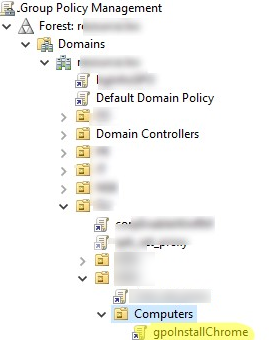
gpmc.msc); - Create a new GPO (gpoInstallChrome) and link it to a container (Organizational Unit) with user computers (Create a GPO in this domain, and link it here);

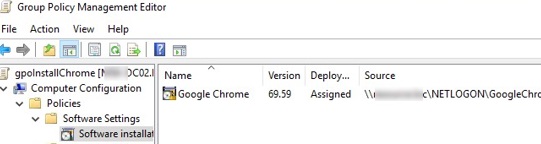
- Open the new GPO and navigate to Computer Configuration -> Policies -> Software Settings -> Software installation;
- Select New -> Package and specify the UNC path to the GoogleChromeStandaloneEnterprise64.msi file on SYSVOL;
- Select the “Advanced” option and press OK;

- Go to the Deployment -> Advanced tab and enable the option Ignore language when deploying this package (this will allow ignoring Windows language on client computers);
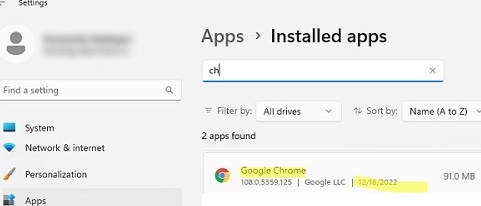
- Reboot the user’s computer to update the Group Policy settings. The Google Chrome installation will start when Windows boots. Check that it appears in the list of installed programs on Windows.

winget install --id=Google.Chrome -e
Install Group Policy Administrative Template Files (ADMX) for Google Chrome
In order to centrally manage Google Chrome settings on users’ computers, you need to download and install the administrative GPO Templates (ADMX files).
- Download and extract an archive with ADMX Group Policy template files for Google Chrome ( http://dl.google.com/dl/edgedl/chrome/policy/policy_templates.zip — archive size is about 100 MB);
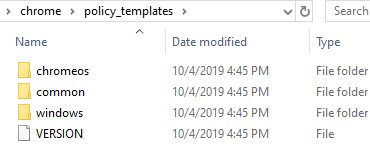
- There are 3 directories in the policy_templates:

* chromeos – administrative templates for Chromium;
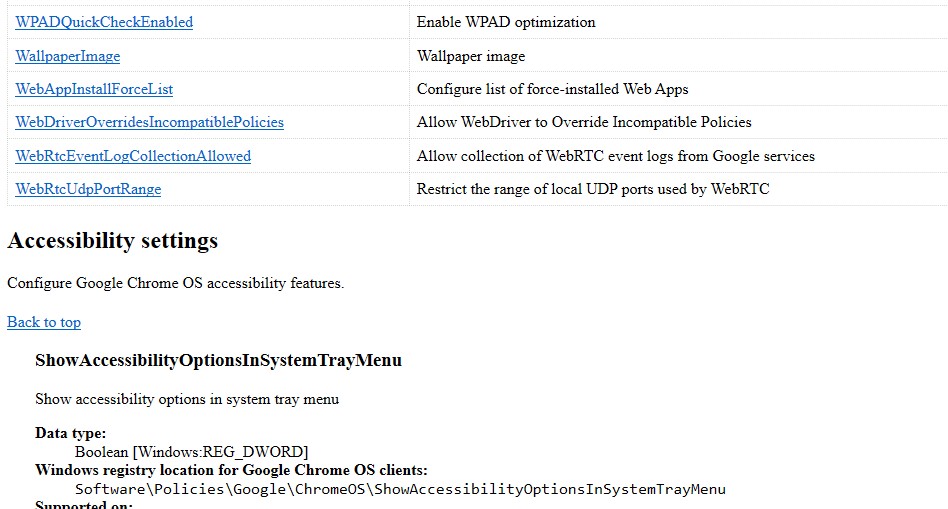
* common – contains HTML files with a description of all Chrome policy settings – see chrome_policy_list.html file;
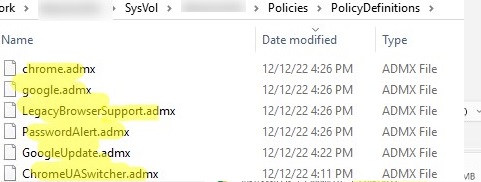
* windows – contains Chrome policy templates in two formats: ADM and ADMX (admx is a newer GPO templates format, that should be used for current versions of Windows 11/10/8.1 and Windows Server 2022/2019/2016/2012R2);There is a chrome.reg file in this folder. It contains an example of Chrome registry settings that can be set via the GPO. You can use the examples in this REG file to directly set Chrome settings in the registry via Group Policy Preferences. - Copy the ADMX GPO template file to ..SYSVOL\PolicyDefinitions folder (Group Policy Central Store on Active Directory domain controllers)
\\woshub.com\SYSVOL\woshub.com\Policies\PolicyDefinitions. You need to copy all *.admx files and directories with localization ADML files (in our example, these are en-US and de-DE); We always recommend you back up the PolicyDefensions directory before installing/updating ADMX policy files.
 - Open the domain Group Policy Management Console (
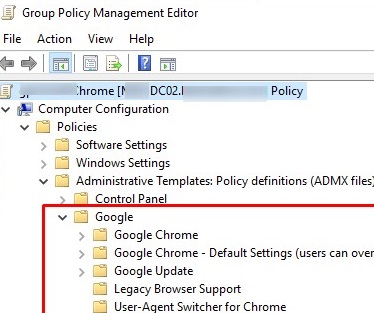
gpmc.msc) and edit any existing GPO (or create a new one). Make sure that a new Google folder containing several new subsections (Google Chrome, Google Chrome – Default Settings (users can override), Google Update, Legacy browser support, User-agent switcher for Chrome) appeared both in the User and Computer sections of Policies -> Administrative Templates.
There are 400+ different browser options available in GPO Administrative Templates for Google Chrome.
Customizing Google Chrome Settings via Group Policy
Note that Google Chrome settings are located in two different Group Policy sections (both in Computer and User Configuration):
- Google Chrome – users (and even the local administrator) cannot change the Chrome settings on their computer specified in this GPO section;
- Google Chrome – Default Settings (users can override) – recommended browser settings that users can change.
Let’s consider the basic Chrome settings that are often centrally configured in an enterprise environment:
- Set Google Chrome as Default Browser: Enabled;
- Set disk cache directory – the path to the Chrome disk cache (usually this is
“${local_app_data}\Google\Chrome\User Data”); - Set disk cache size – disk cache size (in bytes);
- Set Google Chrome Frame user data directory – Chrome directory with user settings;
“${local_app_data}\Google\Chrome\User Data”; - Managed Bookmarks;
- Disable Chrome auto-update: Chrome -> Google Update -> Applications -> Google Chrome: Update Policy Override: Updates disabled;

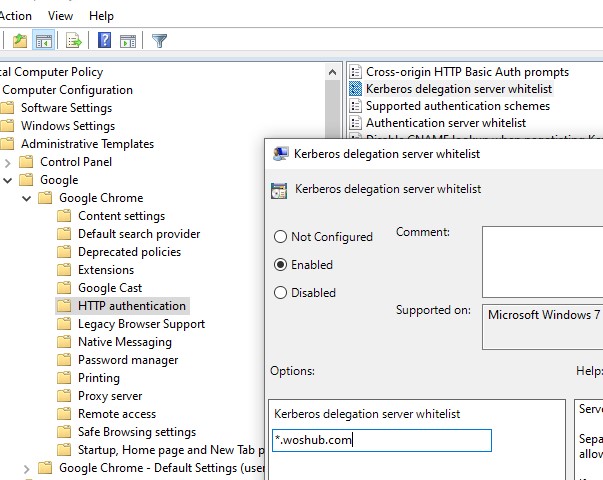
- Add certain websites to the trusted sites list – Policies HTTP Authentication -> Authentication server whitelist;
- Allow Kerberos authentication in Chrome for specific sites. Add a list of servers and site addresses to the policy settings under HTTP Authentication -> Kerberos Delegation Server Whitelist and Authentication Server Whitelist;

- Send anonymous usage statistics and crash information: False;
- Block access to a list of URLs: add a list of websites to be blocked (also, you can block websites in Windows using PowerShell scripts);
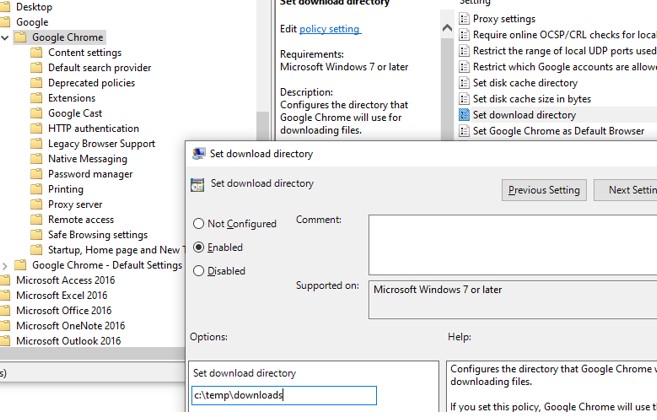
- Change the location of the download folder: Set download directory: c:\temp\downloads;

- Block website notifications on Chrome (Computer Configuration -> Administrative Templates -> Google -> Google Chrome -> Content Settings -> Default notification settings: Do not allow any site to show desktop notifications);
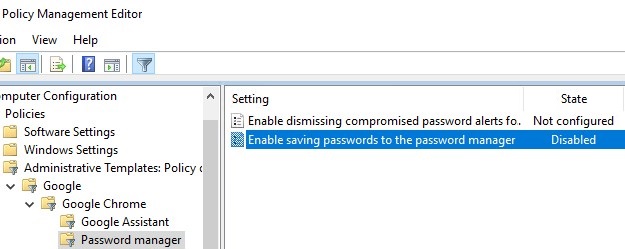
- Prevent users from saving website passwords in the browser: Google Chrome -> Password manager -> Enable saving passwords to the password manager: Disabled;

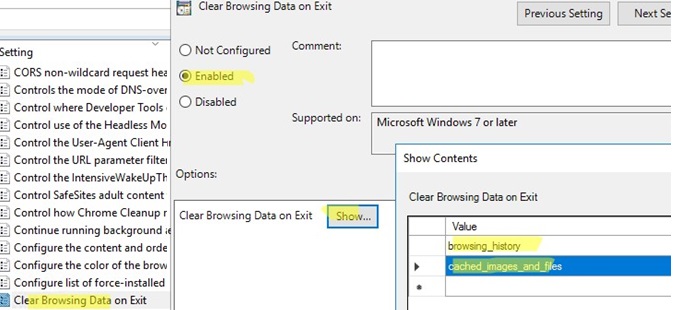
- You can clear Chrome browsing data folders in a user’s profile using the Clear Browsing Data on Exit option; Enable the policy, click Show, and specify which Chrome directories should be automatically cleaned up. Available values:
browsing_history
download_history
cookies_and_other_site_data
cached_images_and_files
autofill
password_signin
site_settings
hosted_app_data

- Use a temporary Chrome profile (data is deleted after the user session ends). Ephemeral profile -> Enabled.The last two option is useful for Remote Desktop Services (RDS) farms with local or roaming profiles (in User Profile Disk or FSLogix format) when you want to reduce the user profile’s size.

Note that the ${local_app_data} directory corresponds to the folder %username%\AppData\Local, and ${roaming_app_data} – to \%username%\AppData\Roaming.
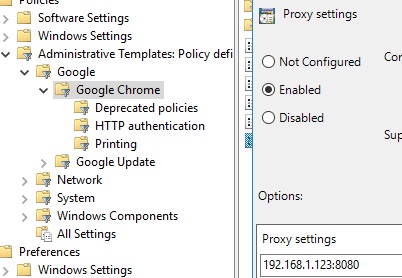
To set proxy server settings for Chrome (may differ from proxy settings in Windows), go to Google Chrome -> Proxy settings – enable the policy and specify the proxy server address and port in the following format – 192.168.1.123:8080
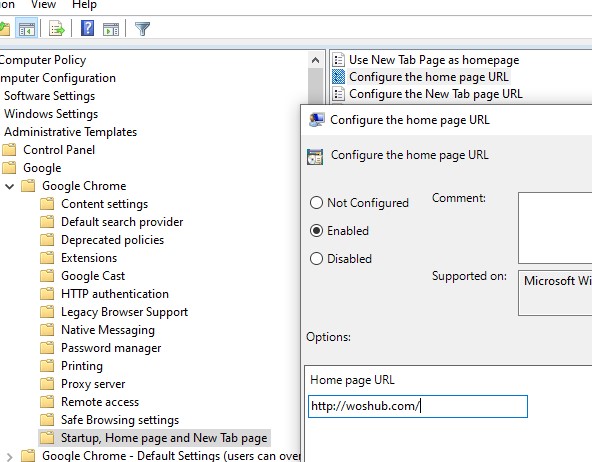
Set a home page: Google Chrome -> Startup, Home page and New Tab page-> Configure the home page URL: https://woshub.com/
It remains to link the GPO with the Chrome browser settings to the desired container (OU) in Active Directory.
Update the GPO settings on the client, run Chrome and check if the new settings have been applied to the browser.
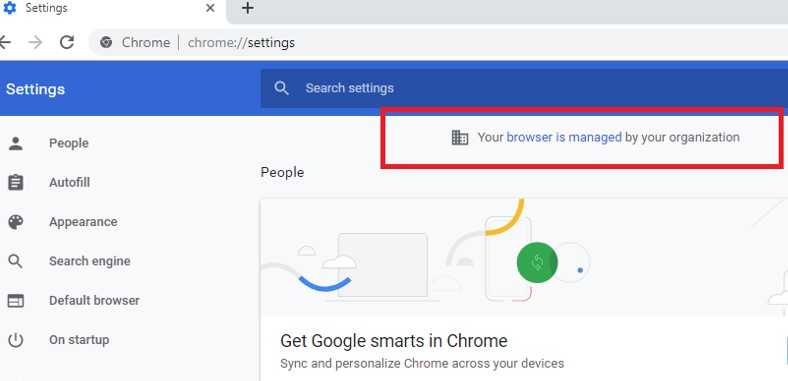
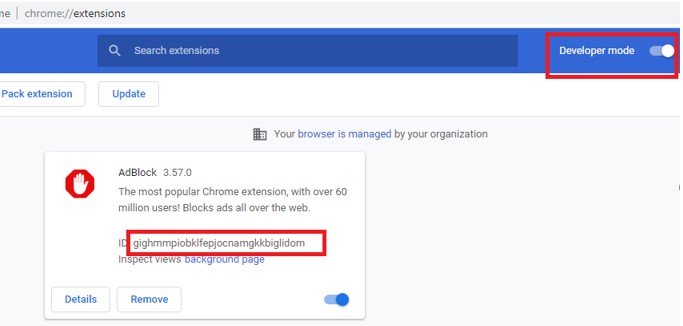
Notice that the Chrome settings page now displays “Your browser is managed by your organization”.
If you have prevented users from changing specific Chrome settings, the browser settings window will display the message “This setting is enforced by your administrator”.

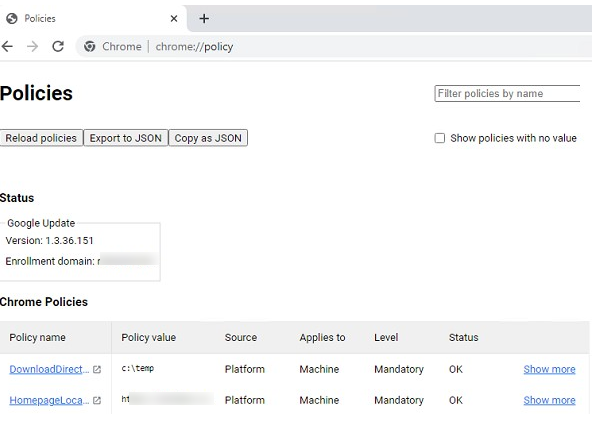
You can display all Google Chrome settings configured with a GPO. Open Chrome://policy address in your browser. Chrome settings you set through the registry or ADMX GPO templates are displayed here.
Installing Google Chrome Extensions Using Group Policy
You can install specific Google Chrome extensions for all domain users using GPO. For example, you want to install the AdBlock extension on all computers automatically. Open the chrome://extensions settings page and install the extension you need on a reference computer.
Now you need to get the extension ID and the URL from which the extension is updated. The Google Chrome Extension ID can be found in the extension properties (Developer mode must be enabled).
Chrome installs the extension to the user profile C:\Users\%Username%\AppData\Local\Google\Chrome\User Data\Default\Extensions\{extension_id_here}.
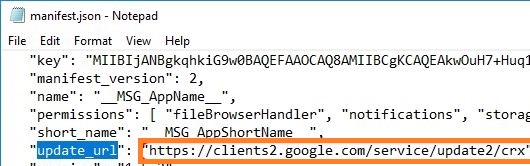
Find and open the manifest.json file in the extension folder and copy the value of the update_url. Most likely, you will see the following URL: https://clients2.google.com/service/update2/crx.
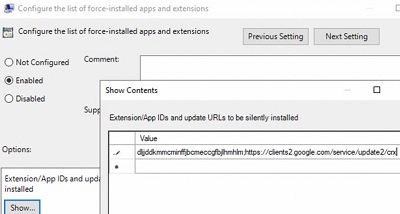
Now, in the GPO editor console, go to Computer Configuration -> Policies -> Administrative Templates -> Google -> Google Chrome -> Extensions. Enable the policy Configure the list of force-installed extensions.
Click the Show button and add a line for each extension that you want to install. Use the following format:
{extension_id_here};https://clients2.google.com/service/update2/crx
Update the Group Policy settings on the user’s computer:
gpupdate /force
Close and restart the browser. Now the specified extension will be automatically installed in Chrome in silent mode without user interaction.
You can prevent users from installing Chrome extensions using the GPO option Configure extension installation blocklist: * and allow users to install only approved extensions (Configure extension installation allow list).
37 comments
In the last example you Set download directory: c:\temp\Downloads.
In my experiment all users’ downloads went there.
I tried c:\temp\Downloads\%username% but now I had the same result with all users’ downloads showing up in c:\temp\Downloads\%username%.
So how do I set this policy to give each user his/her own dir under Downloads?
Also tried ${user_name}
These settings must be applied through User Configuration
Try c:\temp\downloads\%UserName%
or
c:\temp\downloads\%LogonUser%
Is it works only in the domain? I am tested on PC, which not in the domain and Chrome Group Policies I was created didn’t have any effect on Chrome browser 🙁
The policy should be applied to the standalone computer too.Are you add Chrome administrative template to gpedit.msc console?
Do you want block manager password ?
i want to disable executing .exe’s by browsing via chrome. e.g. users can enter the path in the address bar c:\windows\system32\cmd.exe. Upon entering this command – the cmd.exe gets copied into the %temp% folder and can execute. how can i stop this behaviour.
pls help
Hello Nasir,
If this behaviour can be stopped in Chrome I am unsure. However the cmd.exe can be restricted with following settings;
User Configuration – Policies – Administrative Templates – System
Policy: Don’t run specified Windows applications
Add cmd.exe
Apply this GPO to the users that need cmd restricted.
it’s not working ,
but when i chk Chrome://policy it’s shows me that there’s is policy but there’s is no effect .
Current user
Mandatory
Platform
HomepageLocation
http://www.facebook.com
OK
We have a RDP farm, and Adobe PDF is very heavy on our servers with +/- 80 people per server.
Do you know how we can make it so that you cannot choose in Chrome to Always open pdf with Adobe Acrobat? (if you do’nt choose this, the pdf opens in chrome which is perfect).
I know how to reset it when chosen (but I cannot script it).
Open Chrome about:plugins and make sure that Chrome PDF Viewer is enabled.
Next set chrome.exe as a default viewer for *.pdf files.
And simply delete Adobe Acrobat from RDP servers
Just like Osama, It doesn’t work for me too. When I check the Chrome://policy, it’s all there but somehow it doesn’t work.
homepage still google instead of what i’m setting to.
If you are using a domain policy, check that you don’t forget copy chrome.admx file and localization directories to the PolicyDefinitions folder on a DC
how do you add a bookmark via this group policy?
Thank you very much. We have deployed Citrix XenApp in a company and they have published google chrome. Our client requires that users have a predefined Proxy settings and this proxy settings can not be changed by users.
Your guidelines helped us.
I am trying to get the Google Chrome template to appear in GPMC. On the DC I have copied the admx files to C:\Windows\SYSVOL\domain\Policies\PolicyDefinitions and the adml files to C:\Windows\SYSVOL\domain\Policies\PolicyDefinitions\en-us. I have rebooted the DC several times, but the Google Chrome template still does not show up under Computer Configuration\Policies\Administrative Templates. I can see the Google Chrome template in gpedit.msc though. Is there something else I need to do?
Thanks
change the admx filename to .adm
After installation, I created a GPO for chrome. Now I can’t open any webpage. Keeping getting an error saying the site is blocked.Also, every time I open Chrome, the websites example.com and chromium.org pops up automatically. How can I fix this issues. Thanks.
Have you set up any policies for Chrome? Try to disable them all, turning it into the Disabled state
[…] Here’s an article that explains how to setup the GPO so I won’t cover that. […]
I’m on Server 2012 R2 and have no Policy Definitions folder at C:\Windows\SYSVOL\sysvol\domain.local\Policies to begin with but I do have 21 folders with random GUID names (I’m presuming these are other GPs?)
Neither Microsoft’s nor Google’s documentation specifies if creating a Policy Definitions folder in there next to those other folders will affect anything.
Is it safe to just create the folder there next to all those other ones or will it affect them?
I’m thinking of creating it and only putting the Chrome GPs in it?
Yes, these 21 folders with GUIDs are your domain GPOs.
Create a folder in this directory called Policy Definitions and copy the admx Chrome files into it.
After some time, check that the folder \\dc1\SYSVOL\domain.com\Policies\Policy Definitions has appeared on all your DCs.
I only want to block the Chrome password manager from saving login credentials for a few websites where there is risk but really don’t want to block where there isn’t sensitive data. For example, I really don’t care if they save their login for ihatemyjob.com but don’t want them caching logins to banking sites etc. Anyway to block some and not all?
With Chrome GPO, you can only enable or disable password storage for all sites. I’m talking about the policy “Enable saving password to the password manager”. In terms of user security, it’s worth to set it to Disabled.
For example, I never save my passwords in the browser (especially from banking sites), it is not safe.
Is there a setting by which we can disable right click in Google Chrome?
The download link for the ADMX files appears to be dead 🙁
Hi, Peter the download link works fine I just download it
when I wanna add the chrome template is get a error: the follwing error occurred in “‘the path of the chrome.adm’ on line 1:
Error 51 unexpected keywordf
Foud: <?xml
Expecterd class, category, [strings]
The file cannot be loaded.
I which do i need to replace?
Don’t use adm template files – this is a legacy option. Just put chrome admx and adml files into C:\Windows\PolicyDefinitions.
Is there any way to prevent users from installing any plugin on chrome?
I have the ADMx and everything where it supposed to b. When I do an ajustment in GPO like bookmarks disable or disable F11 full screen I refresh chrome and check chrome://policy nothing has changed.
BE MINDED its on a local computer no domain no nothing.
Never mind started working after 10 minutes, while I was typing this post. Very odd
It looks like the Chrome settings were applied after the Group Policy update cycle on your computer.
Your article is awesome, but putting files in SYSVOL always ends up in pain. Just create a folder and share it (read-only)..
My opinion: Don’t put MSI’s into SYSVOL it’s not a file share, it just causes replication issues later in AD. I’m about to configure the GPO’s and your guide is going to save me a bunch of time. Thanks for the hard work.
If all of your clients are located on the same site, you can place the MSI file in any shared folder on any server, with the exception of domain controllers.
In caIn the case of a large network that is connected via a WAN channel, it is better to use the DFS shares. If not available, SYSVOL can be an option too
how to block google account signing on chrome using gpo
Computer Configuration\Administrative Templates\Google\Google Chrome\Browser Sign in Settings = Disable browser sign-in