In order to ensure that the Windows image that you deploy to computers in your network always has the latest security updates, you can add new update packages to your offline Windows installation image using DISM. In this guide, I’ll show you how to inject security patches into the Windows 11/10 and Windows Server 2022/2019/2016 ISO/WIM installation image.
In this example, we’ll show you how to slipstream the latest cumulative security update (April 2023) to a Windows 11 22H2 install image. We are going to add the cumulative update KB5025239 to the image. Native support for the Local Administrator Password Solution (Windows LAPS) is added to Windows 11 with update KB5025239.
How to Add Windows Updates to an Offline Image?
You will need the following files:
- The installation image of Windows in ISO format or its install.WIM file;
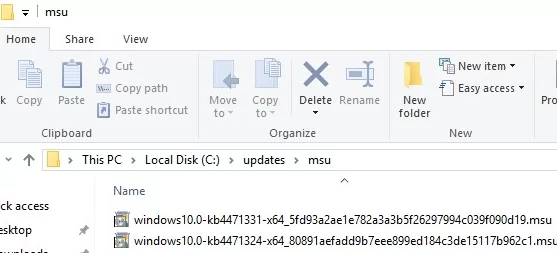
- An .MSU update file that can be downloaded from the Microsoft Update Catalog (How to manually download Windows Update files?). Just download the latest cumulative update for your Windows version and Service Stack Update (SSU).
Create the following directory structure on your computer:
- C:\updates\mnt – is the folder where we will mount the install.wim file containing the Windows installation image;
- C:\updates\msu – is the directory to which you need to copy the update files for your version of Windows in the MSU format;

- C:\updates\WinImage\ – copy the install.wim (or install.esd) file from the Sources directory of your Windows 11 22H2 installation image into this directory. You can also copy the WIM image from a WDS server, MDT, SCCM, or any other OS deployment tool used to install Windows using PXE network boot.
Mounting Windows Image File (WIM) with DISM
Modern Windows installation ISO images that are created with the Media Creation Tool use the ESD compressed format instead of the WIM file. You cannot directly modify a Windows image in the ESD format. Therefore, you must first convert the ESD file to WIM format using the DISM tool.
Mount the ISO image to a virtual drive:
Mount-DiskImage –ImagePath "C:\DIstr\iso\Windows1122h2.iso"
List the editions of Windows in the ESD/WIM image file:
DISM /Get-WimInfo /WimFile:"E:\sources\install.esd"
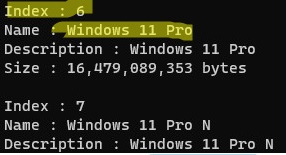
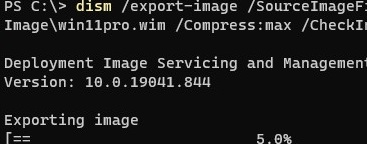
In this example, we will only export a Windows 11 Pro Edition WIM file from the ESD image (its index is 6, so we will specify /SourceIndex:6 in the next command):
dism /export-image /SourceImageFile:"E:\sources\install.esd" /SourceIndex:6 /DestinationImageFile:C:\Updates\WInImage\win11pro.wim /Compress:max /CheckIntegrity
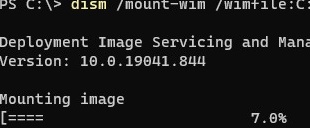
Mount the install.wim file containing the Windows installation image to the C:\updates\mnt directory using DISM:
dism /mount-wim /wimfile:C:\Updates\WinImage\win11pro.wim /index:1 /mountdir:C:\updates\mnt
/index:1 because the WIM image contains only one edition of Windows 11 Pro. If your WIM image contains multiple editions of Windows, you must specify the index of the required edition, or you must perform update integration on each edition in turn.DISM: Adding MSU and CAB Updates to the Windows WIM Image
You can now begin the process of integrating the suitable MSU updates from the specified source directory into your offline Windows image.
dism /image:C:\updates\mnt /add-package /packagepath:C:\updates\msu
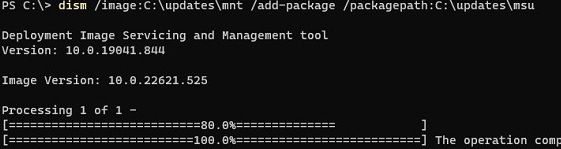
If the DISM detects a wrong update (does not match the OS version, bitness, or if the update is already installed.), it will skip it and write the information to C:\Windows\Logs\DISM\dism.log.
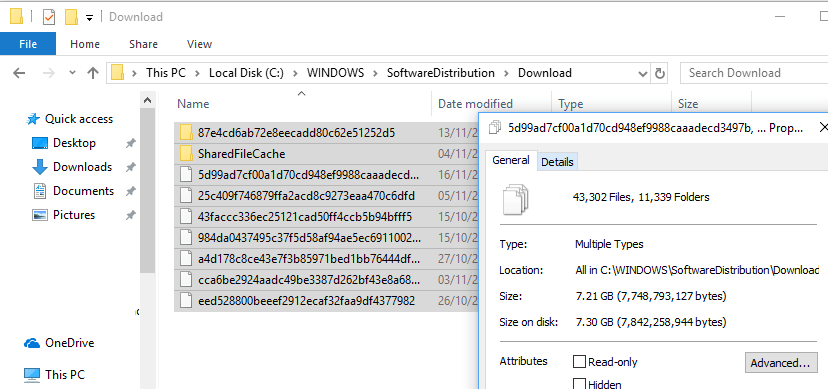
If you don’t want to manually download the MSU update files from the Microsoft Update, you can use a reference computer with the same version of Windows that already has the latest security updates installed as a source, and get all the necessary update files directly from it. Windows saves all patches (CAB files) that it receives from Windows Update servers or the WSUS server to the C:\Windows\SoftwareDistribution\Download directory.
The following command starts the integration of the update files that have already been downloaded and installed on the remote computer (called PC1234) into the install.wim image:
Start /w for /R \\PC1234\C$\Windows\SoftwareDistribution\Download\ %f in (*.cab) do dism /image:C:\updates\mnt /add-package /packagepath:"%f"
In this example, we will access the update directory on the remote computer over the C$ administrative share. A window will appear allowing you to track the update installation process for an offline Windows image. DISM will attempt to add every CAB file it finds on the remote computer to your Windows WIM image.
dism /image:C:\updates\mnt /Cleanup-Image /StartComponentCleanup /ResetBase /ScratchDir:C:\Temp
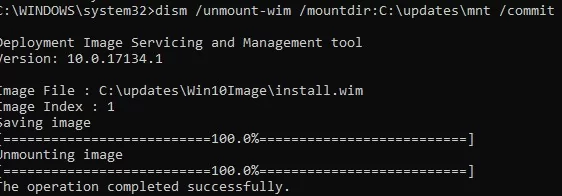
The last step is to save the changes and unmount the Windows WIM image.
dism /unmount-wim /mountdir:C:\updates\mnt /commit
 dism /Cleanup-Wim
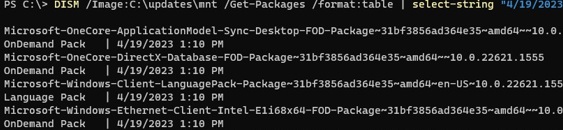
After the updates have been installed, you can verify that the updates have been successfully integrated into the Windows image. List the updates that have been installed today on a mounted Windows WIM image
DISM /Image:C:\updates\mnt /Get-Packages /format:table | select-string "4/20/2023"
You can also view a list of installed updates in an offline WIM image:
Dism /image:C:\Updates\WinImage\win11pro.wim /Get-Packages
In this case, you must split the original install.wim into smaller SWM files:
dism /split-Image /imagefile:C:\Update\Winmage\install.wim /swmfile:C:\Update\WinImage\install.swm /filesize:4096
All that remains is to copy the resulting install.wim image (or SWM files) to the source directory on your media or to a virtual machine, or rebuild the installation ISO image using tools such as oscdimg/UltraISO/Dism++.
A sample command for creating a Windows installation ISO image with UEFI and BIOS support from a local folder (oscdimg.exe is part of the Windows ADK, Assessment and Development Kit):
oscdimg.exe -h -m -o -u2 -udfver102 -bootdata:2#p0,e,bc:\win11\iso\boot\etfsboot.com#pEF,e,bc:\win11\iso\efi\microsoft\boot\efisys.bin -lWin10 c:\iso c:\win11.iso
6 comments
Great post. A few inconsistencies in the file paths. Some commands use C:\updates and others user C:\update
Also: Win10Image vs Win10
Super guide many thanks!
where are updates files are stored in the integration process.
can we post check if the iso contains the updates and service packs.
can we view them
But there is no reply to the comment from the author for my queries still after four years
you should already found answer in the post.
By coincidence, I was slipstreaming a Windows 11 Enterprise installation media yesterday (.iso) to get to the latest version: (22H2)_22621.1555.
I needed it to perform an in-place repair install on a problematic system (“The WOF driver encountered corruption…”). I have had no success with fixing this error in any other way :(.
I did it for the first time, slipstreaming :); had to learn how to do it. I chose the easiest (for me) method: via NTLite free edition.
Thank you much for this article!
As usual, I will save it (via the ‘SingleFile’ browser extension) in my ‘tutorials’ folder. 🙂
Stay well!