Microsoft Network Monitor (NetMon) is a classic network diagnostic tool for Windows that is used to capture and analyze all the incoming and outgoing traffic on a computer. Even though this product has not been developed or updated for over 3 years, it is often used by administrators when they need to diagnose network connections. NetMon offers fewer features than the popular capture and analysis tool WireShark and is not as good at complex packet analysis tasks. However, Network Monitor’s graphical interface is much simpler and more intuitive, and the product itself is lightweight. So its use is justified and practical in some scenarios.
This article shows how to use Network Monitor to capture and analyze network traffic in real-time and to dump traffic for later analysis.
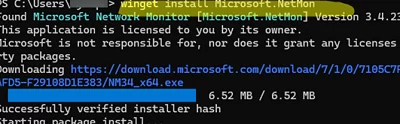
25, 587, and 465, and identify the process executable or script that is performing the mailings.Download the Microsoft Network Monitor 3.4 installer (NM34_x64.exe) from the Microsoft website or install it using the WinGet package manager:
winget install Microsoft.NetMon
Run Network Monitor as an administrator when the installation is complete. In the NetMon window, click New Capture.
By default, Network Monitor collects all traffic that passes through a computer’s network interfaces. The size of such a network dump can be significant if you are capturing network traffic over a long time. In our case, we can set filters to only capture outgoing network packets on one of the known SMTP ports.
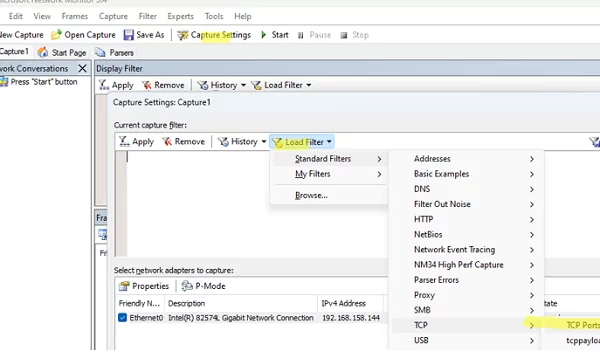
Click the Capture Settings button. Here you can configure filters that describe what traffic NetMon should capture. There are several filter templates for typical tasks in the Load Filter -> Standard Filters menu. In our case, we need a TCP port number filter. Select TCP-> TCP ports.
The following template code is inserted into the Filter Editor window:
tcp.port == 80 OR Payloadheader.LowerProtocol.port == 80
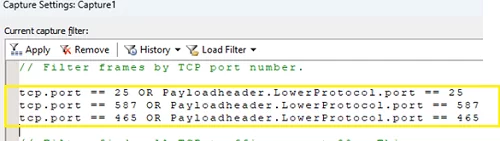
Edit the template rule and add all three default SMTP port numbers:
(tcp.port == 25 OR Payloadheader.LowerProtocol.port == 25 OR
 tcp.port == 587 OR Payloadheader.LowerProtocol.port == 587 OR
 tcp.port == 465 OR Payloadheader.LowerProtocol.port == 465)
If your computer has more than one network interface, or if there are additional IP addresses (aliases) assigned to the adapter, you can add a filter by source IP address:
AND
 (IPv4.SourceAddress == 192.168.18.111)
OR / AND / NOT logical expressions, or you can use || , && , or ! instead.Click the Apply button to save the filter.
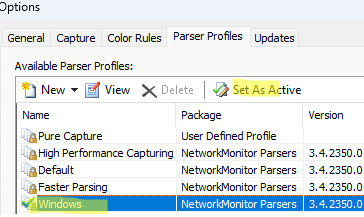
Then go to Tools -> Options -> Parser profiles. Select Windows in the default parser profile (Set as active).
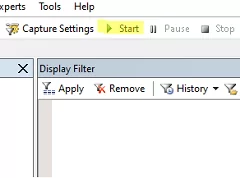
You are now ready to start capturing network traffic. Click the Start button on the toolbar.
Now you need to reproduce the problem, or if it happens randomly, just let NetMon run for a day/week.
In our case, after some time, events corresponding to the filters applied appeared in the NetMon packet log. If you open the contents of the packets, you will see that an SMTP connection has been attempted. Inside the network frames, you will see the detailed commands of the SMTP protocol, the authentication attempt, the address of the target SMTP server, and the email address to which the message was sent (example of SMTP commands in Telnet to send email with authentication).
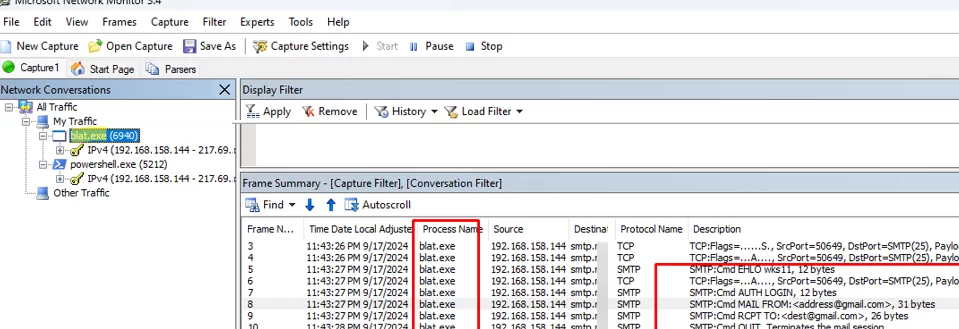
The Process Name field displays the name of the process that initiated the network (SMTP) connection. In this case, it is clear that the SMTP mailings are sent from the blat.exe console tool.
powershell.exe session. This was used to check the availability of port 25 on the external server:Test-NetConnection smtp.corpmail.com -port 25
Click the Stop button to stop capturing network traffic.
The resulting traffic dump can be saved as a *.CAP file for offline analysis.
You can add additional filters by IP or MAC destination/source address, different protocols, ports, and special filters to analyze the traffic of some popular protocols (SMB, HTTP, DNS). Filters can be applied either to the captured traffic or to filter only the displayed data within the current session (Display Filter window).
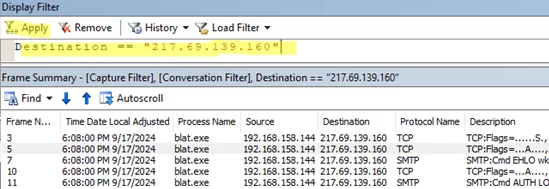
For example, if you want to filter network frames, you can click on any of the values in the list of packets and then choose Add [something] to Display Filter.
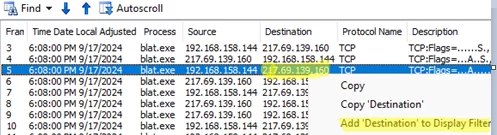
In the screenshot, I have added a filtering rule by destination IP address. The following code has been added to the filter prompt:
Destination == "ip_adress"
Below are some examples of commonly used Network Monitor filters.
Filter by destination IP address:
IPv4.SourceAddress == 192.168.0.1
Filter by source or destination IP:
IPv4.Address == 192.168.0.1
Filter by TCP port number:
tcp.port == 443
 OR
 Payloadheader.LowerProtocol.port == 443
Port ranges can be specified:
(udp.Port>=10000 && udp.port<=19999)
In this article, we looked at how to capture and analyze network traffic in Windows using Microsoft Network Monitor. You can also use the built-in PktMon console command in Windows to dump traffic without having to install a Network Monitor on each computer. A dump taken with such a command line tool can be further analyzed on any computer with NetMon or Wireshark installed.
1 comment
Many thanks man!
you always suprises