Windows allows to assign multiple IP addresses (aliases) to a single physical network adapter. This can be useful when you want to run multiple websites with unique IP addresses on the same IIS server, if you want to bind an application to a specific IP, or if you are preparing to change IP addresses on your network. In Windows, you can add a secondary (virtual) static IP address to an existing network adapter using the GUI or the command prompt.
Assigning an Additional IP Address to a Network Adapter on Windows
The Control Panel GUI can be used to add an additional IP address to the network adapter.
- Navigate to the Control Panel –> Network and Internet –> Network and Sharing Center -> Change adapter settings (or just run the
ncpa.cplcommand); - Open the network interface properties;
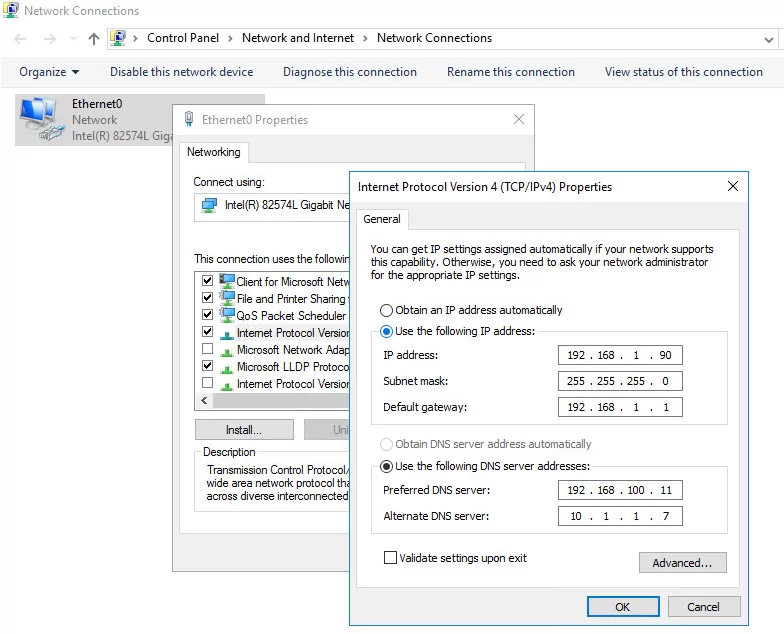
- Select TCP/IP v4 from the list of protocols and click Properties;

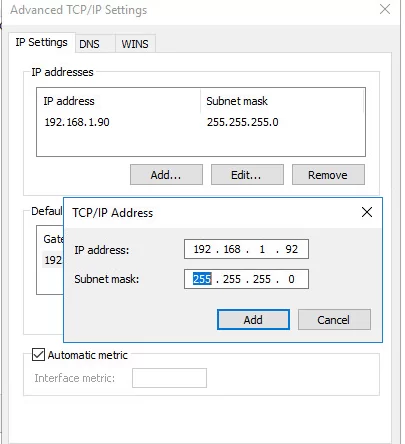
- Click the Advanced button and then click Add in the IP Addresses section;
- Specify an additional IP address, subnet mask, and click Add;
- Save the changes.
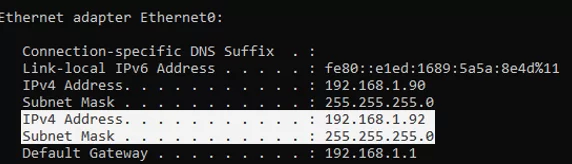
Run the ipconfigcommand and check that there are now two IP addresses assigned to the network interface.
To check the availability of the second IP address over the network from other computers, use the ping command.
The SkipAsSource Flag and the Primary NIC IP Address
If you assign an additional IP from the Control Panel GUI, this IP address will be used for outgoing connections. There is no such thing as a primary IP address in Windows. To prevent Windows from using a specific IP address for outbound connections, you need to enable the SkipAsSource option for it.
Use PowerShell to list the IPv4 addresses assigned to network adapters on Windows:
Get-NetIPAddress | where AddressFamily -eq IPv4| Select-Object IPAddress, InterfaceAlias, SkipAsSource
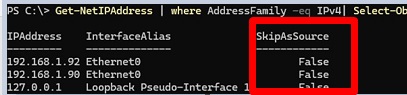
In this example, SkipAsSource is set to False for all computer IP addresses. If you want to make a particular IP address the primary source, disable the SkipAsSource option for all the other IP addresses.
Get-NetIPAddress 192.168.1.90 | Set-NetIPAddress -SkipAsSource $True
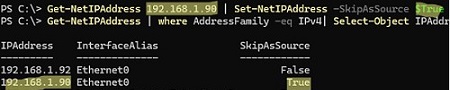
Now the specified IP will not be used by Windows as a source for outgoing connections, except the cases where it is explicitly used by a specific app. Also, if the SkipAsSource flag is enabled, the second IP address will not be registered in DNS (if dynamic registration is enabled).
How to Add a Second IP Address From CMD/PowerShell
You can enable the SkipAsSource flag when adding an additional IP address from the prompt. For example, using netsh:
Netsh int ipv4 add address name="Local Area Connection" 192.168.1.92 255.255.255.0 SkipAsSource=True
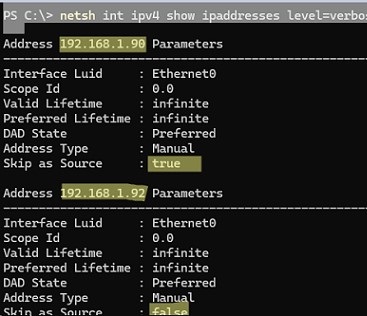
List all assigned IP addresses and their SkipAsSource values:
netsh int ipv4 show ipaddresses level=verbose
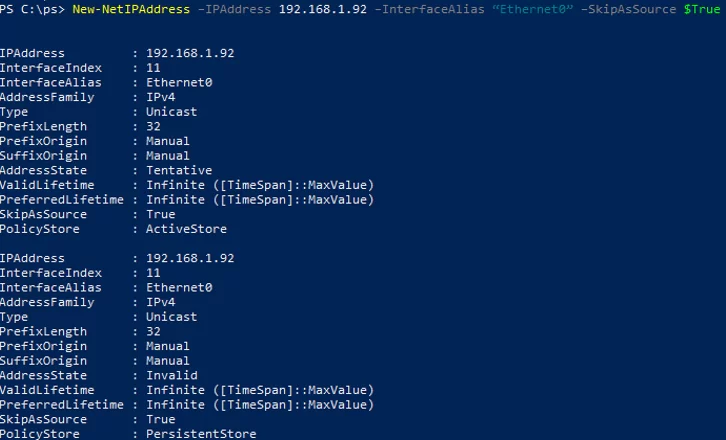
Also, you can also use PowerShell to configure a second IP for an Ethernet0 network adapter:
New-NetIPAddress –IPAddress 192.168.1.92 –PrefixLength 24 –InterfaceAlias Ethernet0 –SkipAsSource $True
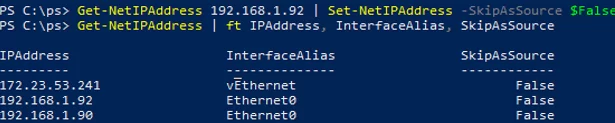
To allow outgoing traffic from a specific NIC IP address, change SkipAsSource to False.
Get-NetIPAddress 192.168.1.92 | Set-NetIPAddress -SkipAsSource $False
Remove the additional IP address:
Get-NetIPAddress 192.168.1.92| Remove-NetIPAddress
7 comments
Hey, It’s really good contents.
I have a question about this.
Do the multiple IPs in single NIC have a priority?
If the server want to connect to another server using the NIC, which IP would be used?
I manage some server like this condition, they operate differently, so I confused.
Do you know anything about this?
You can set the
SkipAsSource=Falseflag for all non-primary IP addresses.what should we give in DNS server ip & alternate DNS ip?
You will always use the DNS address of the primary IP address when resolving.
Interesting stuff. I’d like to utilise it for the following scenario:
NEW AD-DC, new name okay but: masses of devices w/hard code DNS IP.
Use the 2nd IP for the DNS service.
Were you able to set it in a DC? Did you have replication issues? I need to do the same as I have network devices pointing to an IP as DNS
Hello — I hope you are still active here and can assist me.,
I wish to use a dedicated Server 2019 to only host (10 to 15) websites. I have changed the registrar to point the domain to my custom DNS assignment. We have a single static IP.
Goal = set up one server to host multiple web sites over using one IP address. Only have one NIC card installed. Traffic for all websites will be small (< 10,000 per month). Using a SonicWall TZ500 firewall.
Do we need to create additional private IPs — one for each web site?
Running ipconfig shows only one private IP — 192.168.1.145. Could we create additional IPs … 146, 147, 148, etc??
What is limit on the # of IPs that can be created?
Any suggestions you can offer will be appreciated.
Thank you.