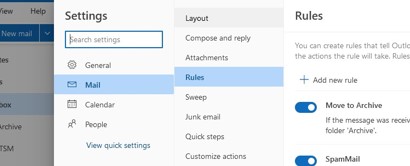
Outlook mailbox rules allow users to configure different conditions for processing incoming e-mail messages in the Inbox folder. You can use Outlook rules to move e-mails from specific senders to the target mailbox folder, forward the email to another user, etc. Users can create and manage mailbox rules from the Outlook GUI. Exchange administrators can manage rules in user mailboxes through PowerShell. In this article, we’ll show you how to use PowerShell to create, delete, disable, and modify Outlook inbox rules in Exchange Server and Microsoft 365 (Exchange Online) mailboxes.
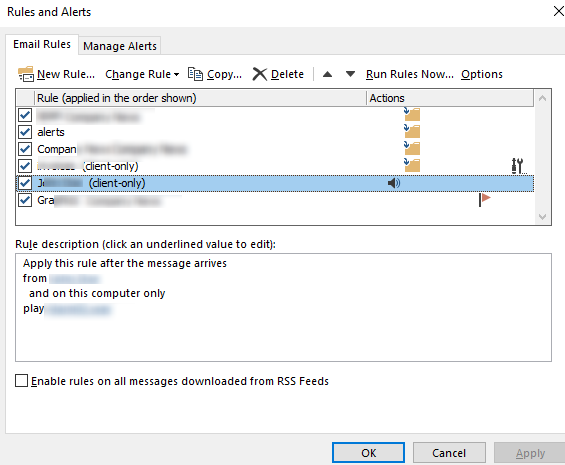
Client-Side vs Server-Side Outlook Rules
There are two types of Inbox rules that can be configured in Outlook: client-side nd server-side rules.
- Server-side Outlook rules are executed on the Exchange server side when an email is received. They always work, it doesn’t matter if the user is running an Outlook client or not (rules created with Outlook Web App are always server-side). The following rules can be applied on the Exchange server side: mark an email as important, move an email to another mailbox folder, delete a message, forward an email to another mailbox;
- Client-side rules are applied only when the Outlook client is started. Examples of rules include moving an e-mail to a PST file, marking an email as read (how to check if an Exchange user has read an email), displaying an alert, or playing a sound. You cannot manage these rules through PowerShell. These rules have a ‘client-only’ status in the Outlook interface.
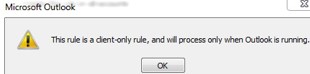
A warning is displayed when you create a new rule in Outlook that is processed on the client:
This rule is a client-only rule, and will process only when Outlook is running.
Get-InboxRule: How to List User Inbox Rules in the Exchange Mailbox?
Let’s try to view the Inbox rules in the user’s mailbox. Connect to your Exchange environment using PowerShell.
$Session = New-PSSession -ConfigurationName Microsoft.Exchange -ConnectionUri http://mun-exch1.woshub.com/PowerShell/ -Authentication Kerberos -Credential $UserCredential
 Import-PSSession $Session
Use the Exchange Online PowerShell module to connect to your M365 tenant:
Install-Module -Name ExchangeOnlineManagement
 Connect-ExchangeOnline
In Microsoft 365, you can use certificate-based authentication in PowerShell.
The following cmdlets are used to manage mailbox rules in Exchange:
- Get-InboxRule
- New-InboxRule
- Enable-InboxRule
- Disable-InboxRule
- Set-InboxRule
- Remove-InboxRule
To view a list of rules in an Exchange mailbox, run the following PowerShell command
Get-InboxRule –Mailbox john.doe
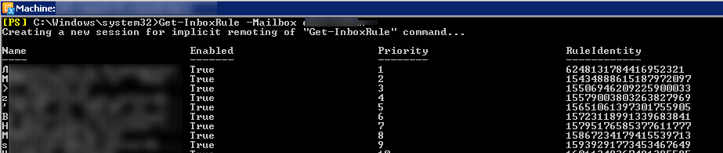
As you can see, the name, status (Enabled: True/False), priority, and RuleIdentity of each rule are displayed.
You can see detailed information about the specific Inbox rule by specifying its name:
Get-InboxRule -Mailbox john.doe -Identity "HelpDesk"| fl
Usually, you can understand the contents of the rule by its description:
Get-InboxRule -Mailbox john.doe -Identity "HelpDesk "| Select Name, Description | fl

There may be hidden server-side rules in an Outlook inbox. These rules are not visible in the Outlook client or OWA. You can list the hidden mailbox rules by using the -IncludeHidden parameter:
Get-InboxRule -Mailbox john.doe -IncludeHidden
You can use PowerShell to find specific rules in a user’s mailbox. For example, you have to find all rules for deleting e-mails:
Get-InboxRule -Mailbox john.doe | ?{ $_.DeleteMessage }
Also, there may be a scenario, when the information security department asks you to find all automatic email forwarding rules in all user mailboxes of your company:
foreach ($i in (Get-Mailbox -ResultSize unlimited)) { Get-InboxRule -Mailbox $i.DistinguishedName | where {$_.ForwardTo} | fl MailboxOwnerID,Name,ForwardTo >> C:\PS\All_Mailbox_Forward_Rules.txt }
The resulting text file will contain the list of mailboxes, forwarding rule names, and recipients to which messages will be forwarded.
Create an Inbox Rule in Outlook with PowerShell
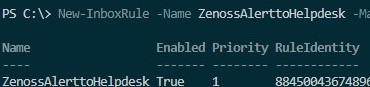
You can create a new rule for Outlook inbox using the New-InboxRule Exchange cmdlet. For example, you want to forward all e-mails containing certain keywords in the subject to another user. Run this command:
New-InboxRule -Name ZenossAlerttoHelpdesk -Mailbox NYadmin -SubjectContainsWords "Zenoss HW Alert" -ForwardTo "Helpdesk"
New-InboxRule: Using Outlook Web App or Windows PowerShell to modify your rules will delete any rules that were previously turned off using Outlook. If you want to preserve the rules you turned off using Outlook, select "No" and use Outlook to edit your rules. Are you sure you want to proceed.
The following rule will set the red category and high importance for all e-mails with the keyword “Annual Meeting” in the subject from the [email protected]:
New-InboxRule -Mailbox john.doe –name SecretaryRule -From [email protected] –SubjectContainsWords “Annual meeting" -ApplyCategory "Red Category" -MarkImportance "High" -StopProcessingRules $true
An example of a rule that moves all messages received before 01/01/2023 to the Archive folder:
New-InboxRule -Name "Move to Archive" -Mailbox john.doe -MoveToFolder "john.doe:\Inbox\Archive" -ReceivedBeforeDate "01.01.2023"
Forward all e-mails for a specified period of time:
New-InboxRule -name ForwardTo -mailbox john.doe -ReceivedAfterDate 12/12/2022 -ReceivedBeforeDate 01/01/2023 -ForwardTo [email protected]
You can create a rule for all users in a specific Organizational Unit (OU) in AD that automatically moves emails with the subject “Casino” to the Junk Email folder.
$mbxs = Get-mailbox -organizationalUnit Managers
 $mbxs | % { }
 $mbxs | % { New-inboxrule -Name SpamMail -mailbox $_.alias -subjectcontainswords "[casino]" -movetofolder “$($_.alias):\Junk Email” }
To view the list of all available properties, conditions, and actions to be used in Exchange rules:
Get-InboxRule -Mailbox john.doe | get-member
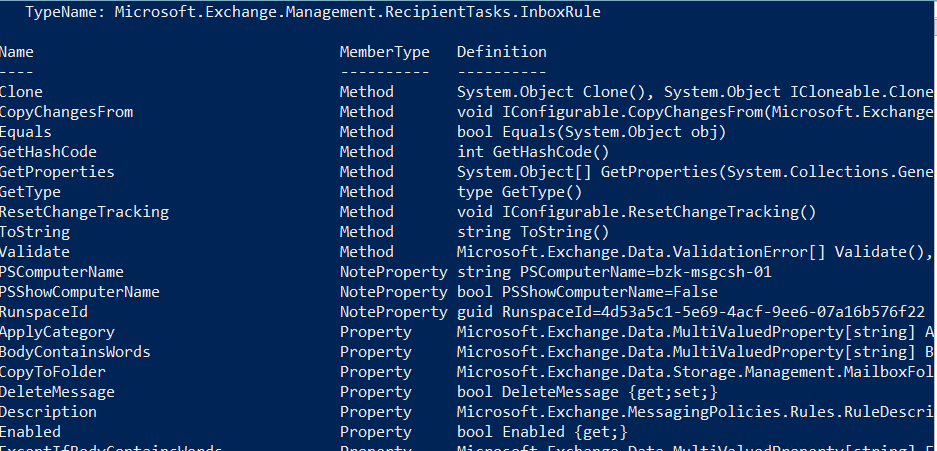
ApplyCategory
BodyContainsWords
CopyToFolder
DeleteMessage
Description
Enabled
FlaggedForAction
ForwardAsAttachmentTo
ForwardTo
From
FromAddressContainsWords
FromSubscription
HasAttachment
HasClassification
HeaderContainsWords
Identity
InError
IsValid
MailboxOwnerId
MarkAsRead
MarkImportance
MessageTypeMatches
MoveToFolder
MyNameInCcBox
MyNameInToBox
MyNameInToOrCcBox
MyNameNotInToBox
Priority
ReceivedAfterDate
ReceivedBeforeDate
RecipientAddressContainsWords
RedirectTo
RuleIdentity
SendTextMessageNotificationTo
SentOnlyToMe
SentTo
StopProcessingRules
SubjectContainsWords
SubjectOrBodyContainsWords
SupportedByTask
WithImportance
WithinSizeRangeMaximum
WithinSizeRangeMinimum
WithSensitivity
-MessageTypeMatches Calendaring parameter to create a rule for calendar invitations in an Exchange mailbox.If you want to create an Inbox rule on a shared Exchange mailbox, ensure that you’ve been assigned the ‘Organization Management’ role or have been granted ‘Full Access’ permissions. You can manage mailbox permissions using PowerShell:
Add-MailboxPermission -Identity itdept -User john.doe -AccessRights FullAccess -AutoMapping:$false -InheritanceType All
To change an Outlook rule, use the Set-InboxRule cmdlet:
Set-InboxRule -Mailbox john.doe –identity SecretaryRule -FromAddressContainsWords {gmail.com}
One or more rules could not be uploaded to Exchange server and have been deactivated. This could be because some of the parameters are not supported or there is insufficient space to store all your rules.
Only enabled rules are taken into account. There can be an unlimited number of disabled rules in a mailbox. You can change the rules quota (RulesQuota) to 256 KB using this command:
Set-Mailbox -identity john.doe -RulesQuota 256Kb
How to Disable and Remove an Outlook Inbox Rule?
To disable a specific Outlook inbox rule, use the command:
Disable-Inboxrule –Mailbox john.doe -Identity “SecretaryRule”
Its status (Enabled) will be changed to False and it will no longer be applied to incoming e-mail messages.
To completely remove an Inbox rule, run this command:
Remove-Inboxrule –Mailbox john.doe -Identity SecretaryRule
The command will prompt you to confirm it, and you just have to press Y. To remove all rules from a user’s mailbox, run the following:
Get-inboxrule -mailbox john.doe | Disable-Inboxrule
You can delete all mailbox rules from Outlook by running it with an additional parameter:
Outlook.exe /cleanrules
It will delete all the client-side rules and server rules for all the mailboxes that are configured in your Outlook profile.
If you get an error when you try to disable or enable auto-reply (Out of Office) in your mailbox:
The Out Of Office Rules cannot be displayed. The client operation failed.
or
System resources are critically low.
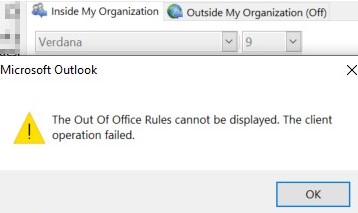
The cause of the problem is corrupt rules in the mailbox. Use PowerShell to remove all rules in the mailbox (including hidden ones).
Get-InboxRule -Mailbox john.doe -IncludeHidden | Remove-InboxRule