A new native package manager, WinGet (Windows Package Manager), appeared on Windows 10 and 11. You can use it to install apps from the command prompt (similar to Linux package managers like yum, dnf, apt, etc.).
WinGet.exe is a console tool that makes app installation easier on a computer running Windows (like Chocolatey package manager). To install a program, you don’t need to search official sites, download the installation files, and install apps manually. Using Windows Package Manager, you can install or update any program from the repository with just one command.
How to Install WinGet Package Manager on Windows 10?
You can install WinGet on Windows 10 with build 1709 or newer. Winget is already embedded into the image of the current Windows 11 21H2 and Windows 10 21H1 builds.
To check if Winget is installed on your computer, open a PowerShell console and run the command:
Get-AppPackage *Microsoft.DesktopAppInstaller*|select Name,PackageFullName
In our case, Winget is installed (the name of the UWP application is Microsoft.DesktopAppInstaller).

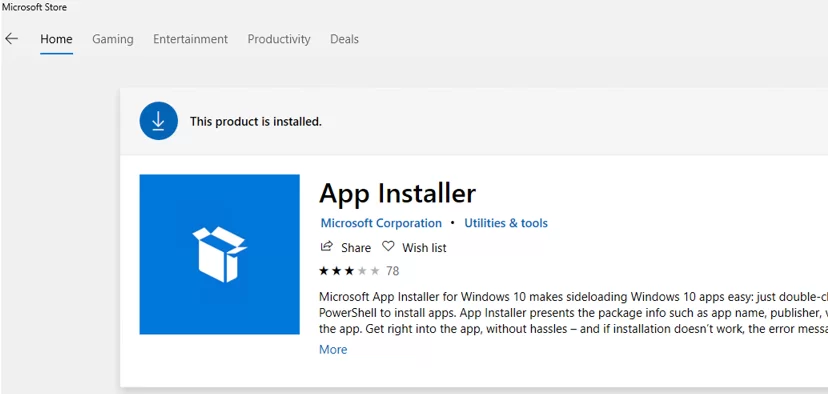
You can install WinGet from the Microsoft Store (it is called App Installer there) https://www.microsoft.com/en-us/p/app-installer/9nblggh4nns1#activetab=pivot:overviewtab
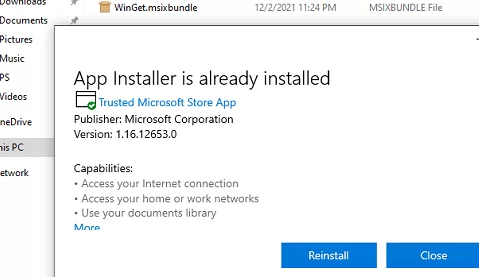
Also, you can install Winget manually using PowerShell (if you removed built-in UWP apps in Windows). To do this, you need to use PowerShell to download the winget msixbundle file from GitHub (https://github.com/microsoft/winget-cli/releases) and install it:
Invoke-WebRequest -Uri "https://github.com/microsoft/winget-cli/releases/download/v1.1.12653/Microsoft.DesktopAppInstaller_8wekyb3d8bbwe.msixbundle" -OutFile "C:\PS\WinGet.msixbundle"
 Add-AppxPackage "C:\PS\WinGet.msixbundle"

You can also download and install the WinGet package manually.
Check the installed winget version using this command:
winget --version

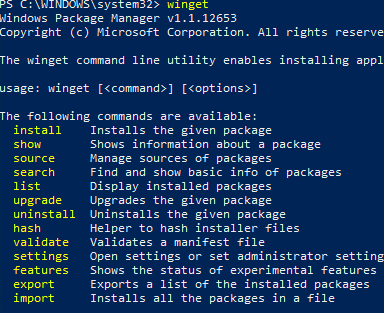
Here are the basic winget commands:
winget install <package>—install a packagewinget uninstall <package>— remove packagewinget upgrade– update software packagewinget list– list installed apps on Windowswinget show <package>— display the package infowinget source <options>— manage repositorieswinget search <search_string>— search for packages in repositorieswinget export– export the list of installed programs to a filewinget import– installation of programs (packages) according to the list in the filewinget hash <package>— get a package installer hashwinget validate <package>— to validate a manifest file
The winget settings are stored in the settings.json file (C:\Users\%username%\AppData\Local\Packages\Microsoft.DesktopAppInstaller_8wekyb3d8bbwe\LocalState). You can change Winget settings using the command:
winget settings
Deploying Software Packages in Windows using WinGet
Online repositories are used to install programs via the WinGet package manager. Their list can be displayed with the command:
winget source list
By default, there are two official repositories available in WinGet:
- msstore (https://storeedgefd.dsx.mp.microsoft.com/v9.0) – Microsoft Store repository
- winget (https://winget.azureedge.net/cache) – basic winget software repository maintained by Microsoft
winget sourcePrior to installing an application via WinGet, you need to find out the package name. To search packages, the search command is used. For example, to search zip archive managers in the repository, run this command:
winget search zip
winget search zip -s msstore
The command returns the list of packages (with their names and versions) matching your query. Pay attention to the Source column. It lists the repository where the package is located.

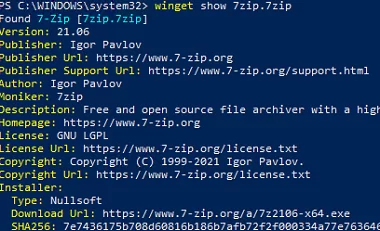
You can get information about a specific package:
winget show 7zip.7zip
Multiple versions of a package can be hosted in the repository. In order to display a list of available package versions, run:
winget show 7zip.7zip --versions
For example, you want to install 7zip. Copy its name or ID and run the following installation command:
winget install 7zip.7zip
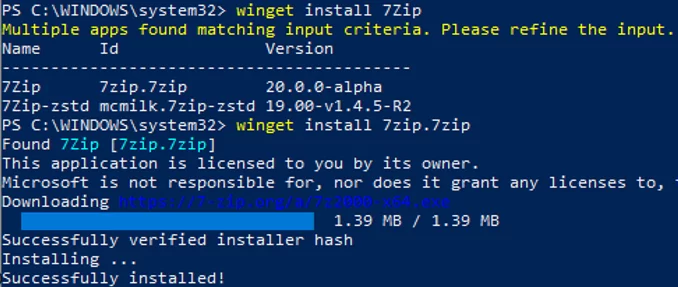
The latest available version of the program is installed by default. You can install a specific version of a package:
winget install 7zip.7zip -v 21.05
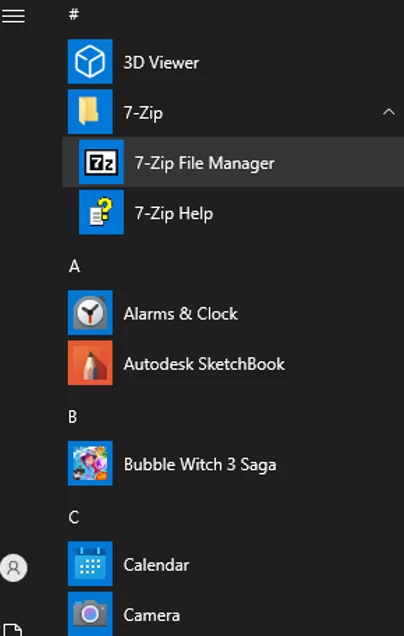
As you can see, the package manager has automatically downloaded and installed the app using a single command. The program has appeared in the list of installed software in the Windows Start menu.
Then let’s install Windows Terminal and VSCode for PowerShell scripts.
Search the package names first:
winget search terminal
 winget search "visual studio"
Then install them in turn:
winget install Microsoft.WindowsTerminal –e ; winget install Microsoft.VisualStudioCode –e
If you want to run the package installation in the background, use the –silent option:
winget install "VLC media player" --silent
When you install some software, you can automatically accept the terms of use. For example, when installing the Sysinternals toolkit:
winget install sysinternals --accept-package-agreements
By default, programs are installed on the system drive in the Program Files folders. You can change the installation folder for a program:
winget install microsoft.visualstudiocode --location "D:\Programs"
Winstall: Web GUI for WinGet Package Manager
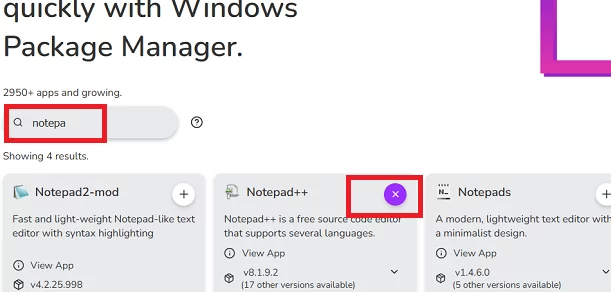
Users who don’t like the winget CLI interface can use the Winstall web service (https://winstall.app/). Winstall is a graphical interface for the WinGet repository (over 2900 programs are available for installation).
You can use Winstall to generate an installation script for the programs you need. Find programs in the repository and click + to add them to the installation script.
Then click on the Generate Script button and the service will create a CLI command to install the selected app packages.
Copy the code from the Batch or PowerShell tab and paste it into cmd.exe or PowerShell console.
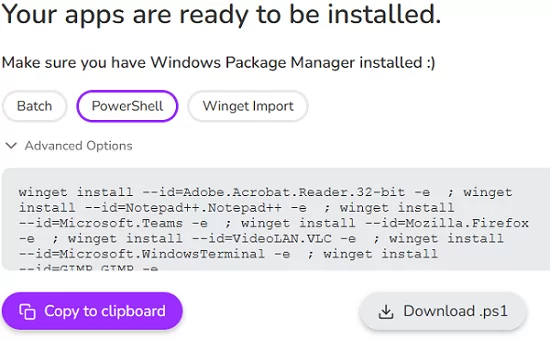
Thus, you can install the programs you need with just one command.
WinGet: Updating and Removing Packages on Windows
WinGet allows you to not only install programs but also update or remove them. To display a list of installed programs on your computer, run:
winget list
The command will display a complete list of programs installed on the computer (including programs not installed via winget). If an update is available for the program, the new version will be displayed in the Available column.

To update an application installed via winget, run the commands:
winget upgrade --id 7zip.7zip
You can update all installed programs at once:
winget upgrade --all
To remove programs, use the command:
winget uninstall --name 7zip.7zip
You can also uninstall applications not installed via WinGet by their ID:
winget uninstall --id "{0F693AA3-4387-4ACB-A6FD-3A396290587}"
Export and Import Installed Software List to Another Computer via WinGet
With WinGet, you can export a list of programs installed on a computer to a JSON file and then use this file to quickly install (import) the same set of apps on another computer.
To export the list of installed apps to a JSON file, run:
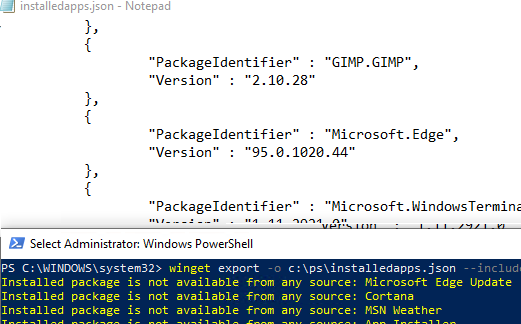
winget export -o c:\ps\installedapps.json --include-versions
The file contains a list of programs installed through the Windows Package Manager.
To install a set of programs from a JSON file on another computer, run the command:
winget import -o .\installed_apps.json
Windows Package Manager can ignore versions and unavailable programs during installation by adding the --ignore-unavailable and --ignore-versions options.
2 comments
Installation did not work.
Invoke-WebRequest : The request was aborted: The connection was closed unexpectedly.
At line:1 char:1
+ Invoke-WebRequest -Uri “https://github.com/microsoft/winget-cli/relea …
+ ~~~~~~~~~~~~~~~~~~~~~~~~~~~~~~~~~~~~~~~~~~~~~~~~~~~~~~~~~~~~~~~~~~~~~
+ CategoryInfo : InvalidOperation: (System.Net.HttpWebRequest:HttpWebRequest) [Invoke-WebRequest], WebExc
eption
+ FullyQualifiedErrorId : WebCmdletWebResponseException,Microsoft.PowerShell.Commands.InvokeWebRequestCommand
PS C:\Windows\system32>
Pin Winget package:
winget pin add powertoys
This app will not be updated automatically when you update all of your winget packages:
winget upgrade –all
Exclusion of package from updates:
winget pin add powertoys –blocking
List pinned Wingetapps:
winget pin list