In this article, we’ll cover several ways to join a Windows computer to an existing on-premises Active Directory domain. We’ll demonstrate how to perform the domain join through the graphical Windows Settings/Control Panel interface, from the command line using netdom or djoin, and with PowerShell (which is generally the fastest and simplest method for joining a computer to a domain).
The methods described in this article are applicable to all supported Windows versions, including recent builds of Windows 11 and Windows Server 2025, 2022, 2019, and 2016.
- Active Directory Domain Join Prerequisites for Windows
- Add Windows to a Domain via the System Properties GUI
- Join a Windows PC to a Domain via the Settings App
- How to Join a Computer to a Domain Using PowerShell
- Pre-staging Computer Accounts in Active Directory
- How to Perform an Offline Domain Join in Active Directory
Active Directory Domain Join Prerequisites for Windows
First, let’s take a look at the basic requirements and preparatory steps you need to take on your computer before joining an Active Directory domain
- Supported Windows editions. Make sure that your computer is running one of the following Windows editions: Pro, Education, Pro for Workstations, or Enterprise. The Windows Home and Single Language editions do not support the option of joining an Active Directory domain.
- Network connectivity. Your device must be connected to a local network with access to at least one Active Directory domain controller. The computer must be configured to use an IP address from the corporate network range with the IP address of the nearest domain controller specified in the computer’s primary DNS settings (the network adapter settings can be configured either manually or via the DHCP server).
- Domain controller and DNS availability. Make sure that your computer can resolve the domain name and can access the domain controller:
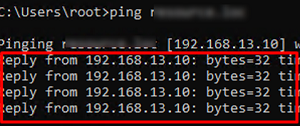
ping woshub.loc Your corporate firewalls should not block the standard AD network ports.
 - Time Synchronization. The computer’s local time must be within five minutes of the domain controller’s time. Proper time synchronization is required for Kerberos authentication (time in a domain is usually configured to synchronize with an external NTP source).
- Set the unique computer name (
hostname) to be used in a domain. By default, Windows generates a random computer name during installation. However, it’s best to change it to something more meaningful. You can change the computer name using the classic Control Panelsysdm.cpl. Click Change, enter a new computer name, and press OK. As you can see, the computer is currently a member of the default WORKGROUP.
Or use this PowerShell command to change the computer hostname:Rename-Computer -NewName "wks-tst1"Restart Windows once you have changed the hostname. - Active Directory domain join permissions. You need a domain account with permissions to add new computers to the domain. These permissions are granted to domain administrators by default and can be delegated to other users. Additionally, any non-privileged domain user can join up to ten computers to the domain (this is configured via the AD attribute
ms-DS-MachineAccountQuota) - Unique Machine local SID. When deploying a preconfigured Windows image (gold image) to workstations, it is essential to use the
syspreptool when capturing the image. Starting in 2025, Microsoft has tightened the requirements for the uniqueness of local computer SIDs and is blocking mutual authentication between computers with duplicate Security Identifiers.
 Your corporate firewalls should not block the standard AD network ports.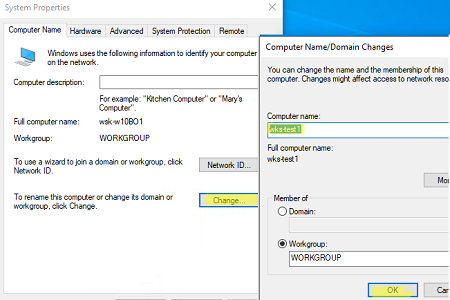

Add Windows to a Domain via the System Properties GUI
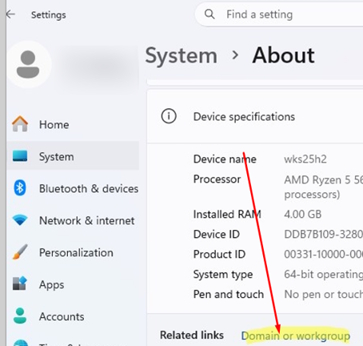
You can add your computer to the domain via the System Properties applet in the classic Windows Control Panel. It can be found in the modern Settings app under System -> About -> Domain or Workgroup, by pressing the Win+Pause/Break hotkey, or by running the command sysdm.cpl .
- In the System Properties, click the Change button on the Computer Name tab.
- Switch the Member of option to ‘Domain’ and specify the name of your Active Directory domain.
- You will be prompted to enter the name and password of a domain user. Enter the credentials of a user who has permission to join computers to the domain.
- The next thing you should see is the message Welcome to the woshub.loc domain;
- Restart your computer.
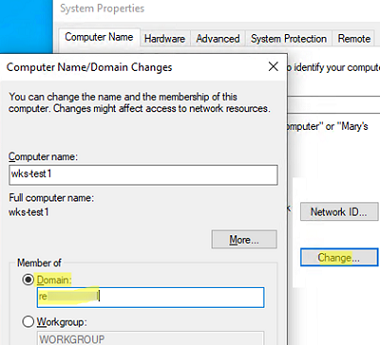
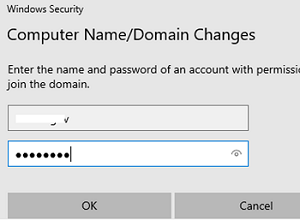
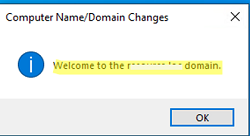
When a computer joins a domain, a new account is created for it using its hostname. Open the AD Users and Computers snap-in by running dsa.msc, and then navigate to the root container CN=Computers. By default, new computer accounts are created in this container, but you can change the default OU for new computers.
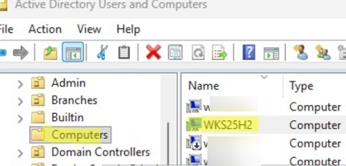
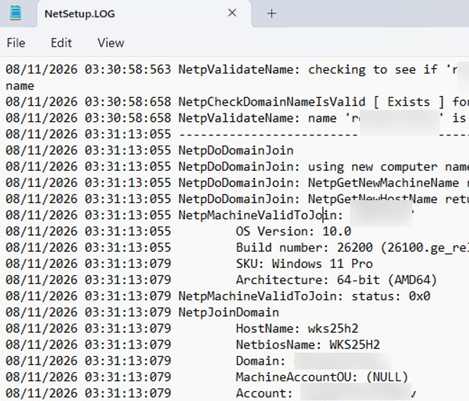
If you cannot add a computer to the domain due to an error, a detailed log of the process is stored on the client in the %windir%\debug\netsetup.log file, which is useful for troubleshooting.
The netsetup.log file can be used to track who added the computer to the domain, when it was added, and the computer name it was added under. If the hostname has been changed, this file can be used to find out the previous computer name.
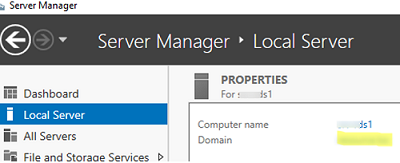
To join a Windows Server 2025/2022/2019/2019 computer to an AD domain, access the System Properties dialog box from the Server Manager -> Local Server -> Domain.
sconfig tool to join a host to a domain. See the article on how to configure the Server Core from the command prompt.After the computer restarts, the domain Group Policies will be applied to your computer, nd you can sign in to the computer using your domain user account.
Join a Windows PC to a Domain via the Settings App
In Windows 11, you can join a computer to an AD domain through the modern Settings app. The steps below are for the latest Windows 11 25H2 build.
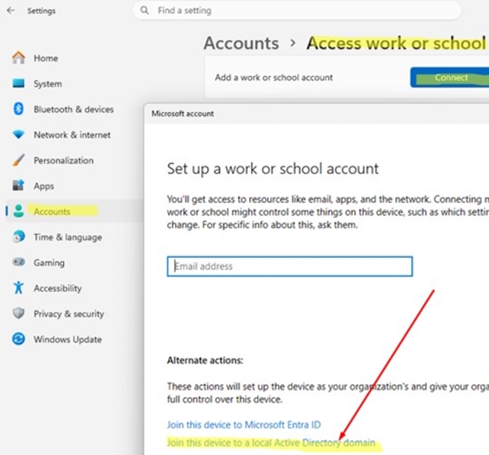
- Go to Settings -> Accounts -> Access work or school -> and click Connect (to quickly navigate to this section, run the following URI shortcut command:
ms-settings:workplace). - Click the link below: Alternate actions: Join this device to a local Active Directory domain.
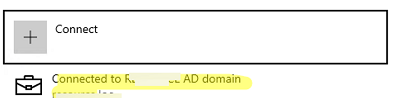
 If your computer has already been added to the domain, you will see a notification, “Connected to WOSHUB AD domain“.
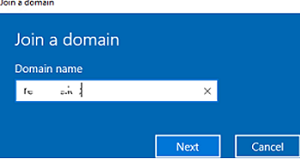
 - Enter the domain name;
- Then specify domain user credentials.
- Skip the next step of adding the user to the local Administrators group (it is preferable to add domain users to the local Admins via GPO).
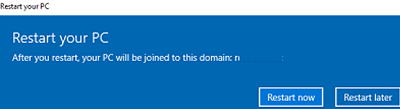
- It remains to restart Windows to complete joining the domain.
How to Join a Computer to a Domain Using PowerShell
You can use the built-in Add-Computer PowerShell cmdlet to join computers to an Active Directory domain. This command also allows you to join a domain with a new hostname and immediately move the computer’s account to a specific OU.
How can you check whether a computer is currently in a domain or a workgroup? Run:
(Get-CimInstance Win32_ComputerSystem).Domain

If the command returned the workgroup name, you can proceed with joining this machine to the domain. In the simplest case, adding a computer to a domain requires only specifying the target domain name.
Add-Computer -DomainName woshub.loc
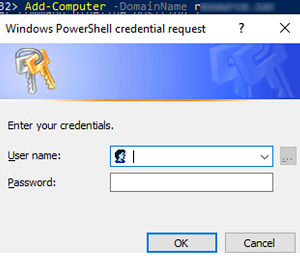
Enter the domain user credentials with the permissions to join machines to the domain.
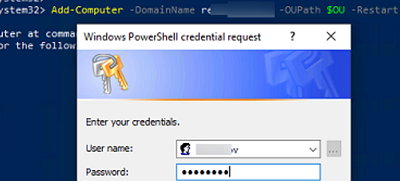
You can immediately place a computer into a specific Organizational Unit (OU) during a domain join, instead of the default root CN=Computers container. Just specify the target OU name in the distinguished name (DN) format in the -OUPath parameter:
$OU ="OU=Computers,OU=Munich,DC=woshub,DC=loc"
 Add-Computer -DomainName woshub.loc -OUPath $OU -Restart
Add the -Restart option to restart Windows immediately after joining the domain.
Once the system has been restarted, you can verify that your computer is now a member of the Windows domain by running the command:
Get-WmiObject Win32_NTDomain
This command should return the domain name, AD site name, IP address, and domain controller name used to log on (Logon server).
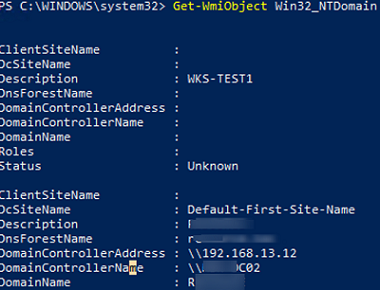
You can also get your domain name with the command:
systeminfo | findstr /B "Domain"

The Add-Computer cmdlet can be used to join remote computers to the domain. To do this, specify the remote computer name in the -ComputerName parameter:
Add-Computer -ComputerName wks-mn14 -DomainName woshub.loc -Credential woshub\Administrator -LocalCredential wks-mn14\Admin -Restart –Force
Note that the Add-Computer command is missing from the built-in Microsoft.PowerShell.Management module in the new versions of PowerShell Core 7.x.
Add-Computer: The term 'Add-Computer' is not recognized as a name of a cmdlet, function, script file, or executable program.
Check the spelling of the name, or if a path was included, verify that the path is correct and try again.
Suggestion [4,General]: The most similar commands are: Add-Computer, Stop-Computer, Get-ADComputer, New-ADComputer, Set-ADComputer, Add-Content, Rename-Computer, Add-Member.
Therefore, use powershell.exe instead of pwsh.exe to add a computer to the domain in this case. For example:
powershell.exe -Command "Add-Computer -DomainName 'woshub.loc' -Restart"
netdom.exe command to join a Windows computer to a domain. However, it requires the installation of the RSAT administration tools on the client’s computer and is now very rarely used. This legacy tool is mainly used for compatibility in some old scripts. Here’s an example of the netdom command to join a machine to the domain:netdom join %computername% /domain:woshub.loc /UserD:woshub\admin /PasswordD:*
The user’s password is prompted interactively and is not saved in the command history.
To remove a computer from an Active Directory (i.e. leave the domain) and return it to a workgroup, run the following PowerShell command
Remove-Computer
After you leave the domain, you will need to know the password of the local Administrator account to log onto this computer. Do you wish to continue?
[Y] Yes [N] No [S] Suspend [?] Help (default is "Y"): y

Pre-staging Computer Accounts in Active Directory
By default, when you join new computers to a domain, they are placed in the built-in Computers container at the domain root. To manually move a machine account to a different OU (Organizational Unit), you can either drag and drop it or use the Move menu item.
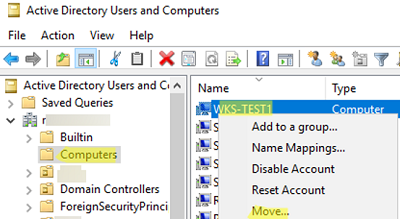
An administrator can pre-stage a computer account in Active Directory using either the Active Directory Users and Computers dsa.msc snap-in (New -> Computer) or with the New-ADComputer cmdlet from the ActiveDirectory PowerShell module:
New-ADComputer -Name "wks-mn14" -SamAccountName "wks-mn14" -Path "OU=Computers,OU=Munich,DC=woshub,DC=loc"
If you are creating a computer account manually, make sure that the name you specify matches the computer’s hostname.
We recommend that you first perform an AD search for other computers with the same name. If a computer with this hostname already exists in AD and you want to assign it to a different machine, a solution would be to reset it. Right-click on the computer object in AD and select Reset Account.
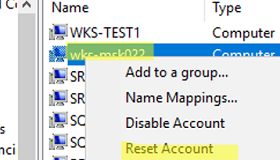
One more way to reset a computer account in AD is to use PowerShell
Get-ADComputer -Identity "computername" | % {dsmod computer $_.distinguishedName -reset}
This resets the domain computer password used to establish a trust relationship with AD.
When attempting to join a computer to a domain using an existing account, the following error will appear:
NERR_AccountReuseBlockedByPolicy:
An account with the same name exists in Active Directory. Re-using the account was blocked by security policy.
Read this post to learn more about the new restrictions and workarounds.
How to Perform an Offline Domain Join in Active Directory
Another way to add a Windows computer to an AD domain is through Offline Domain Join. It allows a computer to join a domain without directly connecting to domain controllers.
First, the administrator creates (provisions) a computer account on a domain controller for the machine that will join the domain and generates a special encrypted metadata file (blob).
djoin /provision /domain woshub.loc /machine WKS123 /savefile WKS123djoin.txt
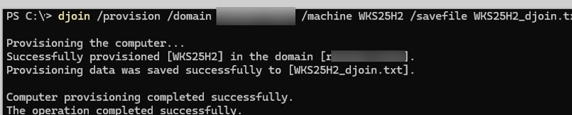
This file is transferred to the target disconnected computer using external media, the cloud, or the internet. After that, the target computer is joined to the domain (even without any network connection).
djoin /requestodj /loadfile WKS123djoin.txt /windowspath c:\windows /localos
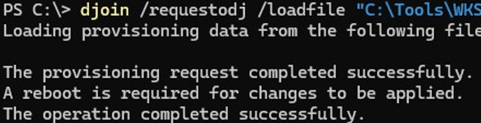
After rebooting, the computer considers itself part of the domain and can fully authenticate to the domain once it connects to the corporate network.
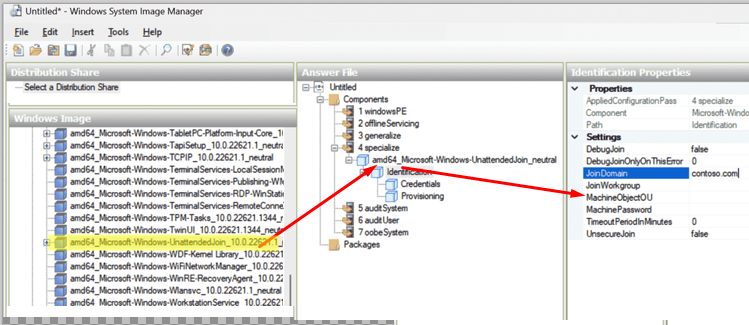
And finally, you can implement a scenario for automatic domain join during OS deployment. To do this, you can create an unattend.xml file with the Microsoft-Windows-UnattendedJoin option configured. This answer file can be generated using the Windows System Image Manager, which is part of the Windows ADK.