When you install or update device drivers in Windows, older versions of the drivers remain on the system drive. This allows the user to roll back to a previous driver version if the new driver is unstable. However, Windows doesn’t automatically remove old and useless versions of drivers, so over time, the amount of space occupied by drivers on the system drive becomes quite large. In this article, we will look at several ways to remove obsolete and old versions of drivers (duplicates) in Windows using built-in and third-party tools.
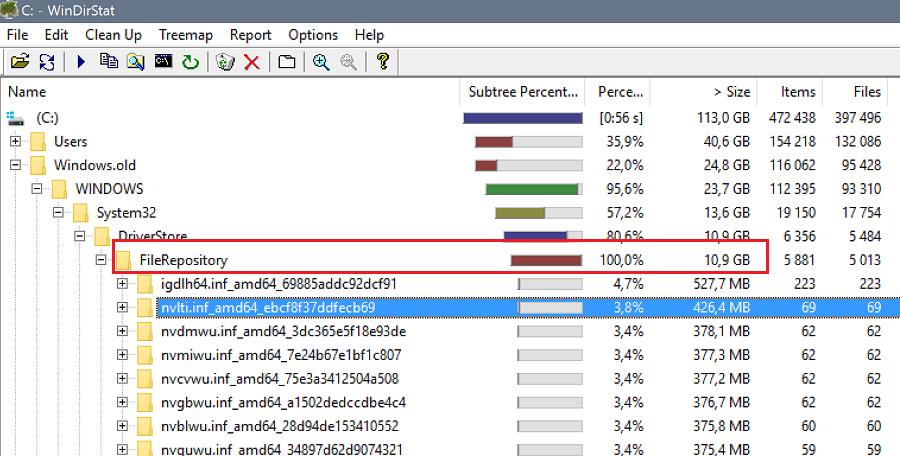
Windows stores all driver files in its driver repository (Driver Store) located in the %WINDIR%\System32\DriverStore\FileRepository.
You can get the driver store directory size with PowerShell ( "{0:N2} GB" -f ((gci –force $Env:windir\System32\DriverStore\FileRepository –Recurse -ErrorAction SilentlyContinue| measure Length -s).sum / 1Gb) ) or graphic tools. On my home Windows laptop, the FileRepository directory takes up about 11 GB of disk space and contains over 5,000 files. There are over 20 different versions of the NVIDIA video graphic driver stored in this directory.
- Never delete any files from DriverStore manually;
- It is highly recommended to create a system restore point before cleaning device drivers (
Checkpoint-Computer -Description "BeforeDriversDelete") or backup your Windows system image; - After cleaning the driver store, you will have to download and install drivers when you connect new devices.
How to Find and Remove Old Drivers in Windows with PowerShell
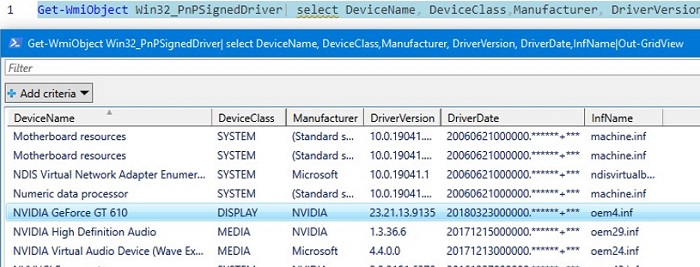
Let’s look at how to find out and remove old versions of drivers in Windows. You can display a complete list of installed drivers using PowerShell and WMI (CIM) class Win32_PnPSignedDriver:
Get-WmiObject Win32_PnPSignedDriver| select DeviceName, DeviceClass,Manufacturer, DriverVersion, DriverDate,InfName|Out-GridView
In my example, I got an Out-GridView table with a list of drivers in the Windows repository in the format: device name, device class, manufacturer, driver version, installation date, driver inf file name (oemXXX.inf).
You can get a list of third-party drivers installed on Windows using the Get-WindowsDriver cmdlet:
Get-WindowsDriver –Online| select Driver, ClassName, BootCritical, ProviderName, Date, Version, OriginalFileName|Out-GridView
You can remove any of the installed drivers using the pnputil CLI tool:
pnputil.exe /remove-device oemxxx.inf
pnputil /remove-device oemxxx.inf /forceLook in the table for drivers that have multiple versions and remove all older versions of the driver (except the latest one) using pnputil.exe.
BootCritical=True).You can also export the list of installed drivers to a text file and then import it into Excel:
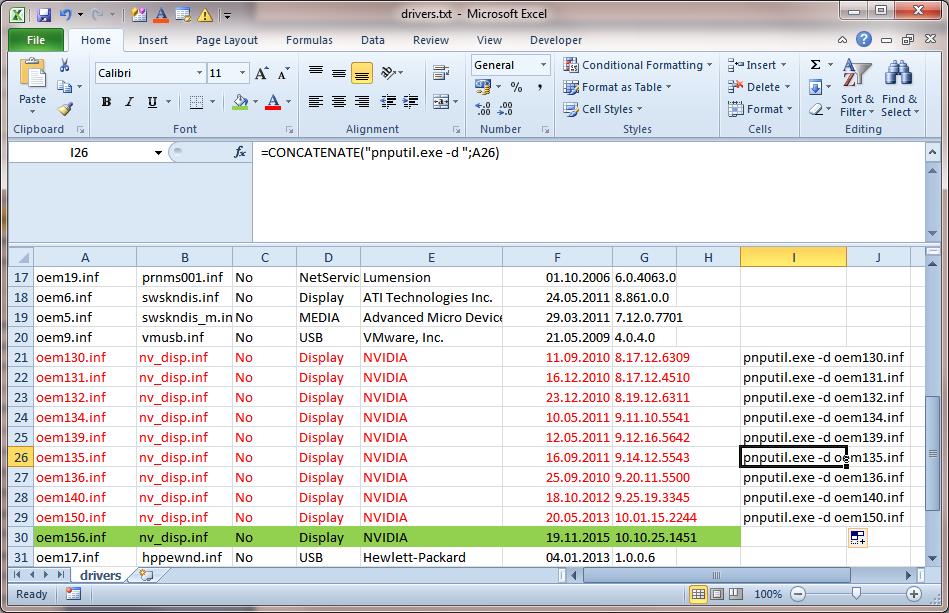
dism /online /get-drivers /format:table > c:\tmp\drivers.txt
Delete all unnecessary data in the table and leave only the following columns: the driver file in the system (oemXXX.inf), the name of the source INF file, device class, manufacturer, installation date, and driver version. Sort this table by column B (containing the name of the original INF file) and column F (driver installation date). Among the drivers with the same name, mark for removal all driver versions except the last one. In my case, you can see that most old drivers are referred to the NVIDIA video adapter.
To make it more convenient, let’s create an additional column with the command to uninstall each driver using the simple formula: =CONCATENATE("pnputil.exe -d ";A21)
Copy and run the pnputil commands in the command prompt or a BAT file.

pnputil.exe –d oem9.inf
 Microsoft PnP Utility
 Driver package deleted successfully
In my case, I deleted about 40 old versions of drivers in Windows and cleared about 8 GB of space (mostly due to removing NVIDIA video card drivers).
You can use the RemoveOldDuplicateDrivers.ps1 PowerShell script to automatically find device drivers that have multiple driver versions (duplicates) installed. (https://github.com/maxbakhub/winposh/blob/main/WindowsDesktopManagement/RemoveOldDuplicateDrivers.ps1 ).
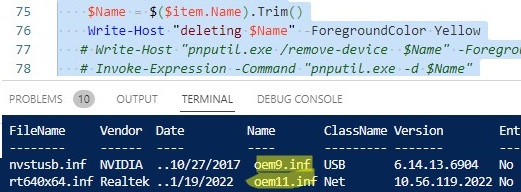
The script will display a list of old driver versions that can be removed because newer versions are installed. The lines with automatic removal actions of found drivers are commented out in the script by default.
Delete Old Drivers in Windows using the Disk Cleanup Tool
In current versions of Windows 10 and 11, you can use the built-in cleanmgr.exe (Disk Cleanup tool) to clean up the Driverstore Filerepository folder.
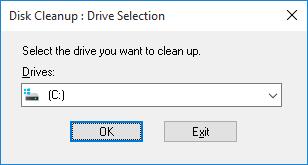
- Run the Disk Cleanup: Win+R -> cleanmgr;
- Select the system drive;

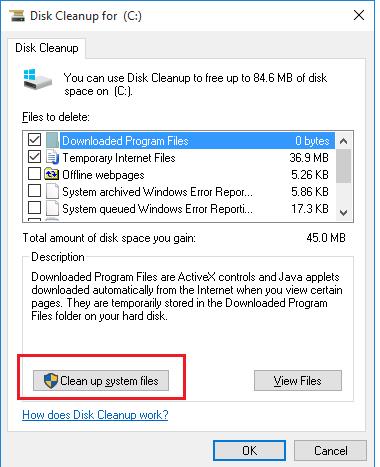
- Click Clean up system files;

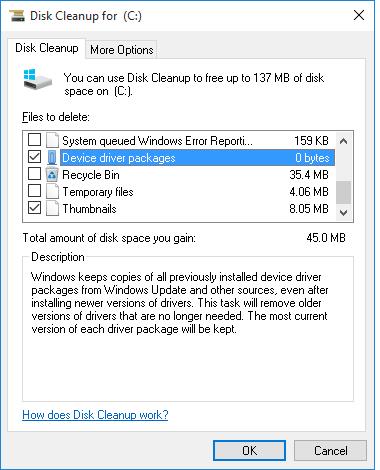
- Check Device driver packages in the list;

- Click OK;
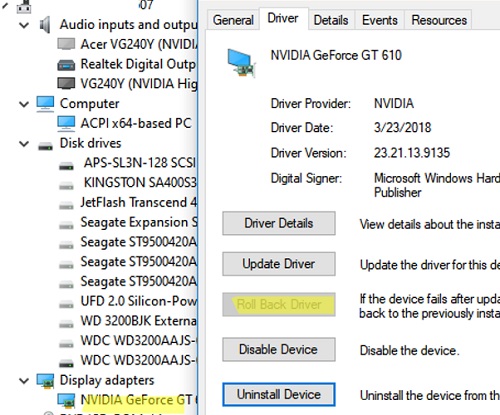
- This cleanup task will remove all previous versions of drivers installed through Windows Update or manually. Only the latest version for each of the drivers will remain in Windows DriverStore. However, you should be aware that the “Roll back driver” button in the Driver Properties tab of Device Manager will become inactive.
 The cleanmgr task only removes duplicate versions of drivers. Unused device drivers should be removed manually.
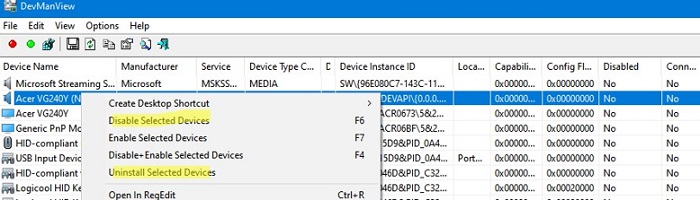
Removing Unused Drivers with DevManView
You can use a small free tool DevManView (by NirSoft) to view and manage the list of installed drivers in the Windows Driver Store.
DevManView is an excellent alternative to the standard Windows Device Manager MMC snap-in and allows you to present a list of drivers installed on your computer as a flat list (table).
- Download and run the DevManView tool;
- Enable the following items in the Options menu: Mark Connected Devices and Show Non-Plug and Play Drivers;
- Sort the table by the Connected column. This will allow you to see which devices are currently connected and which are not;
- We recommend you disable the selected device drivers first (Disable Selected Devices –> F6) and only after restarting the computer, remove the drivers using the Uninstall Selected Devices option.

16 comments
great article!!! thanks a million!
How did you import from the txt file to excel? Copy and paste just leaves all the info in the first column of cells
You shold use “Tab” as a delimeter when importing a txt file to Excel
Note that you cannot copy-paste between regular and administrator windows if UAC is active. You have to retype anyway or use the filesystem to transfer commands (like make a batch file and then run it from admin).
Nvidia and Intel are so aggravating with their massive drivers that never clean up after themselves. Lots of other places they up space around the system, too, like the shader cache.
Nice, but the file I want to remove “is not an installed OEM inf”.
The best way to remove a built-in windows component is with NTLite and reinstall. Once installed, there’s not much you can do.
Great article. I found so many bad recipes. This was trivial and clearly the correct way.
Great except the actual removal command should be:
pnputil /delete-driver oemXXX.inf
I installed an INF manually by right clicking the INF and clicking Install because the driver wouldn’t install the normal way and it turns out the device is completely incompatible with the driver as there was no change in Device Manager at all.
So in other words, I installed an orphaned driver.
Since the driver does not show in DevManView or when using CleanMgr.exe and checking Device driver packages (0 bytes) I assume this is an exception to your rule and it’s ok to directly delete the two files that have the driver name in them.
The filename of the driver is android_winusb.inf so it can’t be removed with the pnputil command either.
I may have a resolution. OEM113.inf is tied to that filename above in the registry. So pnputil may be useful after all. I guess Windows renames the driver to that format because that is not the file I installed. I guess it’s an internal name/external name thing.
I forgot to add…that I found it with 100% certainty in the registry because the filename in the driver store includes the long guid number or whatever you call it and that appears in the registry entry and that is tied to OEM113.inf
Just learned something today on how this works and how to properly uninstall an INF file.
Final update: the command “pnputil /delete-driver oem113.inf” worked like a charm!!!
I had my Everything window open showing the two locations of the files in the driver store repository and they disappeared!!!
PERFECT!!!!!!!
Please condiser improving this PowerShell script to find and remove old and unused device drivers but from any user selected local folder
While this script removed lots of unused drivers, it still leaves a lot of junk, even with the /force switch.
pnputil says the given oemxxx.inf is referred by multiple drivers (even though they are unique).
All of these drivers belong to Intel, most of them to the Intel IGP for which I still have 8 instances.
Unfortunately, DevManView does not help either: It shows only the latest version.
This script has some potentially serious issues. 1) It incorrectly assumes the date format will be in dd.mm.yyyy which causes the wrong items to be returned for deletion 2) It does not factor in where duplicate devices can share the same inf file 3) It uses the incorrect switch /delete-device instead of /delete-driver.