There are two ways to install the Docker containerization platform on Windows 10 and 11. It can be installed as a Docker Desktop for Windows app (uses the built-in Hyper-V + Windows Containers features), or as a full Docker Engine installed in a Linux distro running in the Windows Subsystem for Linux (WSL2). This guide will walk you through the installation and basic configuration of Docker Engine in a WSL environment without using Docker Desktop.
- Pro or Enterprise edition of Windows 10/11 is required for Docker Desktop. The Docker Engine in WSL can even run on Windows Home editions
- Docker Desktop for Windows requires additional RAM and disk space to run Hyper-V virtual machines and additional Windows containers
- Docker Desktop is free for small businesses (up to 250 employees), personal, and non-commercial projects. In other cases, you will need to purchase a paid subscription.
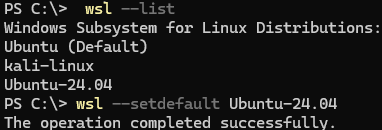
Suppose you already have a WSL2 (Windows Subsystem for Linux) environment installed on your Windows computer with one of the available Linux images (Ubuntu:22.04 in this example). List available WSL distributions:
wsl --list
To set the default WSL image, run the command:
wsl --setdefault Ubuntu-24.04
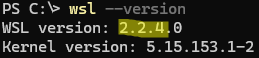
Make sure you are using WSL2:
wsl --version
If not, run:
wsl --set-default-version 2
Connect to your Linux image in the WSL environment:
wsl.exe
Update packages in your Linux distro (Ubuntu in this case):
$ sudo apt-get update && sudo apt-get upgrade -y
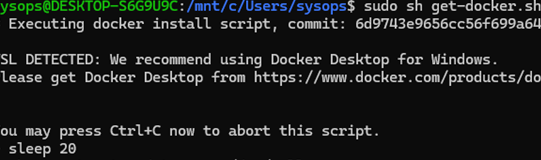
Then install the Docker Engine on Linux using the official script:
$ curl -fsSL https://get.docker.com -o get-docker.sh
 $ sudo sh get-docker.sh
Ignore the warning about installing Docker in a WSL environment.
Add your user to the docker group. This allows you to run the Docker commands without having to elevate privileges with sudo or entering a password.
$ sudo usermod -aG docker $USER
Verify that Docker Engine and Compose have been successfully installed:
$ docker --version
 $ docker compose version

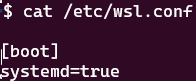
Now configure the Docker daemon to start automatically in WSL. WSL currently fully supports systemd (the init system and service manager used by many popular Linux distros). Check that it is enabled in your WSL Linux image:
$ cat /etc/wsl.conf
[boot]
systemd=true
Then check that systemd is used as the Linux init system:
$ stat /sbin/init
In this case, systemd is used for init (because the /sbin/init is a symbolic link to /lib/systemd/systemd).

Run the Docker Engine service and enable autostart:
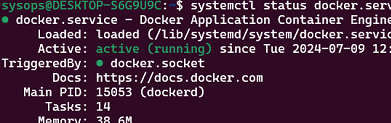
$ sudo systemctl enable --now docker.service
 $ systemctl status docker.service
$ nano /etc/wsl.conf
[boot]
command = "/usr/sbin/service docker start"
The following host computer resources are available to WSL2 by default:
- 50% of RAM
- 25% of swap file
- 100% of the CPU resources
If you want to restrict the use of host resources by the WSL2 subsystem, create a text file %UserProfile%\.wslconfig in the current user’s profile. This file can be used to set global restrictions for all WSL distros. For example, add the following:
[wsl2]
memory=8GB
processors=4
swap=2GB
Restart the WSL image from the Windows command prompt:
wsl --shutdown
Run a test Docker container in WSL:
$ docker run hello-world
Docker Engine will download and run the hello-world demo container from the Docker Hub.
To get the best performance from WSL2, store all your Docker container files inside WSL, rather than in directories that are redirected from the Windows host (such as /mnt/c).
$ sudo update-alternatives --config iptables
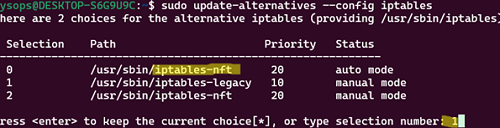
Press 1 to select iptables-legacy mode.
You can now run Docker commands in WSL from the Windows command prompt.
Before any Docker command, you must specify wsl. For example, list available Docker images:
wsl docker images

Now you can develop and run Docker containers on your Windows machine.
4 comments
This was very helpful, thank you for providing it!
Thank you, this was very straightforward and worked without issue. Although this method was buried in the official docs, this was easier to understand.
I followed below steps but getting error when I am trying to run docker command
Unable to find image ‘ImageName:latest’ locally
docker-credential-secretservice: error while loading shared libraries: libsecret-1.so.0: cannot open shared object file: No such file or directory
error getting credentials – err: exit status 127, out: “
Try to install the libsecret package on your WSL distro.
On Ubuntu:
sudo apt install libsecret-1-0