After Windows 11 is installed on your computer, the Out of Box Experience (OOBE) begins, which requires an active Internet connection to proceed. Windows 11 requires network access during initial setup to connect to your Microsoft Account (MSA) and receive the latest security updates. If your computer lacks any network adapters (Wi-Fi or Ethernet), or if the drivers for your network adapter model are missing from the driver store, or if your computer is on an isolated network without Internet access, you won’t be able to complete the Windows 11 installation.
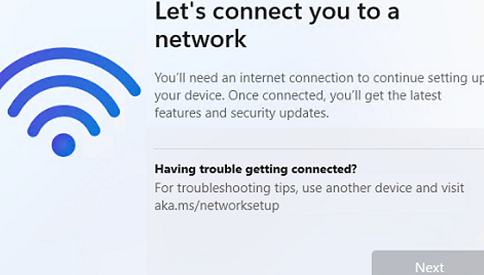
The screenshot below shows the Windows 11 OOBE screen. It is clear that the OS setup cannot continue without a network connection. This issue arises because either the device lacks a network adapter or the current network is not connected to the Internet. You cannot complete the installation of the OS because the button to continue setting up Windows 11 becomes inactive (greyed out).
Let’s connect you to a network.
You’ll need an internet connection to continue setting up your device. Once connected, you’ll get the latest features and security updates.
In the latest Windows 11 builds, including version 25H2, Microsoft enforces a mandatory internet connection during initial setup to encourage the use of Microsoft cloud accounts over local accounts. This article explains several methods to help you complete the installation of Windows 11 when no network connection is available.
Install Windows 11 with a Local User Account
To bypass the internet connection and MSA account sign-in checks, continue installing Windows 11 with a local account:
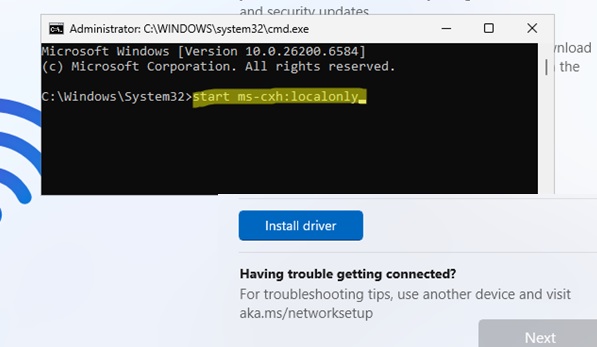
- On the OOBE screen, press
Shift+F10(orFn+Shift+F10on laptops) - A command prompt will open. Run the command in it:
start ms-cxh:localonly
- A dialog for creating a local account will appear. Enter the username, password, and hints. You will then be logged in with a local account, and no internet connection will be required.


You can also disable the requirement to check the network connection during OOBE using the BypassNRO mode (Bypass Network Requirement Oobe).
- To open the command prompt, press
Shift+F10on the installation screen; - Run the command:
oobe\bypassnroThis command may not work in recent versions of Windows 11. Instead, use the following commands to achieve the same result:
reg add HKLM\SOFTWARE\Microsoft\Windows\CurrentVersion\OOBE /v BypassNRO /t REG_DWORD /d 1 /f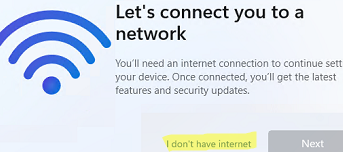
shutdown /r /t 0 - After restarting the computer, the ‘I don’t have Internet‘ button will appear on the OOBE screen. Click it to proceed to the limited setup mode, where you will be prompted to create a local user

- After logging into Windows, you can install any missing network adapter drivers from a USB stick
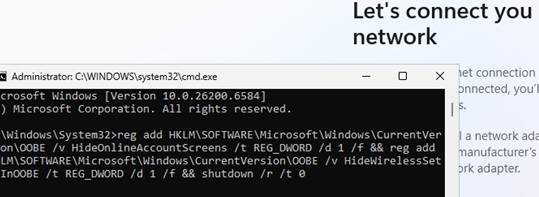
Another way to bypass the MSA account creation screen and network availability check in OOBE is to add the HideOnlineAccountScreens and HideWirelessSetupInOOBE’ registry items.
- Press
Shift + F10on the OOBE screen and run the commands:reg add HKLM\SOFTWARE\Microsoft\Windows\CurrentVersion\OOBE /v HideOnlineAccountScreens /t REG_DWORD /d 1 /f
reg add HKLM\SOFTWARE\Microsoft\Windows\CurrentVersion\OOBE /v HideWirelessSetupInOOBE /t REG_DWORD /d 1 /f - Then restart the computer
shutdown /r /t 0
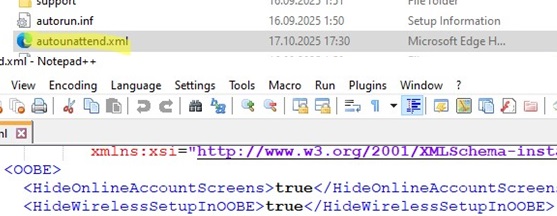
These options can be added to the AutoUnattend.xml answer file to apply them automatically during Windows installation:
<?xml version="1.0" encoding="utf-8"?>
<unattend xmlns="urn:schemas-microsoft-com:unattend" xmlns:wcm="http://schemas.microsoft.com/WMIConfig/2002/State">
<settings pass="oobeSystem">
<component name="Microsoft-Windows-Shell-Setup" processorArchitecture="amd64" publicKeyToken="31bf3856ad364e35" language="neutral" versionScope="nonSxS">
<OOBE>
<ProtectYourPC>3</ProtectYourPC>
<HideEULAPage>true</HideEULAPage>
<HideOnlineAccountScreens>true</HideOnlineAccountScreens>
<HideWirelessSetupInOOBE>true</HideWirelessSetupInOOBE>
</OOBE>
</component>
</settings>
</unattend>
Simply copy the AutoUnattend.xml file to the root directory of the Windows 11 installation USB flash drive.
Loading Network Drivers During Windows 11 OOBE
If your computer/ laptop has Wi-Fi or LAN network adapters whose drivers are missing from the Windows image, you’ll be unable to complete the Windows 11 installation and sign in to your Microsoft Account. In this case, you can add the required network drivers directly during the Windows out-of-box experience (OOBE) phase.
The first step is to identify the model of the network adapter on a computer. This information can be found in the manufacturer’s specifications, or you can identify the device manually.
On the Setup screen, press Shift+F10 and run the devmgmt.msccommand. Open the properties of the unknown device, go to the Details tab, select the Hardware IDs property, and copy the ID.
Using the VEN and DEV identifiers, you can identify the network adapter model and download the appropriate driver from the vendor’s website.

Download the driver and extract it to a USB flash drive. Connect the USB flash drive to your Windows 11 computer.
To open Command Prompt on the Windows 11 setup screen, press Shift+F10
Check the drive letter that has been assigned to your USB flash drive:
wmic logicaldisk get volumename,name
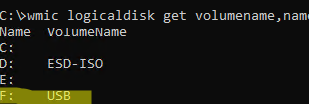
In this example, the USB drive has been assigned the letter F:.
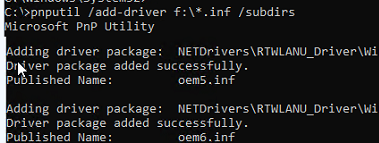
To recursively install all device drivers from a flash drive (based on INF files) into Windows, run the following command:
pnputil /add-driver F:\*.inf /subdirs
Rescan your computer’s hardware:
pnputil /scan-devices
Close the command prompt and restart your computer. Windows 11 should automatically detect your network adapter and install the appropriate driver from the Driver Store. You can then proceed with installing Windows 11 using your Microsoft account.
Adding Network Drivers into a Windows 11 Installation Image
To avoid installing device drivers manually, you can add the network drivers to the Windows ISO/WIM installation image.
1 comment
Does not work anymore, all seems well until restart. The bypass option is not there and ut just keeps searching still