Ventoy is a lightweight PXE multiboot server app that stores bootable ISO images of various operating systems (Windows, Linux, VMware, LiveCD based on WinPE or Linux, etc.), allowing computers to boot and install operating systems over a LAN. To run a network boot PXE server, copy the ISO files with the operating system distros into the local folder and run the iVentoy app. Any computer supporting PXE can then boot from it and continue with any available operating system ISO images.
iVentoy is a portable tool and doesn’t require installation. Download the version of iVentoy that is compatible with your operating system from GitHub https://github.com/ventoy/PXE/releases (there are versions for Linux and Windows). iVentoy comes with a built-in DHCP and TFTP server, so there’s no need to set up your network infrastructure.
In our example, we will use iVentoy for Windows. Download and extract the iventoy-1.0.20-win64-free.zip archive.
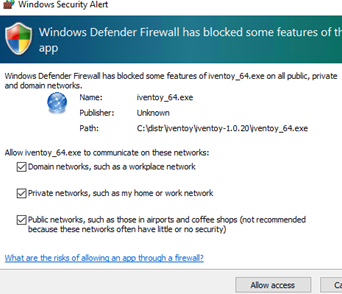
Run the iventoy_64.exe executable. The first time the application starts, allow it to access the network through the Windows Defender firewall. The following network ports are used by default:
| Port number | Protocol | Description |
|---|---|---|
| 67/68 | UDP | DHCP server |
| 69 | UDP | TFTP server |
| 26000 | TCP | iVentoy web interface |
| 16000 | TCP | PXE server HTTP port |
| 10809 | TCP | NBD Server port |
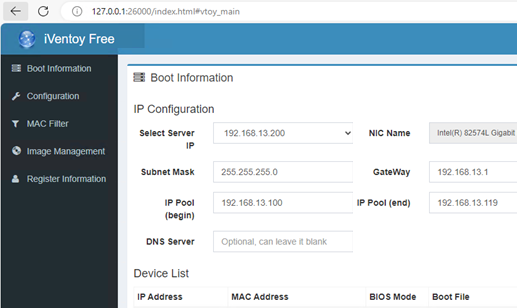
iVentoy is managed through a simple web interface that opens automatically in your browser.
The following configuration tabs are available:
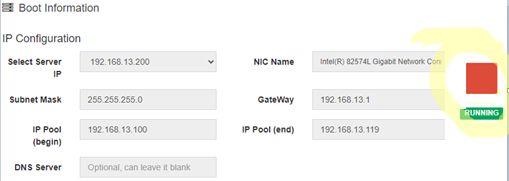
- Boot Information – contains the main settings of the iVentoy server: IP address, NIC used, range of IP addresses for DHCP, list of active client devices
- Configuration – used to change DHCP settings, bootloader settings and customize the PXE iVentoy menu
- MAC Filter – Used to allow or prevent booting from PXE servers for specific MAC addresses (there are no restrictions by default)
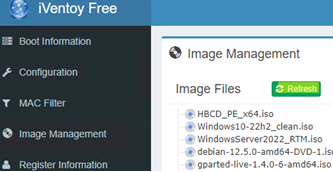
- Image Management – contains a list of available ISO images
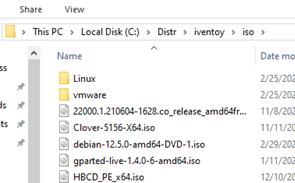
Copy the boot ISO image into the /iso/ directory to make it available in the iVentoy PXE boot menu. To avoid having to physically copy the image files to this directory, you can create a symbolic link to the shared network folder that contains the ISO images:
mklink /D C:\iventoy\iso \\192.168.152.12\distros\iso
Go to the Image Management tab and click Refresh. A list of the operating system images in the ISO folder should appear.
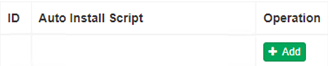
For each ISO image, in the Auto Install Script section, you can add answer files to automate the OS installation (for example, unattend.xml file for Windows). Here you can also add driver arch archives with drivers (Injection File) that need to be mounted on boot (will be mounted to drive letter X: in WinPE).
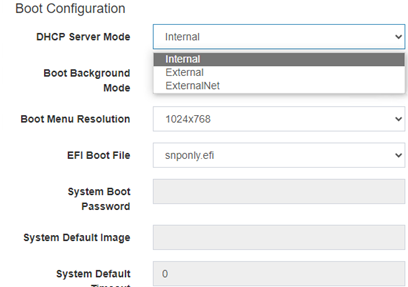
By default, iVentoy uses its own built-in DHCP server. If you have a DHCP server on your network, go to the Boot Configuration section and select External (if DHCP is in the same VLAN) or ExternalNet (if the DHCP serve is outside the current VLAN and packets are forwarded to it via dhcp-relay).
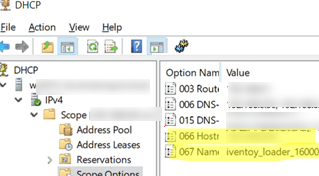
To support iVentoy, enable the following scope options on the DHCP server:
- Option 066 –
iVentoy server IP address - Option 067 —
iventoy_loader_16000(where 16000 is the iVentoy PXE port number.)
Then go to the Boot Configuration tab and start the iVentoy PXE server.
Enable network booting in client device BIOS/UEFI settings and increase boot priority for PXE (usually called Network Boot or PXE). Boot the client computer over the network using a PXE bootloader.
A pseudo-GUI iVentoy menu will appear listing all the ISO images you copied to a folder on the PXE server. Select the image you want to boot from. You can continue to install the operating system on your computer’s local drive or you can use a Live CD to diagnose and fix problems with your computer. 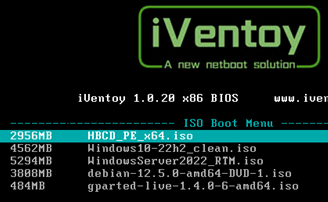
The list of computers that have been booted from the PXE server is available in the ‘Device List’ section.

The free version of iVentoy allows up to 20 clients to boot and install operating systems over the LAN at the same time (the free version is not for commercial use).
Because the built-in Windows Deployment Services (WDS) doesn’t support installing Windows 11 from the original boot.wim, iVentoy can be an easy and convenient alternative for deploying Windows to computers over a network.
8 comments
Can you make a yutube Windows 11 per PXE Boot iventoy_64.exe
Your first paragraph:
To run a network boot PXE server, copy the ISO files with the operating system distros into the local folder
Local folder where? On a USB? On the working OS you do not want to replace? Where?
and run the iVentoy app.
How? Is this a thing I boot from?
Any computer supporting PXE can then boot from it
What are we booting from?
and continue with any available operating system ISO images.
1. OS image ISO files stored on the host (server) running the iVentoy app. This computer acts as a PXE boot server on your network.
2. Run the iVentoy app on any computer that will be used as a PXE server on the same LAN.
3. Select Network Boot/PXE boot mode (instead of booting from local drive/USB media) on the client computer you want to boot from the iVentoy server.
I double-click the iVentoy exe, click Yes at the UAC prompt, there is an hourglass cursor for a few seconds, then… nothing. No window pops up, nothing new is running in the background, no new services have been started. Nothing. 🙁
What is the OS version? on Windows x64 use iVentoy_64.exe
In my case, after running this executable, it appears in the process list in Task Manager and a web interface opens.
Windows 11
Checking the event viewer there is an error with this info:
Faulting application name: iVentoy_64.exe, version: 0.0.0.0, time stamp: 0x65213b52
Faulting module name: iVentoy_64.exe, version: 0.0.0.0, time stamp: 0x65213b52
Exception code: 0xc0000005
Fault offset: 0x0000000000020996
Faulting process id: 0x0x7F1C
I had the same problem. Make sure that the x64 version of “Visual Studio 2015, 2017, 2019, and 2022” from https://learn.microsoft.com/en-us/cpp/windows/latest-supported-vc-redist?view=msvc-170#visual-studio-2015-2017-2019-and-2022 is installed.
Downloaded and installed, rebooted. No change. Still get nothing. 🙁