If you want to create a multi-boot USB flash drive with multiple operating system images, Ventoy is one of the best tools available. Ventoy allows you to create a bootable USB stick onto which you can copy ISO images with the OS distros you need. When booting from this USB stick, you can choose which operating system to install on your computer, or which LiveCD image to boot from.
How to Create a Multi-ISO Bootable Flash Drive Using Ventoy
Ventoy is a free open-source tool available on Windows and Linux (https://github.com/ventoy/Ventoy/releases ).
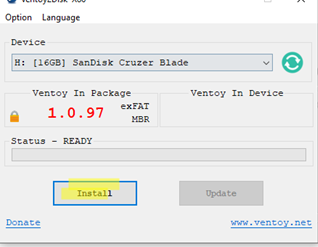
- Download the archive, extract it to a local drive, and run Ventoy2Disk.exe as an administrator;
- Select the USB flash drive you want to burn the Ventoy bootloader to and click Install;

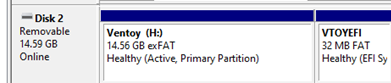
- The USB drive will be cleared. By default, Ventoy creates an MBR partition table with two partitions: a small FAT32 partition for the EFI boot loader (based on grub2) and a large exFAT partition. This configuration allows the USB flash drive to boot on both BIOS and UEFI computers with Secure Boot. Almost any operating system can access the exFAT partition, and there is no maximum file size limit of 4 GB as with FAT32. You can change these settings in the Options menu.
- Now copy to the main partition of the Ventoy drive the ISO image files containing the operating system distros you need;
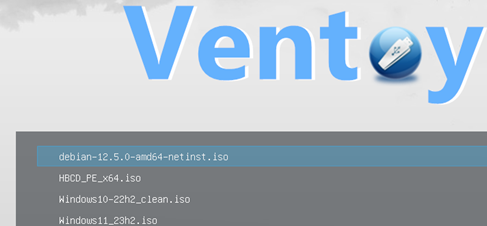
- When booting from this USB drive, the Ventoy GUI menu will appear with a list of available ISO images. By default, Ventoy will scan all directories and display a list of the ISO, WIM, VHDX, and IMG image files it has found. Create a
.ventoyignorefile in a folder to exclude it from scanning. - You can proceed with the installation of any of the available operating systems in the ISO files, or boot from your LiveCD.

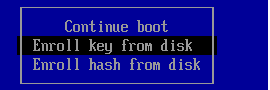
An error may occur when booting from a Ventoy flash drive on a computer with UEFI Secure Boot mode enabled:
Verification failed: 0x1A Security Violation
To fix this, you must add Ventoy keys to the computer’s MOK (Machine Owner Key).
- Click OK -> and press any key;
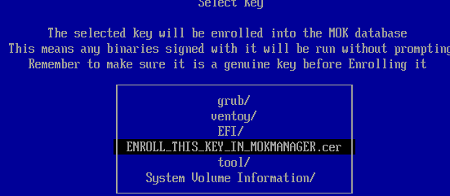
- Select Enroll key from disk;
- Then go to VTOYEFI -> select ENROLL_THIS_KEY_IN_MOKMANAGER.cer file
- Continue -> Yes -> Yes
- Restart your computer. With the Ventoy keys added to UEFI NVRAM, the computer will consider them trustworthy and continue booting from the USB key.
Ventoy can load ISO contents into RAM in several ways:
- Normal mode — only the files needed to boot are loaded into RAM. This mode can cause boot problems with some ISO images and computers (especially those with legacy BIOSes).
- Memdisk mode – The entire ISO image will be loaded into memory (you will need enough RAM on your computer). This boot mode is more stable and reliable.
For example, for the WinPE-based images (including Hiren’s BootCD PE) to work correctly, I had to boot them in Memdisk mode on my computer. To do this, press F1 -> Ctrl + D. This allows the full WinPE ISO image to be loaded into memory:
Loading ISO file to memory

Using Ventoy Extension Plugins
You can customize your Ventoy multi-boot USB flash drive with plug-ins. The ventoy/ventoy.json file on the data partition is used to customize boot manager settings (this file is missing by default).
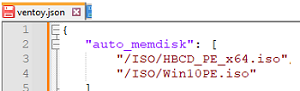
Previously, I showed how to manually boot a WinPE image in the memdisk mode. Add the following lines to ventoy.json to automatically boot certain ISO images in this mode:
{
    "auto_memdisk": [
        "/ISO/HBCD_PE_x64.iso",
        "/ISO/Win11PE.iso"
    ]
}
Now all specified ISO images will always be loaded in RAM.
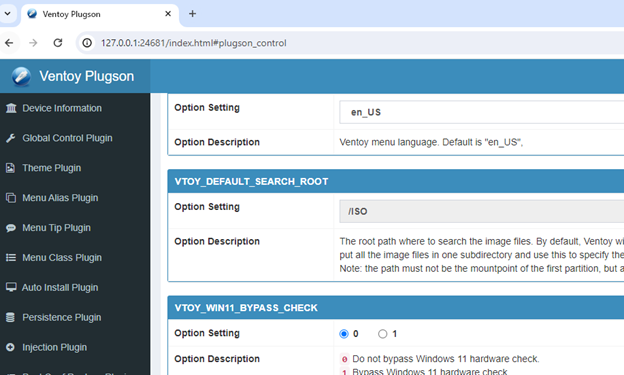
In the control section, you can set global options. For example:
    "control":[
        { "VTOY_DEFAULT_SEARCH_ROOT": "/ISO" }
        { "VTOY_WIN11_BYPASS_CHECK": "1" },
        { "VTOY_WIN11_BYPASS_NRO": "1" },
    ]
VTOY_DEFAULT_SEARCH_ROOT— set the image search directoryVTOY_WIN11_BYPASS_CHECK— bypass minimum system requirements when installing Windows 11 (How to install Windows 11 on unsupported hardware)VTOY_WIN11_BYPASS_NRO– setup Windows 11 with a local account
The Injection plugin allows you to include additional files or archives in the installation environment (drivers, tools).
{
  "injection": [
      {
          "image": "/ISO/win7.iso",
          "archive": "/driver/win-driver.zip"
      }
  ]
 }
In the case of Windows PE, the specified extracted archive will be available in the installation environment under drive letter X:
The Auto_Install plugin allows you to configure the automatic installation of the operating system. For Windows, the unattended.xml answer file is supported.
  "auto_install" : [
        {
            "image": "/ISO/windows_server_2022.iso",
            "template": "/windows2022_unattended.xml"
        }
  ]
For Linux, you can also create answer files: kickstart8.cfg (RHEL, Rocky, Centos) or preseed.cfg (Debian, Ubuntu).
Using plugins, you can customize the appearance of the Ventoy boot menu, use themes, add icons to ISO files and folders. etc.
Use the VentoyPlugson.exe tool to configure the Ventoy plugin parameters from the GUI. The tool generates the correct ventoy.json file and automatically saves it to the Ventoy data partition.
With Ventoy, you can do away with the need for multiple flash drives with different OS install images. All your distros can now be stored on a USB stick. To write a new image to the USB key, simply copy the ISO image file.