This article describes how to manually install updates on a VMware ESXi host from the command line using the esxcli tool. You can only install security patches, perform in-release upgrades, or upgrade between ESXi versions (for example, you can upgrade from VMware ESXi 6.7 to 7.0 or 8.0).
A manual ESXi upgrade from the esxcli console is typically used to update a standalone ESXi host (or free VMware vSphere Hypervisor), a small installation, or a test environment. VMware Update Manager/VMware Lifecycle Manager is the preferred way to update large VMware vSphere vCenter (VCSA-based) infrastructure.
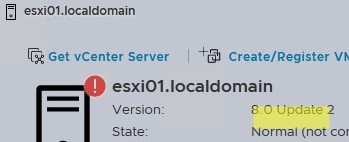
Use the Host Client web interface to check the current ESXi version:
Or get the ESXi version from the console (allow SSH access to the ESXi host):
vmware -v
VMware ESXi 8.0.2 build-22380479
![]()
In this case, ESXi 8.0 Update2 version is installed on the host.
To find out the installation (update) date of the ESXi image, use the command
esxcli software vib list | grep 'Install\|esx-base'
![]()
There are two ways to upgrade your VMware ESXi host:
- Online upgrade – suitable if the ESXi host can access the VMware repository via the Internet.
- Offline upgrade — you must manually download the .zip file that contains the ESXi offline bundle to a local datastore.
Online VMware ESXi Update via CLI
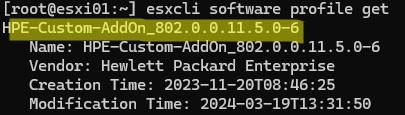
Let’s start with the ESXi online update. Connect to the ESXi console and check the version of the profile you are using.
esxcli software profile get
We are using a custom HPE ESXi 8.0 image (HPE-Custom-AddOn_802.0.0.11.5.0-6).
Enable the rule in the firewall to allow the ESXi host to access the Internet:
esxcli network firewall ruleset set -e true -r httpClient
List available images in the VMware online depot:
esxcli software sources profile list --depot=https://hostupdate.vmware.com/software/VUM/PRODUCTION/main/vmw-depot-index.xml

The images with s in the name contain security patches only (ESXi-8.02sb-xxxxx). We will upgrade to ESXi 8.0U2b-23305546-standard, which includes all patches and new VMware Tools.
Put the host into maintenance mode:
esxcli system maintenanceMode set --enable=true
Upgrade the ESXi image to the specified build online:
esxcli software profile update -p ESXi-8.0U2b-23305546-standard -d https://hostupdate.vmware.com/software/VUM/PRODUCTION/main/vmw-depot-index.xml
In my case, a warning message appeared:
Hardware precheck of profile ESXi-8.0U2b-23305546-standard failed with warnings: <CPU_SUPPORT OVERRIDEWARNING: The CPUs on this host are not supported by ESXi 8.0.2. You can override and force install, but it is not officially supported or recommended. Please refer to KB 82794 for more details.

In this case, the host CPU is not officially supported in the new ESXi build. To ignore this warning, add the -no-hardware-warning option to the previous command.
When the ESXi image update is complete, the following message appears
The update completed successfully, but the system needs to be rebooted for the changes to be effective.
And also a list of installed VIB packages.
Disable the Internet access:
esxcli network firewall ruleset set -e false -r httpClient
Reboot the ESXi server:
reboot
Disable the maintenance mode:
esxcli system maintenanceMode set --enable=false
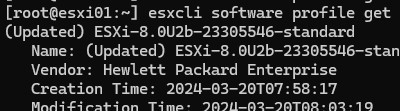
Check that the ESXi build has been updated:
esxcli software profile get
If the online ESXi upgrade fails or you receive the Got no data from process: LANG=en_US.UTF-8 error appears when upgrading from the command line, you must perform an offline upgrade.

How to Upgrade VMware ESXi Using an Offline Bundle
To install rollup updates offline on ESXi:
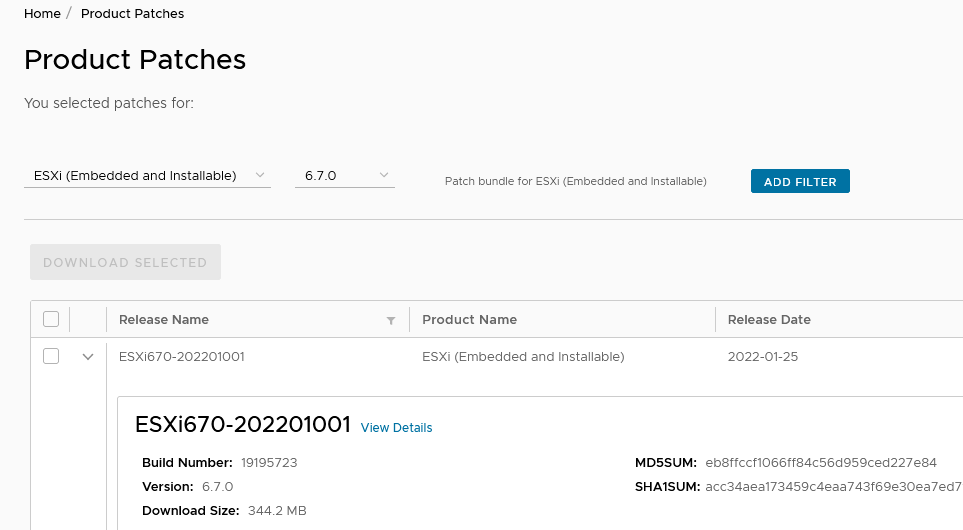
- Log in to your account on the VMware website and navigate to https://my.vmware.com/group/vmware/patch
- Select a product: ESXi (Embedded and Installable) and your ESXi build;
- Choose your ESXi version and download the latest offline bundle (by release date). If you are using a custom ESXi image from a vendor (for example, HPE Custom Image for ESXi 8.0U2), go to the Custom ISOs tab (https://customerconnect.vmware.com/downloads/info/slug/datacenter_cloud_infrastructure/vmware_vsphere/8_0#custom_iso);

- Download the offline bundle ZIP file with the ESXi patch;
- Use the Datastore Browser to copy the archive to any host datastore (it can be a local disk, an NFS folder, a VMFS LUN connected over iSCSI or Fibre Channel, or an external USB drive connected to your ESXi host). If there is not enough free space, expand the VMFS datastore;

- Connect to your ESXi host via SSH and put the host into maintenance mode:
vim-cmd /hostsvc/maintenance_mode_enter - List the profiles available in the image file:
esxcli software sources profile list --depot /vmfs/volumes/87654321-12345678-7a20-000c12345678/update/ESXi670-202111001-depot.zip - To install updates offline from the local folder, run:
esxcli software vib update --depot /vmfs/volumes/87654321-12345678-7a20-000c12345678/update/ESXi670-202111001.zip
To select a specific profile, add an option--profile=your_profile_nameMessage: The update completed successfully, but the system needs to be rebooted for the changes to be effective. Reboot Required: true
- If dependency errors occur during the upgrade, you can ignore them by using -f. But this can lead to unexpected problems later. It is better to resolve the dependencies and add the required driver to the ESXi installation image.
[DependencyError]VIB VMW_bootbank_vmkusb_0.1-4vmw.670.3.159.18828794 requires vmkapi_incompat_2_5_0_0, but the requirement cannot be satisfied within the ImageProfile.
- Reboot your ESXi host:
reboot -f - Disable the maintenance mode:
vim-cmd /hostsvc/maintenance_mode_exit - Make sure that the OS version has been updated:
vmware –v


Install-VMHostPatch -HostPath /vmfs/volumes/volume/esxi_patch.zip
From the command line, you can not only install patches for the current ESXi release but also upgrade to the next version. For example, you can upgrade from ESXi 6.7 to 8.0. Download the appropriate ESXi offline bundle and perform the updates as described in this guide.
- Make sure your server hardware is supported by the newer OS version before upgrading your ESXi version (see VMware Compatibility Guide and VMware Product Interoperability Matrix)
- If the ESXi host is connected to a vCenter, first upgrade vCSA to a newer version that supports the new ESXi
7 comments
A great write up. Downn to the point without any fuss.
Thank you very much!
how old is your HP Server? mine is G8 and I am bit hesitant to use V7
Great article. Very clear and to the point (and it worked for us!!)
Thanks for posting this.
As of ESXi 8.0 Update 2, you need to use this alternate method to update your image.
See:
Steps to Update ESXi 8.0 Update 2 (or later)
https://knowledge.broadcom.com/external/article/380215/esxi-version-change-is-not-allowed-using.html
Example:
[root@esxi2025:~] vim-cmd /hostsvc/maintenance_mode_enter
[root@esxi2025:~] esxcli software sources profile list –depot /vmfs/volumes/datastore1/VMware-ESXi-8.0U3c-24414501-depot.zip
Name Vendor Acceptance Level Creation Time Modification Time
—————————– ———— —————- ——————- —————–
ESXi-8.0U3c-24414501-no-tools VMware, Inc. PartnerSupported 2024-12-12T00:00:00 2024-12-12T00:00:00
ESXi-8.0U3c-24414501-standard VMware, Inc. PartnerSupported 2024-12-12T00:00:00 2024-12-12T00:00:00
[root@esxi2025:~] esxcli software profile update -d /vmfs/volumes/datastore1/VMware-ESXi-8.0U3c-24414501-depot.zip -p ESXi-8.0U3c-24414501-standard
[HardwareError]
Hardware precheck of profile ESXi-8.0U3c-24414501-standard failed with warnings:
Apply –no-hardware-warning option to ignore the warnings and proceed with the transaction.
Please refer to the log file for more details.
[root@esxi2025:~] esxcli software profile update -d /vmfs/volumes/datastore1/VMware-ESXi-8.0U3c-24414501-depot.zip -p ESXi-8.0U3c-24414501-standard –no-hardware-warning
Update Result
Message: The update completed successfully, but the system needs to be rebooted for the changes to be effective.
VIBs Installed:
You used the commands “esxcli software vib update …”. Which is ok for updating patches within a major release. To update to the next major release for example from 6.7 to 7.0 or 7.0 to 8.0 you need to use the command “esxcli software profile update …”.
If you use the vib update to upgrade from 6.7 to 7.0 you will have issues on reboot as the profile was not updated.
Thanks for the clarification. The post will be updated soon.