The Windows.edb file (Windows.db in Windows 11) is the location of the index database for the Windows Search service. The search index allows users to quickly search for files, emails in PST files, and other content on the hard drive. Background indexing is performed by the SearchIndexer.exe process. If you have a large number of files, the size of the Windows.edb index file can grow up to tens or even hundreds of GB, taking up the free space on the system drive.
The hidden Windows.edb file is stored by default in the C:\ProgramData\Microsoft\Search\Data\Applications\Windows\ folder.
If you want to quickly check the current size of the Windows.edb file, use the PowerShell command:
((Get-Item $env:programdata'\Microsoft\Search\Data\Applications\Windows\Windows.edb').length/1GB)
![]()
In my example, when searching for large files on the system drive, I found that the Windows.edb file had grown to over 15GB (almost 15% on my 100GB SSD drive).

Let’s look at some ways to reduce the size of the huge Windows search index file (Windows.edb).
How to Reset and Rebuild Windows Search Index
The Windows Search Service allows you to reduce the size of the Windows.edb file by completely rebuilding the search index.
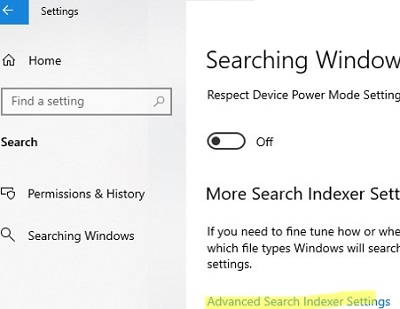
- Go to Settings -> Search -> Searching Windows -> Advanced Search Indexer Settings (in the case of the Classic Control Panel, go to Indexing Options, or run the command
control srchadmin.dll);
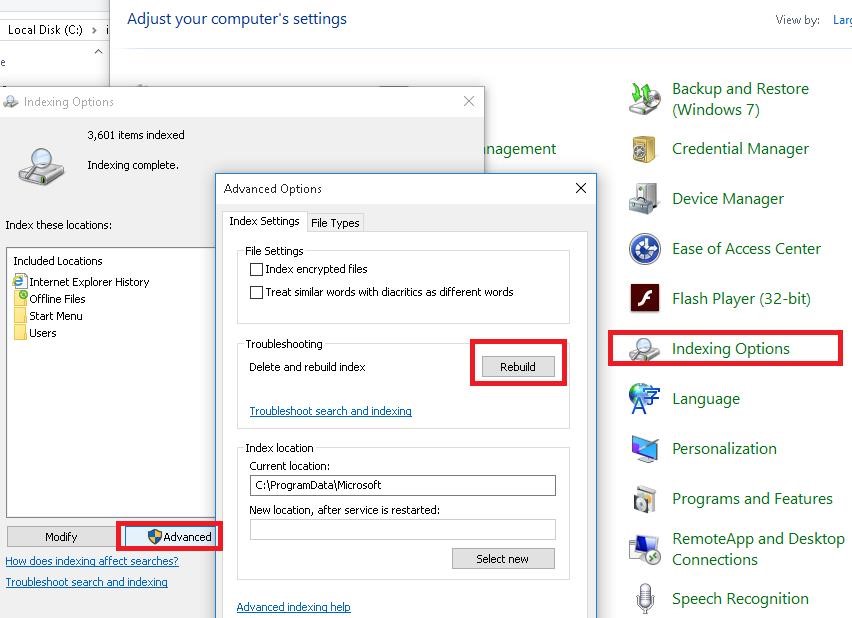
- Click Advanced -> Rebuild;

- Windows Search will delete the old Windows.edb file, recreate it, scan the drives (and other indexed locations), and rebuild the index. This process can take a long time depending on the number of files.
Reduce the Size of Windows.edb File Using Defragmentation
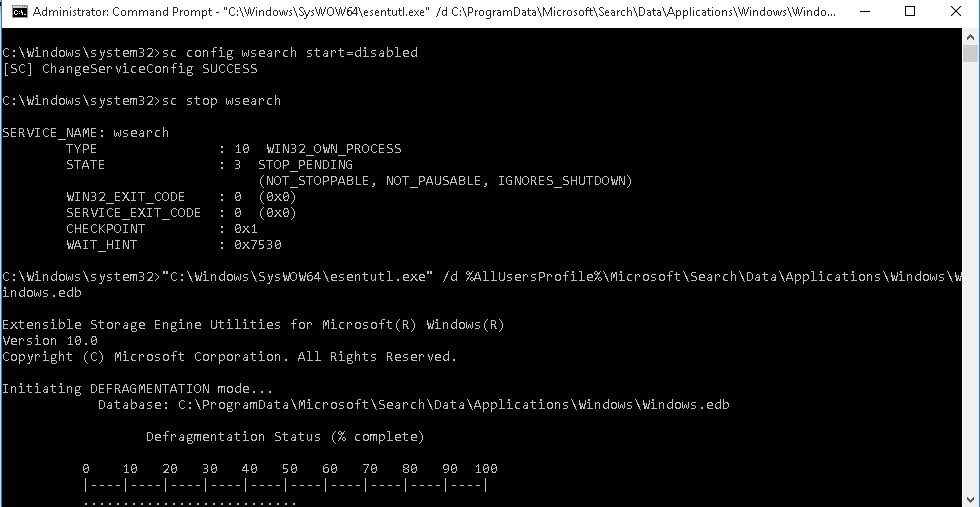
The Windows Search Index file is a Microsoft EDB database. You can perform offline defragmentation of the EDB database using the built-in esentutl.exe command (which should be familiar to Exchange Serve admins). Stop the Windows Search service and defragment the Windows.edb file offline using the following batch:
sc config wsearch start=disabled
 sc stop wsearch
 esentutl.exe /d %ProgramData%\Microsoft\Search\Data\Applications\Windows\Windows.edb
 sc config wsearch start=delayed-auto
 sc start wsearch
Defragmentation can reduce the size of the search index database by 20-50%.
Delete Large Windows.edb File and Reset Windows Search Index
If you are running out of disk space, you can manually delete the Windows.edb file. This is safe because you won’t lose any data, only the search index will be reset. Stop the Windows Search service, delete the Windows.edb file, and start the service again.
net stop "Windows Search"
 REG ADD "HKLM\SOFTWARE\Microsoft\Windows Search" /v SetupCompletedSuccessfully /t REG_DWORD /d 0 /f
 del %PROGRAMDATA%\Microsoft\Search\Data\Applications\Windows\Windows.edb
 net start "Windows Search"
SetupCompletedSuccessfully = 0 forces the Windows Search service to restore the default settings.After you restart Windows Search, it will start the background reindexing process and rebuild the Windows.edb file (computer performance may be degraded during reindexing).
Moving the Windows.edb File to Another Drive
In some scenarios, users may actively use Windows Search to find data on local drives (for example, searching in folders and personal PST files is often used by RDS server users). In this case, if you cannot radically reduce the size of Windows.edb or permanently reset the search index, you can move the search index file from the system partition to another drive (volume).
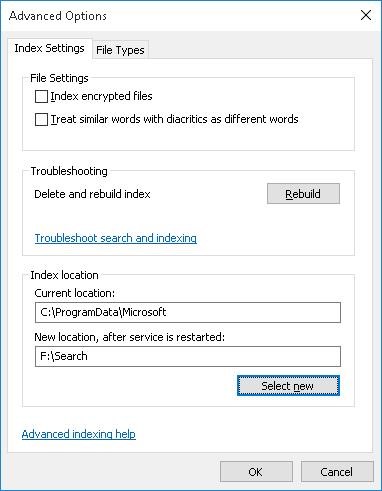
To change the location of the index file, go to Control Panel -> Indexing Options -> Advanced -> Index location-> New Location, specify the path to the new location of the Windows.edb file, and click Ok.
Restart Windows Search service:
Restart-Service wsearch
Fixing Windows.edb Large File Size Problem
If your Windows.edb file continues to grow in size after you defragment and/or rebuild the search index, try the following methods, which may help resolve the problem.
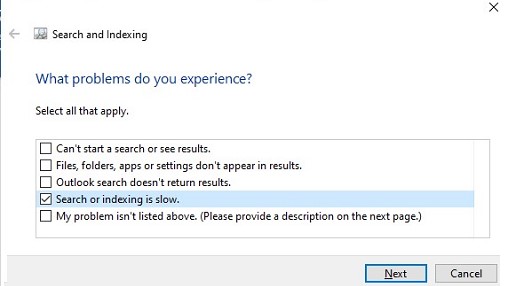
- Run the built-in Windows Search and Indexing Troubleshooter using the command:
msdt.exe -ep SystemSettings_Troubleshoot_L2 -id SearchDiagnostic. Select “Search or indexing is slow” in the list. The wizard will then attempt to restore the Windows Search service to its default state;
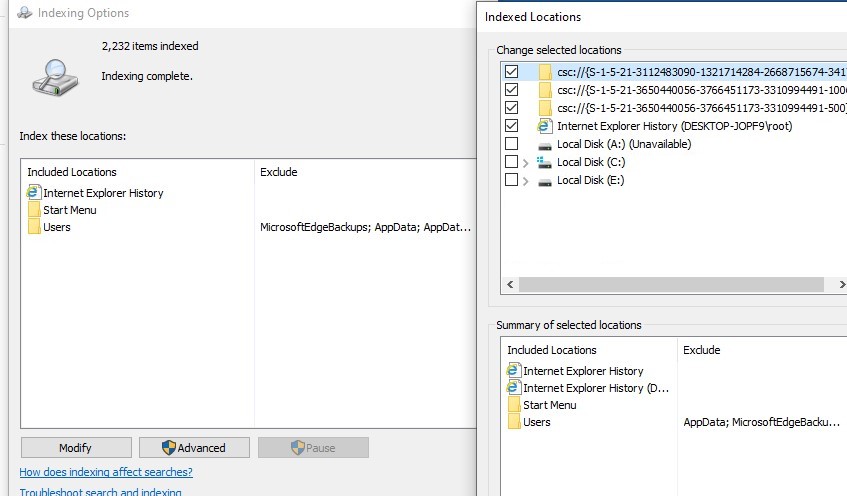
- Try to index only the local content you need. Exclude from the search index items you are not looking for. Click the ‘Modify‘ button in the indexing settings and uncheck any paths and apps that you don’t want to be indexed in the Indexing Location. Rebuild the index after changing the index path settings (Advanced -> Rebuild);

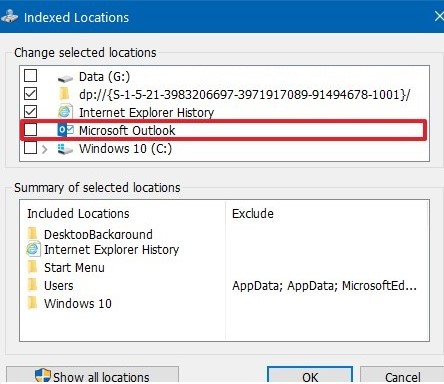
- If you are using Outlook with PST files on your computer, the size of the Windows.edb file increases in proportion to the size of the PST files as they are indexed. This can cause the hard drive to run out of space and cause computer performance problems. In this case, Microsoft recommends that you exclude Outlook from the list of indexed items.
 Of course, Outlook search will stop working (this won’t be a problem if the mailbox is hosted on an Exchange Server with search indexing enabled);
 - If nothing helps and the Windows.edb file size keeps growing, you can disable the
wsearchservice completely or configure a logon script to reset the search index at startup.
13 comments
This issue is not only related to Win8 and 2012.
It also happened with Win 10. very terrible.
This is exactly what I was looking for. Thanks for your help!
You saved my life!
1st, thank you for this – was running out of space very fast and just caught it in time.
::On Server 2012 R2::
I had a “cant find file” error when i ran this: “esentutl.exe /d %AllUsersProfile%\Microsoft\Search\Data\Applications\Windows\Windows.edb”
My work around was to navigate to the actual directory the .edb file was in:
# cd /d %ProgramData%\Microsoft\Search\Data\Applications\Windows
then run:
# esentutl.exe /d Windows.edb
This worked and our file went from 74GB to 120MB.
My file windows.edb was 327 GB. it took all space on C: drive. Thanks a lot for help.
Thank you for your help
life saver
377 GB -> 8 MB with the first step.
THANK YOU.
Thanks, great tip with the defragmentation! Reduced size by 60% in my case, and no need to rebuild the DB.
Thank you so much for the informative article. I’ve been constantly running out of disk space on my laptop’s 250GB drive, when I noticed that my windows.edb file was close to 50GB in size. I did a Delete and Rebuild of my index and the new index shrank down to 340MB, giving me back close to 50GB of disk space.
Oh, and the reindexing took less than a half hour, so it was very fast.
Article didn’t help – issue still actual on Windows Server 2019 and after index rebuilding it continue to grow.
Thank you the Windows.edb was so so Heavy – > Hard Disk almost Full
Solution : Rebuild
Thanks, that was very helpfull!