A user must enter a password for a local or Microsoft (online) account each time they log on to Windows. This allows you to restrict access to your computer. In this article, we will look at how to disable the password prompt on the logon screen in Windows 10/11 and allow automatic login to the computer using specific user credentials. Auto-logon assumes that user credentials (username and password) are stored in the Windows registry and used for automatic login.
Disabling the Windows logon password does not mean that your account should have a blank password. Windows can use saved user credentials (name and password) to automatically logon to the computer. In all other cases, for example, when accessing from another computer over the network (SMB) or when connecting to a Remote Desktop (RDP), you will be prompted for a password.
How to Disable Login Password on Windows
On a standalone computer and in a workgroup environment, the easiest way to turn off the logon password prompt on the Windows sign-in screen is to use the User Accounts Control Panel.
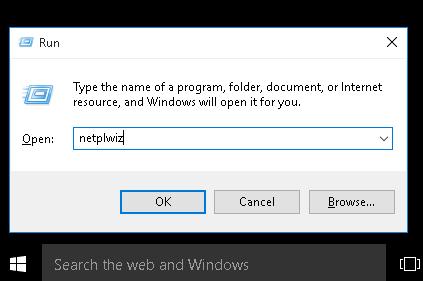
- Press Win+R and run the command
netplwizorcontrol userpasswords2;
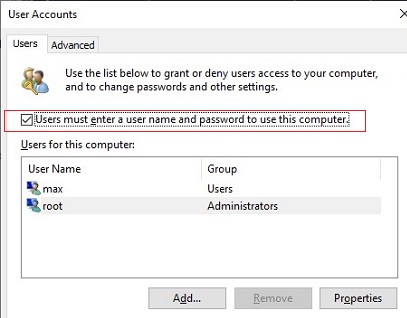
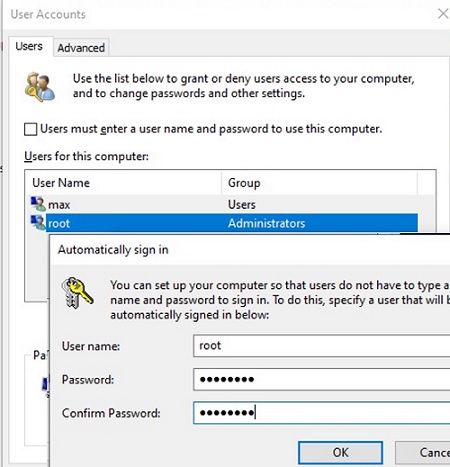
- A list of local Windows accounts will appear. Uncheck the option “User must enter a username and password to use this computer” and save changes (OK);
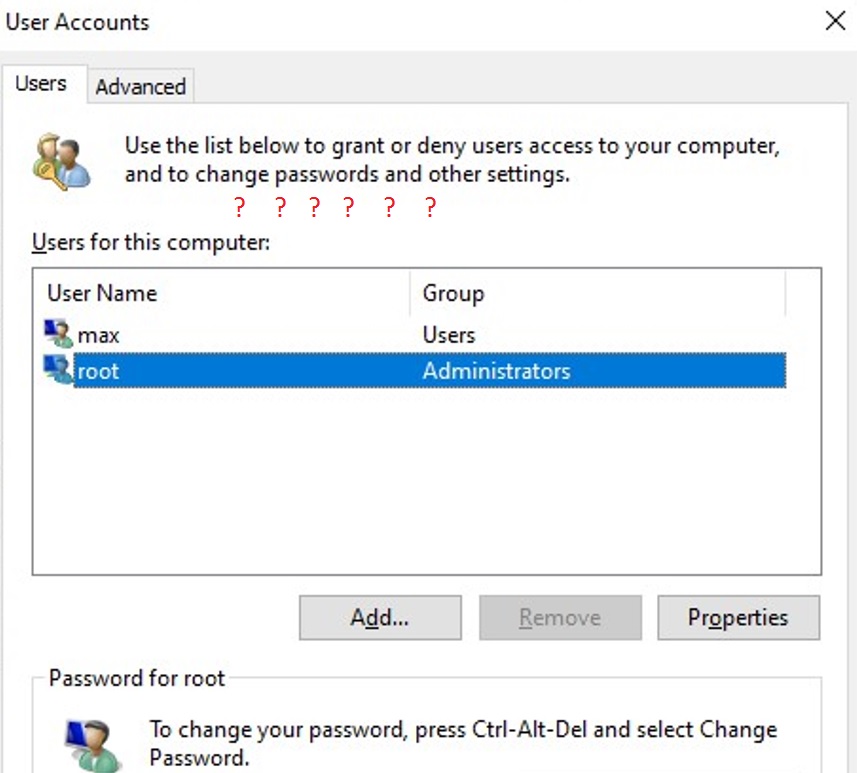
 Starting with Windows 10 20H1, the option “User must enter a username and password to use this computer” is not shown by default if you use a local user account to sign-in Windows instead of a Microsoft cloud account (MSA). Create the DevicePasswordLessBuildVersion registry value with a value of 0 in the HKLM\SOFTWARE\Microsoft\Windows NT\CurrentVersion\PasswordLess\Device key to display this check box.
You can make changes to the registry using PowerShell:New-ItemProperty -Path "HKLM:\SOFTWARE\Microsoft\Windows NT\CurrentVersion\PasswordLess\Device" -Name DevicePasswordLessBuildVersion -Value 0 -Type Dword –ForceThis will disable the “Require Windows Hello sign-in for Microsoft accounts” option. Re-open thenetplwizconsole and make sure that the checkbox has appeared.
- Enter the user name and password (twice) for the account you want to use to automatically log on to Windows;

- Restart your computer and make sure that the Windows boots directly to the desktop without entering a password.The AutoLogonSID registry parameter in the HKLM\Software\Microsoft\Windows NT\CurrentVersion\Winlogon key stores the user SID used to log on.
On computers that have been added to an Active Directory domain, you cannot turn off the “Require username and password” option because of the domain password policy. In this case, you can enable Windows autologin via the registry (see below).
Enable Windows Auto Login via the Registry
You can save a user password in the computer’s registry to allow Windows to log on automatically. This allows you to set up automatic logon without prompting for a password and to skip the Login Screen for your Microsoft account, domain account, or local account.
- Press Win+R and type
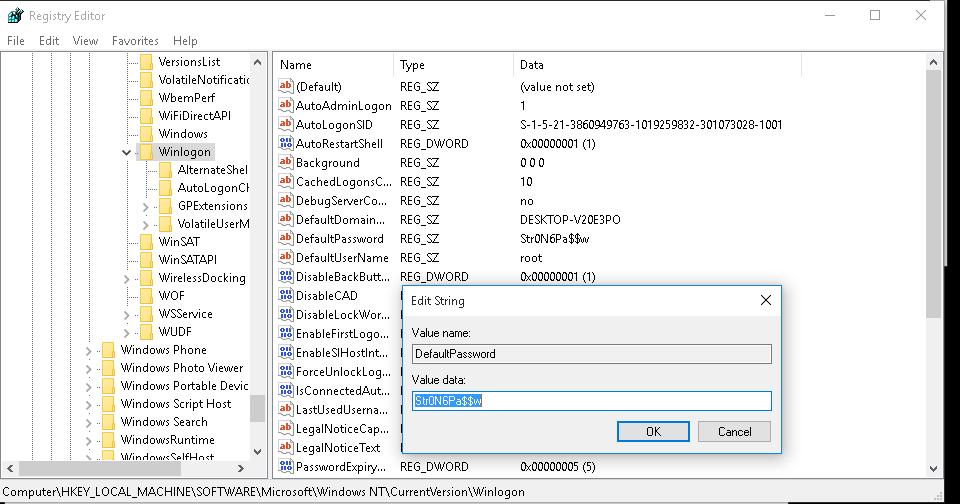
regedit; - Go to the registry key HKEY_LOCAL_MACHINE\Software\Microsoft\Windows NT\CurrentVersion\Winlogon;
- Change the value of the registry parameter AutoAdminLogon from 0 to 1;
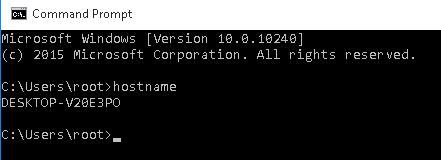
- Create a new string parameter DefaultDomainName and specify the domain or a local computer name as its value;Tip. You can find out your current computer name using the
hostnamecommand.
- In the DefaultUserName parameter you need to specify the user account name you want to sign in with;
- Specify the user account password in plain text in a string reg parameter DefaultPassword (create if missing);

- Close the Registry Editor and restart your computer;
- When Windows boots, it should automatically log on using the saved user name and password, without prompting for user credentials on the logon screen.
You can enable Windows autologin via the registry using the following BAT script. Replace root and P@ssword with your username and password, and replace WORKGROUP with the name of your AD domain (if the domain user account is used).
reg add "HKLM\SOFTWARE\Microsoft\Windows NT\CurrentVersion\Winlogon" /v AutoAdminLogon /t REG_SZ /d 1 /f
 reg add "HKLM\SOFTWARE\Microsoft\Windows NT\CurrentVersion\Winlogon" /v DefaultUserName /t REG_SZ /d root /f
 reg add "HKLM\SOFTWARE\Microsoft\Windows NT\CurrentVersion\Winlogon" /v DefaultPassword /t REG_SZ /d  P@ssword /f
 reg add "HKLM\SOFTWARE\Microsoft\Windows NT\CurrentVersion\Winlogon" /v ForceAutoLogon /t REG_SZ /d 1 /f
 reg add "HKLM\SOFTWARE\Microsoft\Windows NT\CurrentVersion\Winlogon" /v DefaultDomainName /t REG_SZ /d WORKGROUP /f
 reg add "HKLM\SOFTWARE\Microsoft\Windows NT\CurrentVersion\Winlogon" /v IgnoreShiftOverride /t REG_SZ /d 1 /f
reg delete "HKEY_LOCAL_MACHINE\SOFTWARE\Microsoft\Windows NT\CurrentVersion\Winlogon" /v AutoLogonCount /f
 reg delete "HKEY_LOCAL_MACHINE\SOFTWARE\Microsoft\Windows NT\CurrentVersion\Winlogon" /v AutoLogonChecked /f
The AutoLogonCount contains the number of times you can log Windows in using the automatic logon feature. This value decreases each time the computer boots. If the value reaches 0, the automatic login is disabled.
Or you can run a PowerShell script to write the user’s logon credentials to the registry:
$Username ='max'
 $Pass = 'Max$uperP@ss'
 $RegistryPath = 'HKLM:\SOFTWARE\Microsoft\Windows NT\CurrentVersion\Winlogon'
 Set-ItemProperty $RegistryPath 'AutoAdminLogon' -Value "1" -Type String
 Set-ItemProperty $RegistryPath 'DefaultUsername' -Value $Username -type String
 Set-ItemProperty $RegistryPath 'DefaultPassword' -Value $Pass -type String
 Restart-Computer
The value of the DefaultUserName registry entry changes when a different user is logged on to the computer (it contains the name of the last logged in user). After this, the automatic Windows logon will no longer work.
Disable Password After Resuming from Sleep/Hibernation on Windows
Windows may require you to enter a password when your computer wakes from sleep or hibernation. This is called a Secondary Logon.
You can disable the password prompt after waking from sleep using the Windows Control Panel:
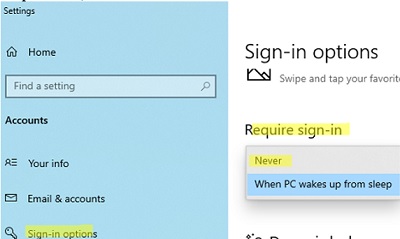
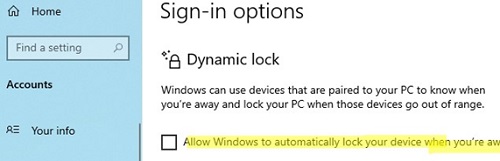
- Go to Settings -> Accounts -> Sign-in options (or run the quick access URL command:
ms-settings:signinoptions ); - Change the value of the Require sign-in parameter from When PC wakes up from sleep to Never;

- Then check that dynamic screen lock is disabled here: Allow Windows to automatically lock your device when you’re away;

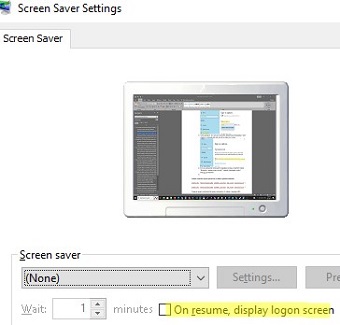
- Disable the ‘On resume, display logon screen’ option in Control Panel if the screen saver is configured on a computer:
control desk.cpl,,@screensaver
You can disable the password when resuming from sleep with the commands:
powercfg /setacvalueindex scheme_current sub_none consolelock 0
 powercfg /setdcvalueindex scheme_current sub_none consolelock 0
You can disable the password prompt after waking from sleep/hibernation using GPO:
- Open the Local Group Policy Editor snap-in –
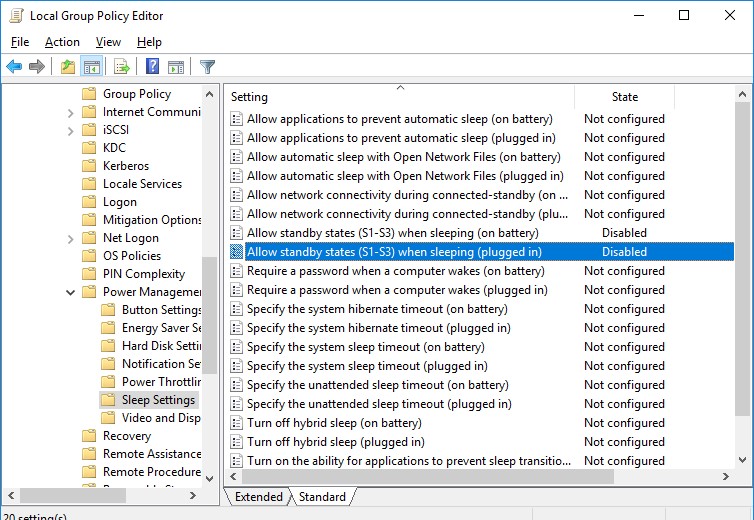
gpedit.msc(on Home editions of Windows, you can run the local policy editor as follows); - Navigate to Computer Configuration -> Administrative Templates -> System -> Power Management -> Sleep Settings;
- Disable the GPO parameters “Require a password when a computer wakes (on battery)” and “Require a password when a computer wakes on battery (plugged in)”;

- Now Windows won’t ask for a password when you wake your computer from sleep or hibernation.
reg add "HKEY_LOCAL_MACHINE\SOFTWARE\Microsoft\Windows\CurrentVersion\Policies\System" /v "DisableLockWorkstation" /d 1 /t REG_DWORD /f
Enable Auto Sign-in to Windows with the AutoLogon Tool
You can store the user password in encrypted form in the registry using the Autologon utility. This is a more secure way to automatically log on to Windows. The Autologon is available for download from the Microsoft website as part of the Sysinternals toolset (https://learn.microsoft.com/en-us/sysinternals/downloads/autologon).
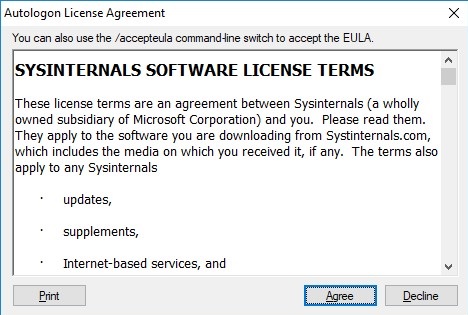
- Download and run
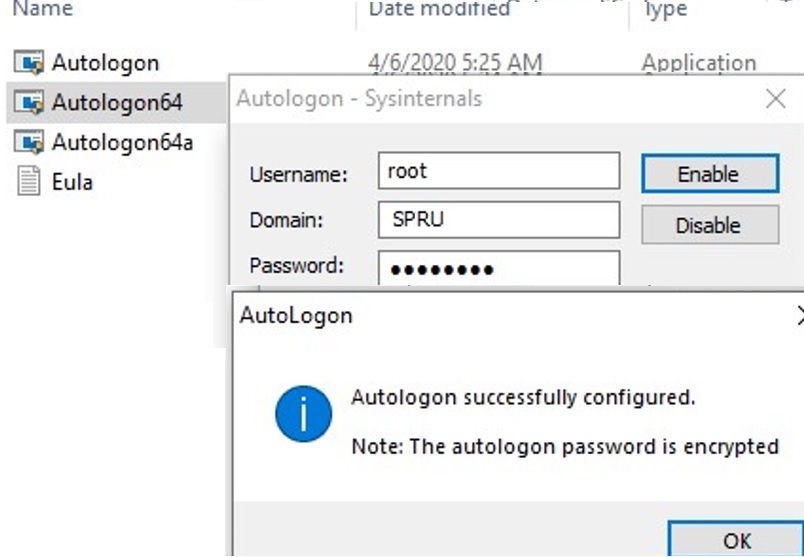
Autologon.exe(orautologon64.exe) as an administrator; - Accept the terms of the license agreement;

- Specify the user account, domain, and password that will be used to automatically log on to Windows. Click the Enable button:
Autologon successfully configured. The autologon password is encrypted.
- An encrypted password is stored in LSA format under the HKLM\SECURITY\Policy\Secrets registry key. In this case, although the password is not stored in clear text, the encryption algorithm is not strong and technically any user with local admin permissions can decrypt it.

You can set user credentials to automatically log on to Windows using the Autologon command-line options. Use the following syntax to enable passwordless logon:
autologon64.exe USER_NAME DOMAIN PASSWORD /accepteula
We looked at how to disable the password login on Windows and automatically boot directly to the user’s desktop. Hold down the Shift key when Windows starts up if you want to temporarily disable automatic logon and manually select a user on the sign-in screen.
Automatic login to devices without a password is often used on devices operating in information kiosk mode. When such a device is booted up, Windows should automatically log on to the desktop and start the necessary programs via autorun.
It is not recommended to configure the automatic login to be for the built-in Windows Administrator account or for a user with local administrator permissions.
27 comments
Thanks for all the help, problem solved I don’t know exactly how but it is.
show how to log in my right normal enter password.
Tried all this except for Regedit – there is no password in my Win 10, nothing to enter. Similarly, Autologon doesn’t work – no password to enter. One local account, one user. Don’t want to create password only to disable it via Autologon – seems illogical. Every time it starts with Login screen, I hit Enter button and I’m in – annoying.
Oddly, Win 10 doesn’t Log Off when I click on Shut Down link instead of hitting the tactile Power button.
Any suggestions?
I’m trying to use Policy Plus, but I can’t seem to find the Computer Configuration section. I have tried searching for the text “standby states” and comes up with 0 results. Any suggestions? Thanks.
It was very useful. Thanks
The check box isnt coming. Plz help!!
Same :((
on the search type powershell, then Run As Administrator. Paste there:
New-ItemProperty -Path “HKLM:\SOFTWARE\Microsoft\Windows NT\CurrentVersion\PasswordLess\Device” -Name DevicePasswordLessBuildVersion -Value 0 -Type Dword –Force
then reopen the netplwiz
Dude, you’re the man! I looked everywhere. Your advice was straight to the point, simple and easy to follow!
really helpful thanks yo!
My Won 10- Pro 64-bit machine has always been “Local Account” (not “Microsoft Account”) and has never required a password to log on. That’s how I set it up originally.
However, an HP Printer-Scanner will not scan to a folder on this Win 10 PC as a target of “Scan to Network Folder” using SMB 2 or 3 unless the Win 10 PC requires a password to log on. The HP WILL scan to a Win 10 network folder if both the PC and the HP printer are set to use SMB 1.
Thoughts about this?
Thanks.
Thank you for the lovely post. very helpful and clear!
you are the best
THANK YOU!
For being the only homepage that has a fix for the 20H2 Update which removes the simple Tickbox in Netplwiz
WINTURDS Version 10.0.18363 Build 18363
My PC used to only require logon at boot, never after sleep. I stupidly installed the Teams POS, which completely broke the situation and now I have to enter a password at boot, at wake and after the display turns off. I have been stuck with it for the last two days.
After carefully typing in the registry settings to enable passwordless logon, then close regedit, then restart the PC, the new settings are erased. Did this twice on this goddamned POS OS.
Also carefully added the PasswordLess stuff, which has no effect either.
THANK YOU! But I think:
The path is “HKEY_LOCAL_MACHINE\SOFTWARE\Microsoft\Windows NT\CurrentVersion\PasswordLess\Device”
not “HKLM:\SOFTWARE\Microsoft\Windows NT\CurrentVersion\PasswordLess\Device”
Yes! Yes! Yes! All those tweaks got rid of all the annoyances of logging in. Didn’t have the checkmark box, fixed. Didn’t want the lock screen, fixed. Didn’t want a password screen, fixed. Now I can cold boot or come out of hibernation directly to the desktop screen.
It won’t work on second restart, because this “genius” put AutoLogonCount to 1, meaning autologon will reset after 1 use.
Just use official docs https://docs.microsoft.com/en-us/troubleshoot/windows-server/user-profiles-and-logon/turn-on-automatic-logon
Hello team i administer a Windows 2016 Virtual server, i’m new and i think i’m getting the hang of it. I need help because apparently when i try to manage user accounts, the dialog shows up and then disappears. i also run the command netplwiz and it still did the same. I also run the sfc /scannow and it was able to fix some issues. I honestly thought it was fixed after the reboot but still either via the CMD or clicking “Manage User Accounts”, the dialog shows up and then disappears. Any help to assist would be great.
Thank you so much, you give the safe path.
Tested on Win10 22H2 Pro.
After installing Windows 11 with just a singular PASSWORDLESS account for auto login, I still somehow had the screen with the “Login” Button in the middle after resuming from energy saver mode. Nothing else worked (for 2023H2) to disable this screen except the solution using gpedit.msc “Require a password when a computer wakes on battery (plugged in)” mentioned in this Tutorial. Thank you very much!
The site being buried in google results with partly completely unrelated results to my search query didn’t help but I found it eventually.
I should have added, I used NTLite to be set up with just a singular local Account, and my goal was to have a seamless start right into the GUI without having to press login or enter a password. It worked for starting up the PC, but when using energy saver mode, there was still the screen with “Login” button in the middle and nothing worked to remove it. The usual option “dont ask for password when resuming” everyone points to does not even exist in my version, which is based on 2023H2.
THANKS
not only did this not solve my problem, but now i have two user accounts on the signing page which are unaccounted for in netplwiz. cool
Disable one of the local users in order to hide it from the sign-in page:
Disable-LocalUser -Name "Admin123"Is the key `IgnoreShiftOvveride` correct? There are two v’s.
Typo fixed, thanks! correct is ‘IgnoreShiftOverride’