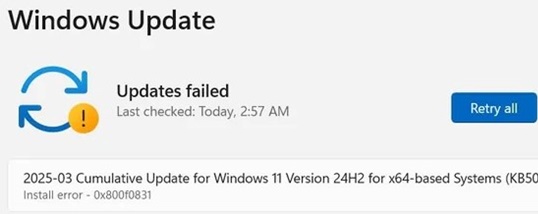
If the Windows Update service is not working properly, updates are not downloading or installing, restoring its original settings is the easiest and most effective solution. In this article, we’ll show you how to reset the Windows Update agent and service configuration.
Usually, to diagnose problems with the Windows Update service, an administrator typically needs to analyze the error codes in the %windir%\WindowsUpdate.log file. There are hundreds of possible errors that an administrator may encounter when analyzing the Windows Update log (see the complete list of Windows Update errors), and resolving them is a generally non-trivial procedure. To avoid undue efforts and waste no time, it’s much easier to completely reset the Windows Update service and agent to their default state.
Using Windows Update Troubleshooter to Fix Common Update Issues
Before manually resetting the Windows Update configuration, it is recommended that you first try the built-in Windows Update Troubleshooter, which is a simpler and often effective solution. This tool can automatically detect and resolve common issues with the Windows Update service, saving time and effort during diagnostics.
In Windows 10 and 11, you can access the Windows Update Troubleshooter through the Settings app or by entering the following command:
msdt.exe /id WindowsUpdateDiagnostic
If you are using an older version of Windows, you will need to download it manually:
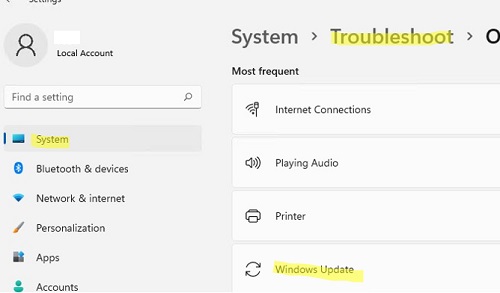
- Windows 11 — Settings -> System -> Troubleshooter -> Other Troubleshooter -> Windows Update

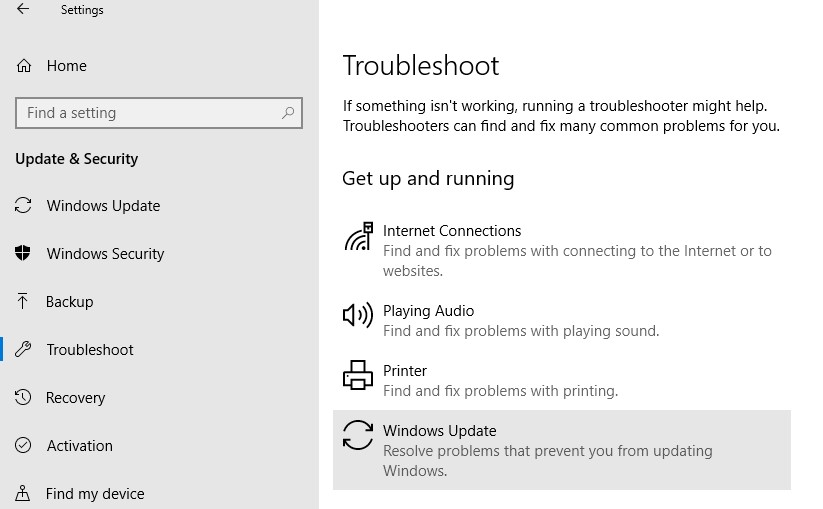
- Windows 10 – download wu10.diagcab (https://aka.ms/wudiag ) or run the local version of the tool: Start -> Settings -> Updates and Security -> Troubleshoot -> Additional Troubleshooters-> Windows Updates (Resolve problems that prevent you from updating Windows);
 To quickly navigate the Windows Troubleshooting tools, you can use the ms-settings URI command:
ms-settings:troubleshoot - Windows 7 and Windows 8.1 — WindowsUpdate.diagcab (https://aka.ms/diag_wu). Microsoft removed this tool from the website because these OS versions are not supported. However, you can still download it from the Web Archive.
Wait for the Windows Update Troubleshooter to scan your computer and attempt to automatically fix any issues it detects with Windows Update and related components.
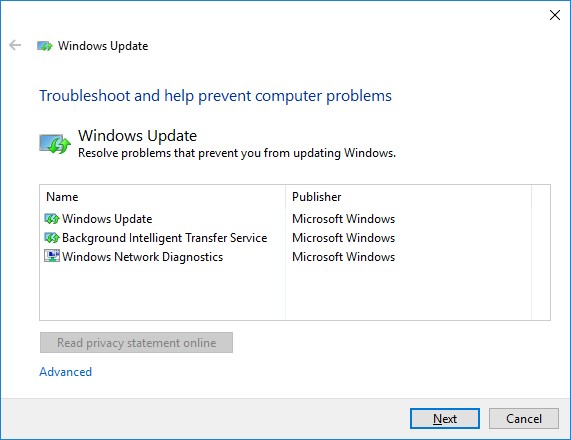
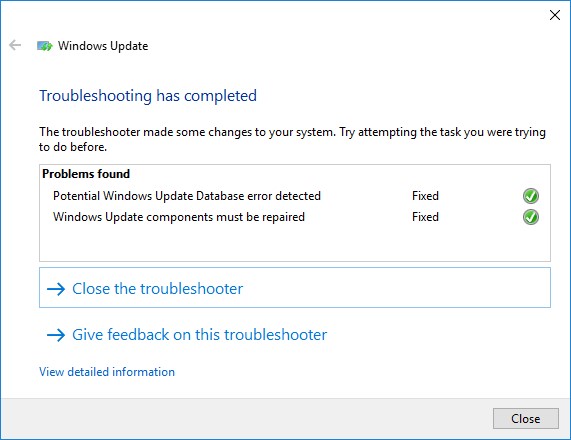
In my case, the tool identified some missing security settings and re-registered the wuauclt service (Windows Update). After that, restart your computer and try to search for an update. If the updates fail to download or install, proceed to the next step.
Resetting Windows Update Client Using PowerShell
The PSWindowsUpdate PowerShell module can be used to reset the Windows Update agent and service.
Install the module on your computer from the PSGallery script gallery:
Install-Module -Name PSWindowsUpdate
Allow PowerShell scripts to run in the current session.
Set-ExecutionPolicy –ExecutionPolicy RemoteSigned -Force -Scope Process
Then, import the module into the session.
Import-Module PSWindowsUpdate
To reset Windows Update components, run the command:
Reset-WUComponents –verbose
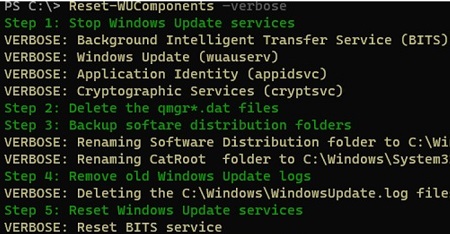
The Reset-WUComponents command performs all the same operations as the BAT script described below: it disables the services used by Windows Update, re-registers the DLLs, clears the C:\Windows\SoftwareDistribution directory, and recreates the Windows Update database. The full log of actions is available.
VERBOSE: Background Intelligent Transfer Service (BITS)
VERBOSE: Windows Update (wuauserv)
VERBOSE: Application Identity (appidsvc)
VERBOSE: Cryptographic Services (cryptsvc)
Step 2: Delete the qmgr*.dat files
Step 3: Backup software distribution folders
VERBOSE: Renaming Software Distribution folder to C:\Windows\SoftwareDistribution.bak
VERBOSE: Renaming CatRoot  folder to C:\Windows\System32\Catroot2.bak
Step 4: Remove old Windows Update logs
VERBOSE: Deleting the C:\Windows\WindowsUpdate.log files.
Step 5: Reset Windows Update services
VERBOSE: Reset BITS service
VERBOSE: Reset Windows Update service
Step 6: Reregister dll's
VERBOSE: regsvr32.exe / s atl.dll
VERBOSE: regsvr32.exe / s urlmon.dll
VERBOSE: regsvr32.exe / s mshtml.dll
VERBOSE: regsvr32.exe / s shdocvw.dll
VERBOSE: regsvr32.exe / s browseui.dll
VERBOSE: regsvr32.exe / s jscript.dll
VERBOSE: regsvr32.exe / s vbscript.dll
VERBOSE: regsvr32.exe / s scrrun.dll
VERBOSE: regsvr32.exe / s msxml.dll
VERBOSE: regsvr32.exe / s msxml3.dll
VERBOSE: regsvr32.exe / s msxml6.dll
VERBOSE: regsvr32.exe / s actxprxy.dll
VERBOSE: regsvr32.exe / s softpub.dll
VERBOSE: regsvr32.exe / s wintrust.dll
VERBOSE: regsvr32.exe / s dssenh.dll
VERBOSE: regsvr32.exe / s rsaenh.dll
VERBOSE: regsvr32.exe / s gpkcsp.dll
VERBOSE: regsvr32.exe / s sccbase.dll
VERBOSE: regsvr32.exe / s slbcsp.dll
VERBOSE: regsvr32.exe / s cryptdlg.dll
VERBOSE: regsvr32.exe / s oleaut32.dll
VERBOSE: regsvr32.exe / s ole32.dll
VERBOSE: regsvr32.exe / s shell32.dll
VERBOSE: regsvr32.exe / s initpki.dll
VERBOSE: regsvr32.exe / s wuapi.dll
VERBOSE: regsvr32.exe / s wuaueng.dll
VERBOSE: regsvr32.exe / s wuaueng1.dll
VERBOSE: regsvr32.exe / s wucltui.dll
VERBOSE: regsvr32.exe / s wups.dll
VERBOSE: regsvr32.exe / s wups2.dll
VERBOSE: regsvr32.exe / s wuweb.dll
VERBOSE: regsvr32.exe / s qmgr.dll
VERBOSE: regsvr32.exe / s qmgrprxy.dll
VERBOSE: regsvr32.exe / s wucltux.dll
VERBOSE: regsvr32.exe / s muweb.dll
VERBOSE: regsvr32.exe / s wuwebv.dll
Step 7: Reset WinSock
VERBOSE: netsh winsock reset
Step 8: Reset Proxy
VERBOSE: netsh winhttp reset proxy
Step 9: Start Windows Update services
VERBOSE: Cryptographic Services (cryptsvc)
VERBOSE: Application Identity (appidsvc)
VERBOSE: Windows Update (wuauserv)
VERBOSE: Background Intelligent Transfer Service (BITS)
Step 10: Start Windows Update services
VERBOSE: wuauclt /resetauthorization /detectnow
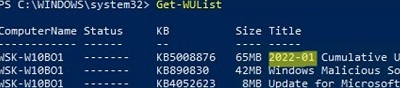
To scan for updates, you can either run a scan from the Settings app or search for available updates using a PowerShell command:
Get-WUList
Using Reset Windows Update Tool (WURESET)
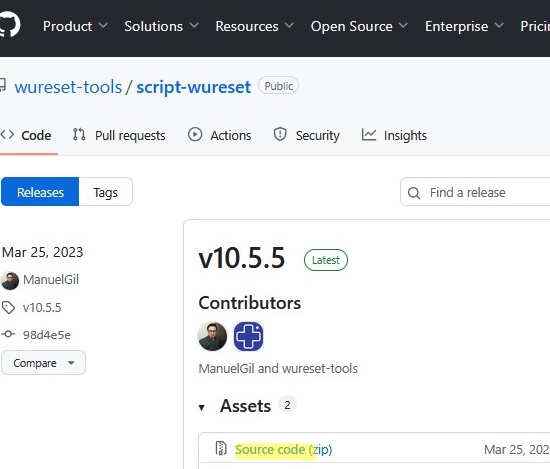
A third-party utility called Reset Windows Update Tool (wureset) can be used to reset Windows Update settings on a computer. This script was originally available on TechNet, but the repository was later moved to GitHub (https://github.com/wureset-tools/script-wureset).
Go to the “Releases” section and download the most recent version of the script source code. In my case, it is v10.5.5 (2023-03-24).
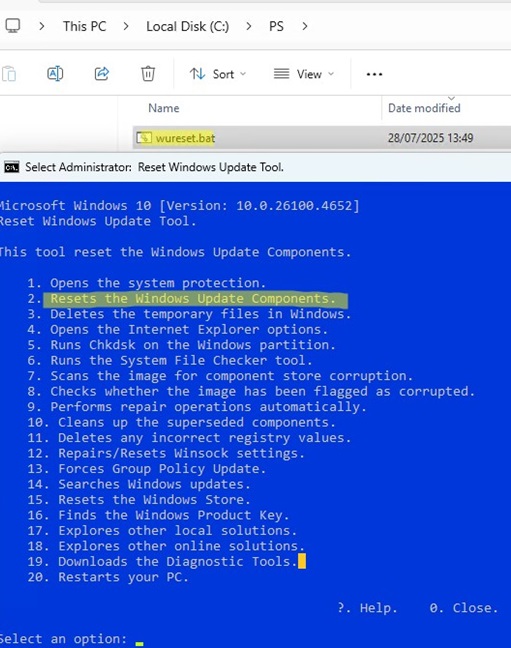
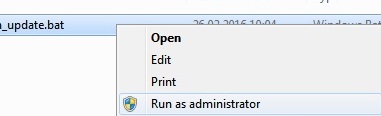
Extract the wureset.bat file from the archive. This is the BAT script for resetting the Windows Update settings. Run it as an administrator.
The script detects your Windows version and displays a list of 20 options. Although some of these are not directly related to resetting the WU agent settings, they may be helpful in resolving various Windows issues (checking the disk with the chkdsk, repairing the Windows image with DISM, resetting Winsock, clearing temporary files, etc.)
To repair the Windows Update, it is usually sufficient to use option 2 – Resets the Windows Update Components. Press 2 and Enter.
The script will automatically perform all the actions that we described below when performing a manual reset of the Windows Update Agent from the command line.
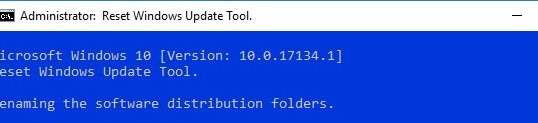
Once the Windows Update Agent Reset script has finished, restart your computer and check that the wuauserv service is operating properly.
The wureset.bat script is universal and compatible with all versions of Windows, including Windows 7, 8, 10, and 11, as well as Windows Server versions from 2008 to 2025.
Reset Windows Update Settings to Default Using CMD
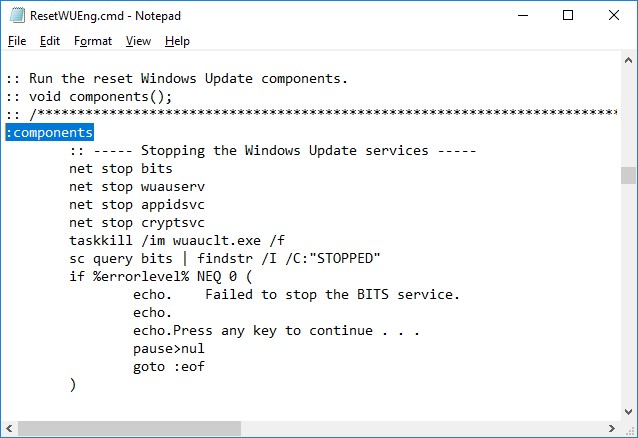
Let’s look at how to reset the Windows Update agent and service settings from the command line. All the described operations are performed in the elevated command prompt. I put all the commands into a single batch file (you can download the BAT file via the link at the end of the post).
This script enables you to reset the configuration of the Windows Update service and clear the local cache on a computer.
gpresult tool or rsop.msc to display the resulting GPO settings. Or you can reset the local GPO settings according to this guide. Let’s take a step-by-step look at what this script does:
- Stop Windows Update, BITS, and cryptographic services:
net stop bits
 net stop wuauserv
 net stop appidsvc
 net stop cryptsvc
 taskkill /im wuauclt.exe /f
- Delete the service files qmgr*.dat from the folder %ALLUSERSPROFILE%\Application Data\Microsoft\Network\Downloader\:
Del "%ALLUSERSPROFILE%\Application Data\Microsoft\Network\Downloader\qmgr*.dat" - Rename the system folders in which the configuration files and update cache are stored. (if necessary, they can be used as backups). These directories will be automatically recreated after the update service(
wuauserv) is restarted:
Ren %systemroot%\SoftwareDistribution SoftwareDistribution.bak
Ren %systemroot%\system32\catroot2 catroot2.bak - Delete the old windowsupdate.log file:
del /f /s /q %windir%\windowsupdate.log - Reset the permissions on the BITS and Windows Update services (this allows you to restore the default permissions on services if they have been changed):
sc.exe sdset bits D:(A;;CCLCSWRPWPDTLOCRRC;;;SY)(A;;CCDCLCSWRPWPDTLOCRSDRCWDWO;;;BA)(A;;CCLCSWLOCRRC;;;AU)(A;;CCLCSWRPWPDTLOCRRC;;;PU)
 sc.exe sdset wuauserv D:(A;;CCLCSWRPWPDTLOCRRC;;;SY)(A;;CCDCLCSWRPWPDTLOCRSDRCWDWO;;;BA)(A;;CCLCSWLOCRRC;;;AU)(A;;CCLCSWRPWPDTLOCRRC;;;PU)
 sc.exe sdset cryptsvc D:(A;;CCLCSWLOCRRC;;;AU)(A;;CCDCLCSWRPWPDTLOCRSDRCWDWO;;;BA)(A;;CCDCLCSWRPWPDTLCRSDRCWDWO;;;SO)(A;;CCLCSWRPWPDTLOCRRC;;;SY)S:(AU;FA;CCDCLCSWRPWPDTLOCRSDRCWDWO;;WD)
 sc.exe sdset trustedinstaller D:(A;;CCLCSWLOCRRC;;;AU)(A;;CCDCLCSWRPWPDTLOCRSDRCWDWO;;;BA)(A;;CCDCLCSWRPWPDTLCRSDRCWDWO;;;SO)(A;;CCLCSWRPWPDTLOCRRC;;;SY)S:(AU;FA;CCDCLCSWRPWPDTLOCRSDRCWDWO;;WD)
- Re-register the dynamic libraries (DLLs) related to the BITS and Windows Update services:
cd /d %windir%\system32
 regsvr32.exe /s atl.dll
 regsvr32.exe /s urlmon.dll
 regsvr32.exe /s mshtml.dll
 regsvr32.exe /s shdocvw.dll
 regsvr32.exe /s browseui.dll
 regsvr32.exe /s jscript.dll
 regsvr32.exe /s vbscript.dll
 regsvr32.exe /s scrrun.dll
 regsvr32.exe /s msxml.dll
 regsvr32.exe /s msxml3.dll
 regsvr32.exe /s msxml6.dll
 regsvr32.exe /s actxprxy.dll
 regsvr32.exe /s softpub.dll
 regsvr32.exe /s wintrust.dll
 regsvr32.exe /s dssenh.dll
 regsvr32.exe /s rsaenh.dll
 regsvr32.exe /s gpkcsp.dll
 regsvr32.exe /s sccbase.dll
 regsvr32.exe /s slbcsp.dll
 regsvr32.exe /s cryptdlg.dll
 regsvr32.exe /s oleaut32.dll
 regsvr32.exe /s ole32.dll
 regsvr32.exe /s shell32.dll
 regsvr32.exe /s initpki.dll
 regsvr32.exe /s wuapi.dll
 regsvr32.exe /s wuaueng.dll
 regsvr32.exe /s wuaueng1.dll
 regsvr32.exe /s wucltui.dll
 regsvr32.exe /s wups.dll
 regsvr32.exe /s wups2.dll
 regsvr32.exe /s wuweb.dll
 regsvr32.exe /s qmgr.dll
 regsvr32.exe /s qmgrprxy.dll
 regsvr32.exe /s wucltux.dll
 regsvr32.exe /s muweb.dll
 regsvr32.exe /s wuwebv.dll
- Reset Winsock settings:
netsh winsock reset - Reset system proxy settings:
netsh winhttp reset proxy - Reset the Windows Update settings configured via GPO, as well as the current client binding to the local Windows Server Update Services (WSUS) server, by deleting items in the registry key HKLM\SOFTWARE\Microsoft\Windows\CurrentVersion\WindowsUpdate:
REG DELETE "HKLM\SOFTWARE\Microsoft\Windows\CurrentVersion\WindowsUpdate" /v AccountDomainSid /f
 REG DELETE "HKLM\SOFTWARE\Microsoft\Windows\CurrentVersion\WindowsUpdate" /v PingID /f
 REG DELETE "HKLM\SOFTWARE\Microsoft\Windows\CurrentVersion\WindowsUpdate" /v SusClientId /f
 REG DELETE "HKLM\SOFTWARE\Policies\Microsoft\Windows\WindowsUpdate" /v TargetGroup /f
 REG DELETE "HKLM\SOFTWARE\Policies\Microsoft\Windows\WindowsUpdate" /v WUServer /f
 REG DELETE "HKLM\SOFTWARE\Policies\Microsoft\Windows\WindowsUpdate" /v WUStatusServer /f
 REG DELETE "HKLM\SOFTWARE\Policies\Microsoft\Windows\WindowsUpdate" /f
- Start the previously stopped services:
 sc.exe config wuauserv start= auto
 sc.exe config bits start= delayed-auto
 sc.exe config cryptsvc start= auto
 sc.exe config TrustedInstaller start= demand
 sc.exe config DcomLaunch start= auto
 net start bits
 net start wuauserv
 net start appidsvc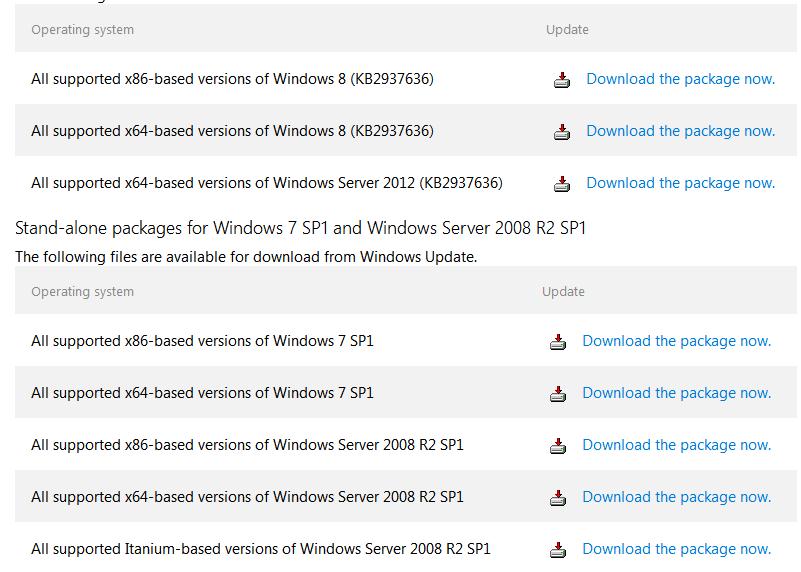
net start cryptsvc - Optional. In Windows 7 and 8.1, it was possible to download and reinstall the latest version of the Windows Update Agent (WUA) separately. Use PowerShell to check the version of the Windows Update Agent’s wuaueng.dll file on a computer:
((Get-Item $Env:windir\system32\Wuaueng.dll).VersionInfo).ProductVersion
You can download the latest version of the Windows Update agent here https://support.microsoft.com/en-us/kb/949104
Windows 8.1 –7.9.9600
Windows 8 –7.8.9200.16693
Windows 7 –7.6.7600.256
 Use the following commands to force reinstall the Windows Update Agent: Windows 7 x86:
 WindowsUpdateAgent-7.6-x86.exe /quiet /norestart /wuforceWindows 7 x64:WindowsUpdateAgent-7.6-x64.exe /quiet /norestart /wuforce
The final step is to reboot the computer and scan for new updates against Windows Update or the WSUS server.
wuauclt /resetauthorization /detectnow
Starting with Windows Server 2016 and Windows 10, the wuauclt command has been deprecated, and the USOClient.exe utility should be used instead.
Refresh and apply all Windows Update settings that have been configured via GPO or via the registry.
USOClient.exe RefreshSettings
Start searching for updates.
USOClient.exe StartScan
Then, go to Windows Update and ensure that no errors occur while checking, downloading, or installing updates.
The reset_windows_update_agent.bat script is available for download here reset_windows_update_agent.zip (options 9 and 11 are not included in the script since they are optional). Download and extract the script, then run it as an administrator.
If Windows updates are downloading and installing correctly now, you can remove the backup folders:
Ren %systemroot%\SoftwareDistribution SoftwareDistribution.bak
 Ren %systemroot%\system32\catroot2 catroot2.bak
If nothing else works, try to manually download and install the latest cumulative update for your Windows version from the Microsoft Update Catalog.
3 comments
thx, i **cked up my windows doing that.
In my case, the WUSA installer got stuck on copying packages to the Windows Update cache. This is resolved by using the command to reset the Windows Update components:
Reset-WUComponents –verbose
Thanks! In my case, resetting the SoftwareDistribution and catroot2 folders helped to get rid of the high CPU usage and memory leak from the Svchost.exe (wuauserv) process. After installing the latest Windows 10 update, the wuauserv process started using more than 50% of the available RAM.