The standard setup.exe installer in the Windows distro can be used to interactively install the operating system or update the OS version (install the feature update) on the computer. In addition to the interactive mode, setup.exe supports a large number of command line parameters that can be useful to sysadmins. You can use the setup.exe parameters to automate the Windows 10/11 build (version) update on users’ computers using SCCM, MDT, or other tools in disconnected (offline) environments.
In this article, we’ll show how to get an installation ISO image with the latest Windows 11 build (24H2 in our example), use the command-line parameters of setup.exe to check your computer’s compatibility with the new version of Windows, and perform a background in-place upgrade.
Windows 11 Setup.exe Command-Line Options
If you normally run the Windows Installer (setup.exe) from the installation ISO, the graphical installation/upgrade wizard will appear. However, setup.exe has many command-line parameters that you can use to configure the process of updating the operating system version (up to a fully automated silent build update scenario).
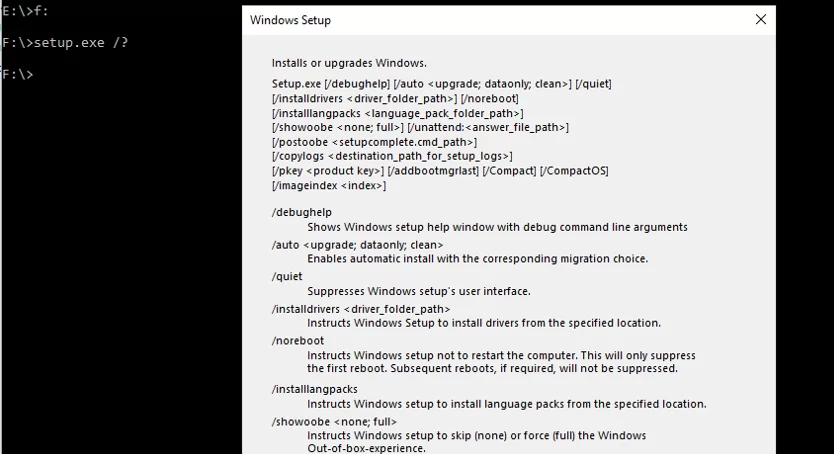
The general syntax and available command-line parameters of Setup.exe are listed below:
/1394Debug:<channel>
[BaudRate:<baudrate>]
/AddBootMgrLast
/Auto {Clean | DataOnly | Upgrade}
/BitLocker {AlwaysSuspend | TryKeepActive | ForceKeepActive}
/BusParams:<bus.device.function>
/CompactOS {Enable / Disable}
/Compat {IgnoreWarning / ScanOnly}
/CopyLogs<location>
/Debug:<port> [BaudRate:<baudrate>]
/DiagnosticPrompt {enable | disable}
/DynamicUpdate {enable | disable}
/EMSPort: {COM1 | COM2 | off} [/emsbaudrate:<baudrate>]
/InstallDrivers<location>
/InstallFrom<path>
/InstallLangPacks<location>
/m:<folder_name>
/MigNEO Disable
/MigrateDrivers {all | none}
/NetDebug:hostip=<w.x.y.z>,port=<n>,key= <q.r.s.t>[,nodhcp][,busparams=n.o.p]
/NoReboot
/PKey<product key>
/Priority Normal
/PostOOBE<location> [\setupcomplete.cmd]
/PostRollback<location> [\setuprollback.cmd] [/postrollbackcontext {system / user}]
/Quiet
/ReflectDrivers<location>
/ResizeRecoveryPartition {Enable / Disable}
/ShowOOBE {full / none}
/Telemetry {Enable / Disable}
/TempDrive <drive_letter>
/Unattend:<answer_file>
/Uninstall {enable / disable}
/USBDebug:<hostname>
/WDSDiscover
/WDSServer:<servername>
The list of available installation options can be displayed as follows:
setup.exe /?
See the documentation page for detailed information on all setup.exe command-line options and possible values: https://learn.microsoft.com/en-us/windows-hardware/manufacture/desktop/windows-setup-command-line-options?view=windows-11
How to Get the Latest Windows 11 ISO Image
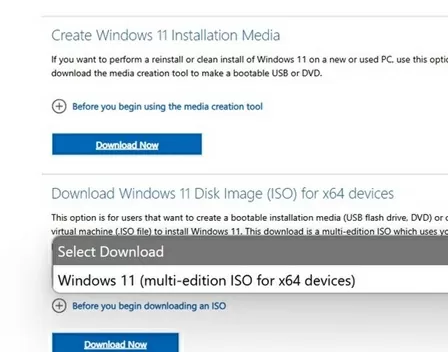
To offline update the current OS build on a computer, you’ll need to get an ISO installation image with the latest version of Windows 11 (currently Windows 11 24H2).
You can generate an installation ISO image using the official Media Creation Tool or download the latest Windows 11 multi-edition x64 ISO from the Microsoft download page (https://www.microsoft.com/en-us/software-download/windows11).
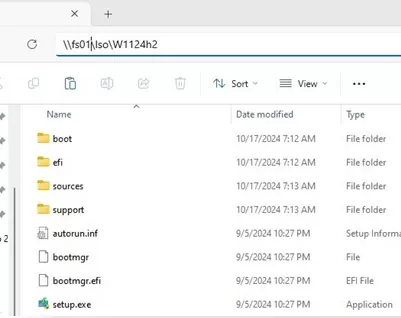
Mount the ISO image in Windows and extract the image contents to a file server folder.
Windows 11 Pre-Update Validation (Compatibility Check) with Setup.exe
Before you start the operating system update, make sure your computer is compatible with the new build of Windows 11 in the installation ISO image. Open an elevated command prompt, go to the directory with the image, and run:
cd c:\Iso\W1124h2
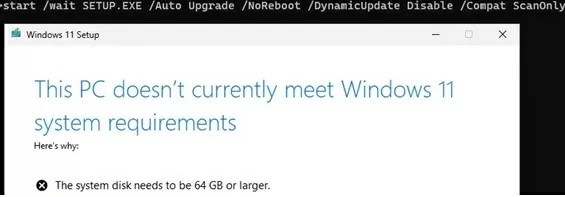
 start /wait SETUP.EXE /Auto Upgrade /NoReboot /DynamicUpdate Disable /Compat ScanOnly
The following setup.exe parameters are used:
/Auto Upgrade– automatic build update mode;/NoReboot– prevent computer reboot/DynamicUpdate Disable— do not download the latest security updates and patches from Windows Update;/Compat ScanOnly– run the compatibility check only, without performing the build update.
Windows Setup runs compatibility checks and then exits (without completing the installation) with an exit code to indicate if there are compatibility issues. In this case, Windows Setup reported that the build update is not possible because the computer does not meet the requirements due to the insufficient size of the system disk.
By adding the Quiet parameter, you can hide the graphical Windows 11 Setup Update Wizard prompts and return only the exit code.
start /wait setup.exe /Auto Upgrade /Quiet /NoReboot /DynamicUpdate Disable /Compat ScanOnly
When the pre-update scan is complete, print the exit code:
echo %errorlevel%
This variable contains the status of the compatibility check.
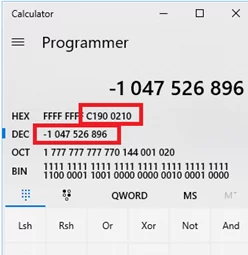
In our case, the exit code returned is -1047526912. What does this value mean? (The hexadecimal error code is given in parentheses. It can be obtained in the calculator by converting DEC to HEX.)
-1047526896(0xC1900210) – Windows Setup reports that no compatibility concerns were found-1047526912(0xC1900200) – this computer is not compatible with Windows 11 hardware requirements (Learn how to upgrade to Windows 11 on unsupported hardware)-1047526904(0xC1900208) – incompatible environment (hard block)-1047526898(0xC190020E) – insufficient free disk space-1047526908(0xC1900204) – wrong Windows edition or architecture
C:\$Windows.~BT\Sources\Panther\ contain the detailed compatibility check results and errors. These log files are created by setup.exe during the compatibility check.For more information about why you cannot update to a new Windows 11 build, use the setupdiag.exe tool.
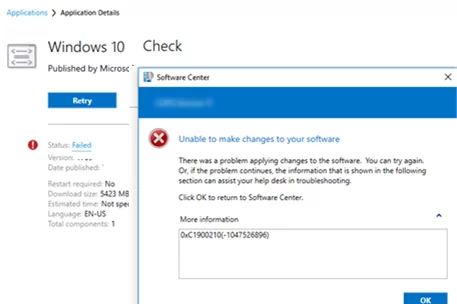
If you have SCCM, Intune or similar tool, you can centrally collect the compatibility check codes (errorlevel) from users’ computers with a simple package and advertisement:
setup.exe /Compat ScanOnly ...
Silent Windows 11 Build Update from Command-Line
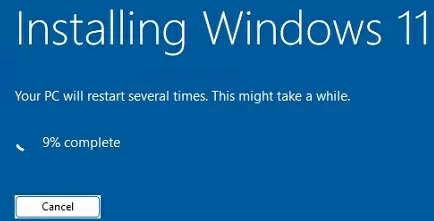
If you have not identified any compatibility issues that prevent you from updating to a new Windows build, you can use a simple script to automatically update to a newer version of the operating system in silent mode.
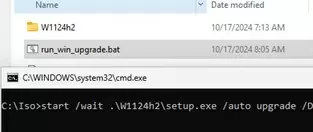
Create a batch file named run_win_upgrade.bat in the shared folder that contains the Windows 11 source installation files. For example, I add the following update command to the file:
start /wait .\W1124h2\setup.exe /auto upgrade /DynamicUpdate disable /showoobe None /Telemetry Disable /Copylogs %SystemDrive%\temp /EULA Accept /compat IgnoreWarning /NoReboot
The following build update options are used:
/Auto:Upgrade– keep all installed apps and user data./ShowOOBENone– skip the Out-of-Box Experience (OOBE) screen after a Windows update- You can add the parameter
/migratedrivers all. Can be used to force the migration of all drivers If the parameter is not specified, the installer makes decisions for each driver individually. /Copylogs %SystemDrive%\temp– write the update logs to the specified directory./Telemetry Disable– do not collect and report installation data from Windows Setup/EULA Accept– accept the license agreement/Unattend:unattend.xml– allows to specify an unattended Windows Setup answer file (not used in this example)/Quiet– perform silent (background) build update. Windows Setup graphical dialogs are not displayed to the user. Use this option for automatic build update scenarios./Priority low|normal– increase or decrease the priority of the Windows Setup process/CompactOS enable|disable– enable or disable file compression using the Compact OS feature (saves disk space)/BitLocker AlwaysSuspend— suspend BitLocker encryption during upgrade/Compat IgnoreWarning– ignore any incompatibility warnings that can be skipped./NoReboot– do not automatically restart the computer after an update is complete.
Starting with Windows 10 1607, you can specify installation options in the Setupconfig.ini file. This file must be placed in the same folder as setup.exe and contain the update options that match the command above:
[SetupConfig]
NoReboot
ShowOobe=None
Telemetry=Disable
DynamicUpdate=Disable
To run Windows 10 upgrade using the parameter file, the following command is used:
Setup.exe /ConfigFile setupconfig.ini
1 comment
You can get the following error then trying to upgrade your Windows 10 build:
You can’t keep Windows settings, personal files, and apps because your current version of Windows might be installed in a unsupported directory.
The source of the problem is that upgrade wizard could not find default Windows 10 app folders
To fix this:
– Run the regedit.exe;
– Go to HKEY_LOCAL_MACHINE\SOFTWARE\Microsoft\Windows\CurrentVersion;
– Find the registry parameter named ProgramFilesDir. It must contain the full path to the directory where the system ‘Program Files’ folder is kept. If your system is installed on drive C:, the value of this parameter must be C:\Program Files. If the system is installed on another drive, the path will be different, for example, E:\Program Files;
-Edit the value of this parameter so that it contains the full path to Program Files directory in your Windows 10 installation; ProgramFilesDir path in registry
I-n the same way, check the values of the following parameters: ProgramFilesDir(x86), ProgramFilesPath and ProgramW6432Dir. If Windows 10 is installed on the C: drive, the following paths should be listed there:ProgramFilesDir(x86) = C:\Program Files (x86)
ProgramFilesPath = C:\Program Files
ProgramW6432Dir = C:\Program Files