The Windows Recovery Environment (WinRE) is a minimal operating system based on the Windows Preinstallation Environment (WinPE) image that includes several tools to repair, reset, and diagnose Windows. If Windows fails to boot, the BCD boot loader will attempt to start the WinRE environment, which can automatically fix problems or provide access to recovery tools. In WinRE, you can fix the bootloader configuration, restore the OS from an image backup, roll back to a system restore point, run a command prompt, etc.
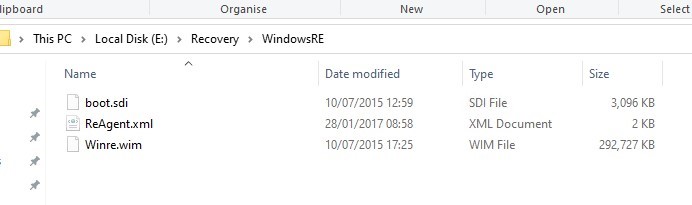
Windows RE consists of three files on a hidden Recovery Partition (in older versions of Windows, this partition was known as the System Reserved partition.)
- winre.wim – WIM image with WinPE environment that includes additional Windows recovery tools;
- boot.sdi – a System Deployment Image (SDI) file used to create an in-memory WinRE RAM disk;
- ReAgent.xml — WindowsRE configuration file.
In this article, we’ll show you how to boot Windows into the Recovery environment and how to repair the WinRE if it doesn’t work.
How to Boot Into the Windows Recovery Environment
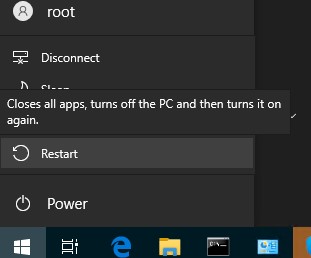
To boot your computer into the Windows Recovery, hold down Shift and click the Restart button on the Start menu.
You can also restart the computer in WinRE mode from the command prompt using the /o option of the shutdown command:
shutdown /f /r /o /t 0

There is another command to force the system to boot into the Recovery Environment the next time the computer boots:
reagentc /boottore
The recovery environment should start automatically if there are problems with the normal Windows boot process. For example, if three previous attempts to start Windows normally have failed, the computer will automatically boot into the Windows Recovery environment. This means that to boot your computer into WinRE, all you have to do is interrupt Windows boot by pressing the power button 3 times in a row.
Windows Recovery Tools in WinRE
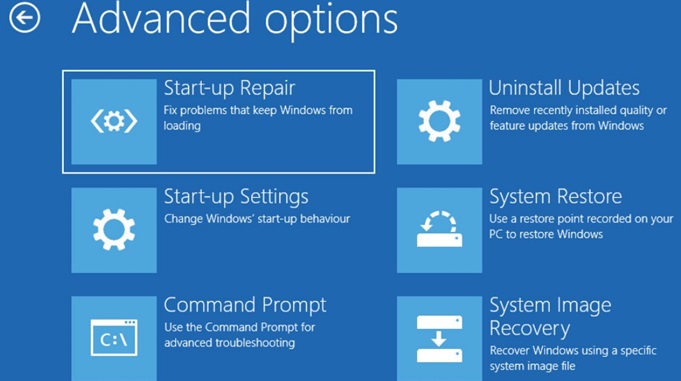
There are several tools available in the WinRE recovery environment that will allow you to fix a variety of problems with Windows:
- Reset this PC – allows you to reset your Windows to factory settings (personal data and files will be deleted);
- System Restore – allows you to restore Windows from a previously created restore point;
- System Image Recovery – full Windows recovery from a system image backup on external media;
- Automatic Repair/Start-up Repair – Windows tries to find and fix problems automatically: the wizard can repair the Windows bootloader, BCD configuration, and MBR (Master Boot Record);

- Uninstall Updates – allows to remove the recently installed updates (useful if Windows won’t boot after installing updates);
- Startup Settings – allows you to select different Windows boot scenarios: boot the computer in Safe Mode, disable driver digital signature enforcement, disable the automatic Windows restart on system failure (this is the only way to see the BSOD error code on the Windows boot screen);
- Go back to the previous version – allows you to roll back to the previous Windows version (after you have upgraded your Windows build);
- Command Prompt – open a command prompt to manually run diagnostic and repair commands;
- UEFI Firmware Settings – automatically open the computer’s UEFI settings the next time it boots;

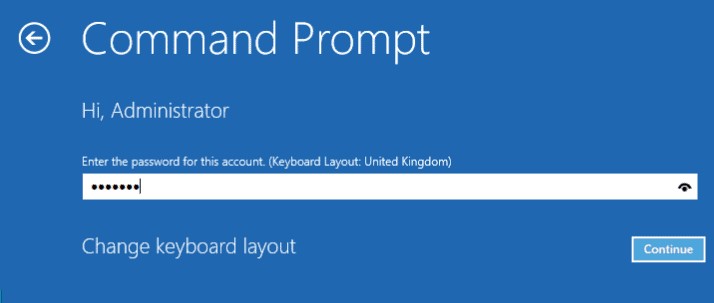
If you want to run a command prompt or any other troubleshooting tool, WinRE will ask you to enter the password for a local administrator account (the credentials are checked against the local SAM database.). However, it is possible to reset the local administrator password on Windows.
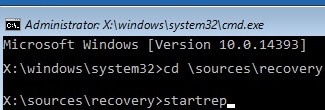
You should see a command prompt X:\Windows\System32>.
From the WinRE command prompt, you can check the disk with the chkdsk, check the Windows image with DISM and sfc.exe, run regedit, bootrec, startrep (this tool allows you to find and fix problems with the registry, drivers, and partitions), run memory diagnostics with the mdsched command, etc.
To close the WinRE command prompt and return to the boot mode selection, run the command:
exit
Could Not Find the Recovery Environment on Windows
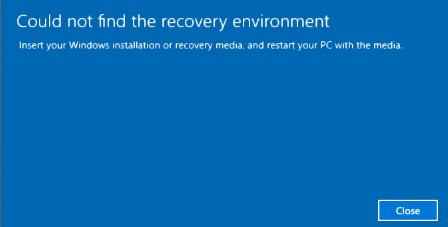
In some cases, when the recovery partition or recovery environment WIM image file is deleted/corrupted, or the ReAgent or BCD configuration is incorrectly configured, an error may occur when you try to boot into the Windows Recovery Environment:
Could not find the recovery environment.
Insert your Windows installation or recovery media, and restart your PC with the media.
The reasons why the WinRE environment does not boot on the computer can vary:
- WinRE is compliantly disabled on Windows;
- The Boot Configuration Data Store (BCD) doesn’t contain any entries for booting in recovery mode;
- The winre.wim (WinRE environment image) file is missing or moved;
- Missing or invalid WinRE configuration file (ReAgent.xml).
Next, we’ll look at the main ways to repair the WinRE environment on Windows 10 and 11.
How to Enable or Disable Windows Recovery Environment (WinRE)
You can check whether Windows Recovery Environment is enabled on your computer:
reagentc /info
The command displays the current configuration of the Windows Recovery Environment. In this example, WinRE is enabled:
Windows RE status: Enabled
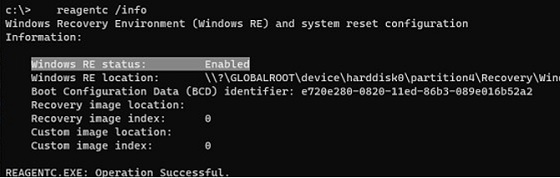
This command also returns the WinRE entry identifier in the BCD (Boot Configuration Data (BCD) identifier) and the path to the Windows RE image (location: \\?\GLOBALROOT\device\harddisk0\partition4\Recovery\WindowsRE).
To activate/disable the recovery environment in Windows, use the following commands:
reagentc /disable
 reagentc /enable
Windows Recovery Environment logs are stored in a file %WINDIR%\System32\LogFiles\Srt\SrtTrail.txt.
Repairing the Windows Recovery Environment (WinRE)
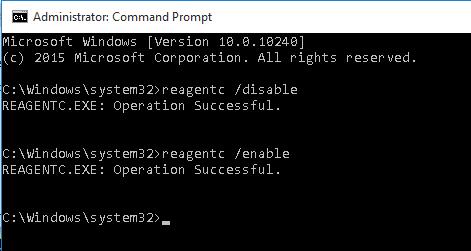
The simplest way to repair the Windows recovery environment configuration is to disable and enable WinRE:
reagentc /disable
 reagentc /enable
The reagentc should update the BCD boot loader configuration and add entries for the WinRE environment.
MBR2GPT: Failed to update ReAgent.xml, please try to manually disable and enable WinRE.
To fix this, you need to reboot and manually disable and enable WinRE.
If you receive the error “REAGENTC.EXE: Unable to update Boot Configuration Data“, first fix the problem with the Windows bootloader (instructions for UEFI and BIOS computers).
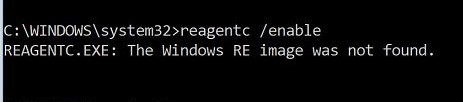
The reagent command may return an error:
REAGENTC.EXE: The Windows RE image was not found.
This usually means that the winre.wim file is missing or the System Restore partition has been deleted. If this is the case, you will need to try to repair the WinRE environment.
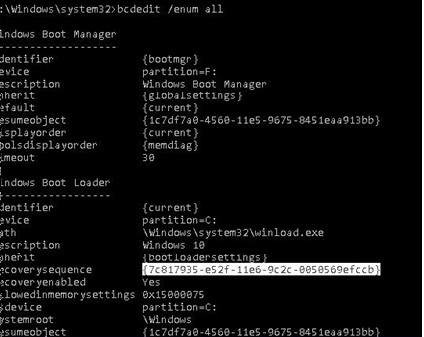
Check that the Boot Configuration Data (BCD) configuration has the correct entries to boot the WinRE environment:
bcdedit /enum all
In the list of boot options, find the Windows Boot Loader section, with identifier={current}. This entry looks like this in our example:
Windows Boot Loader
-------------------
identifier              {current}
device                  partition=C:
path                    \Windows\system32\winload.exe
description             Windows 10
locale                  en-US
inherit                 {bootloadersettings}
recoverysequence        {7c817935-e52f-11e6-9c2c-0050569efccb}
recoveryenabled         Yes
allowedinmemorysettings 0x15000075
osdevice                partition=C:
systemroot              \Windows
resumeobject            {1c7df7a0-4560-11e5-9675-8451eaa913bb}
nx                      OptIn
bootmenupolicy          Standard
Find and remember the GUID value of the recoverysequence attribute. For example, it is {7c817935-e52f-11e6-9c2c-0050569efccb}.
Then you need to find the boot configuration section with the identifier value equal to the GUID value obtained earlier and with the Windows Recovery Environment in the description field. This entry can look like this:
Windows Boot Loader
-------------------
identifier              {7c817935-e52f-11e6-9c2c-0050569efccb}
device                  ramdisk=\Device\HarddiskVolume4\WindowsRE\Winre.wim,{7c817936-e52f-11e6-9c2c-0050569efccb}
path                    \windows\system32\winload.exe
description             Windows Recovery Environment
locale                  en-US
inherit                 {bootloadersettings}
displaymessage          Recovery
osdevice                ramdisk=\Device\HarddiskVolume4\Recovery\WindowsRE\Winre.wim,{7c817936-e52f-11e6-9c2c-0050569efccb}
systemroot              \windows
nx                      OptIn
bootmenupolicy          Standard
winpe                   Yes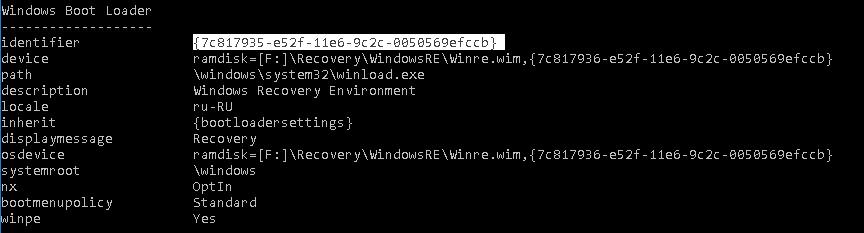
The full path to the recovery environment WIM image is given in the Device line. In this example, it is located on hard disk partition 4 (HarddiskVolume4) at the path \Recovery\WindowsRE\Winre.wim.
To forcefully set the path to the WIM image on this partition in the WinRE configuration, run the command:
REAGENTC.EXE /setreimage /path \\?\GLOBALROOT\device\harddisk\partition4\Recovery\WindowsRE
If this partition exists, you can bind this boot loader entry to boot WinRe as the recovery environment for the current OS image.
Copy the GUID of the found entry and use it in the following command:
bcdedit /set {current} recoverysequence {FoundGUID}
Make sure that the Winre.wim file is located in the specified path. It is usually stored in one of the following locations (folders are hidden)
- C:\Windows\System32\Recovery;
- On a separate, hidden Recovery Partition (or Reserved Partition);
- On the manufacturer’s OEM recovery partition.
Then check the path to the wim file that is specified in the ReAgent.xml file (which is located in the C:\Windows\System32\Recovery directory or in the Recovery directory on the recovery partition).
notepad c:\Windows\System32\Recovery\ReAgent.xml
Open the configuration file with any editor and check the value of the <WinreLocation path = attribute. If the specified path is not available (the original partition has been deleted), you can change the path to <ImageLocation path= “\Recovery\WindowsRE”), create the C:\Recovery\WindowsRE directory, and copy the Winre.wim file into it.

Then disable and re-enable WinRE:
reagentc /disable
reagentc /enable
Recreate the Recovery Environment on Windows
If you cannot find winre.wim in any of the default directories, try searching for it using a file manager or with the following command
dir /a /s c:\winre.wim
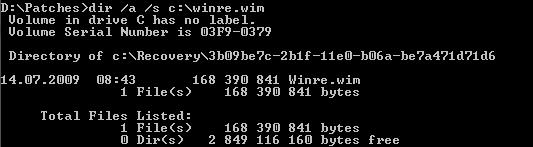
If you find the file, copy it to the default location using the commands:
attrib -h -s c:\Recovery\xxxxxxx\winre.wim
 xcopy /h c:\Recovery\xxxxxxx\winre.wim c:\Windows\System32\Recovery
If you do not have a WinRE WIM image on the disc, you can copy the file from a computer with a similar version of Windows (OS version and bitness must match), or from a Windows installation media (for example, bootable USB flash drive with Windows or ISO image).
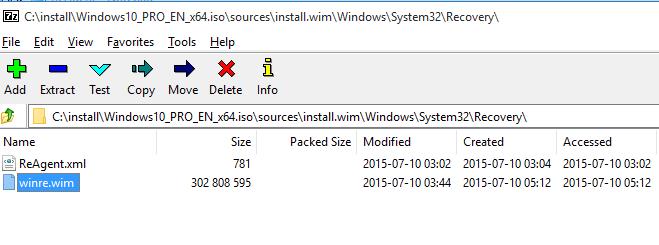
In this example, the Windows installation ISO image is used as the source of the WinRE files.
Open the ISO image using 7-Zip, select the \sources\install.wim (or install.esd) file and extract the \Windows\System32\Recovery\Winre.wim and ReAgent.xml files to C:\Windows\System32\Recovery folder. Then copy the original boot.sdi file from the \Windows\Boot\DVD folder.
Delete the ReAgent.xml file that contains the old WinRE configurations:
ren C:\Windows\System32\Recovery\ReAgent.xml ReAgent_backup.xml
Replace the path to the winre.wim file in the Recovery Agent configuration:
reagentc /setreimage /path C:\windows\system32\recovery
REAGENTC.EXE: Operation Successful.
The command will return an error if the winre.wim file does not exist in the destination directory:
REAGENTC.EXE: No valid image found in the specified path.
It remains to enable the Windows Recovery Agent with the command:
reagentc /enable
In this case, the Windows recovery environment files are stored on the system drive C:.
13 comments
Hi. Thanks for instructions.
I’ve got the error in last command:
REAGENTC.EXE: Operation failed: 3bc3
REAGENTC.EXE: An error has occurred.
Thanks a lot,
I went through this guide until this already was my fix:
bcdedit /set {current} recoverysequence {FoundGUID}
so systematic, wunderful !!!
Thank you Sooooo Much Dear………..
Why is it so %^*#@ hard to recover any Windows system??? It seems like you have to be a PC expert to navigate all the tricks, parameters, special programs and keystrokes needed just to start the process — not to mention the fact that sometimes you have to wait for hours while some file performs a check or repair without any clues as to what it’s actually doing.
For me I have recovery set up perfectly fine yet when I try to enable reagentc it spits out Error 2 and tells me I have missing BCD data which is totally false. Bcdedit /enum all shows recoveryenabled yes and all GUID’s are in place. I really dislike Windows sometimes…
I recommend also to mention that you can set up a new BCD from WinRE, if the BCD partition has gone haywire. I use:
Diskpart
/ List Disk / List Volume / Select volume / Assign Letter=z: (z: is an example)
exit Diskpart and then
BCDBOOT h:\Windows /S z: /F uefi /v /vbcd
Small drive letters need replacing with current system’s values and maybe choose MBR instead of UEFI
WinRE Was NOT able to fix My issue using the ‘repair startup’ options. I have a “corrupt or missing winload.EFI x00000f thingy error @#$%! Started right after I “attempted” to install windows 7 on the a dual boot with existing windows 10. EZ-PZ RIGHT? NOT!!!
it doesn’t like ANY of my five Win7 ISO files #$%@ I HATE WINDOWS 10!! I’m about to wipe it and just install windows 7.
SO, brand new 1 week, I just hit reset PC and hopefully that will fix the EFI problem.
Sure, I was an L1 Windows 98 tech specialist – but I did not know about the windows 10 RE feature thanks! See you can teach an old dog new tricks – here boy!
Repaired WinRe using only the REAGENTC command
REAGENTC.EXE /setreimage /path \\?\GLOBALROOT\device\harddisk3\partition5\Recovery\WindowsRE
REAGENTC.EXE /enable
/Info Before:
Informazioni di configurazione per Ambiente ripristino Windows
e la reimpostazione del sistema:
Stato Ambiente ripristino Windows: Disabled
Percorso Ambiente ripristino Windows:
Identificatore dati di configurazione di avvio (BCD): df2795b6-bc86-11eb-a4ee-f18045c7c806
Percorso immagine di ripristino:
Indice immagine di ripristino: 0
Percorso immagine personalizzata:
Indice immagine personalizzata: 0
REAGENTC.EXE: operazione riuscita.
/info After:
Informazioni di configurazione per Ambiente ripristino Windows
e la reimpostazione del sistema:
Stato Ambiente ripristino Windows: Enabled
Percorso Ambiente ripristino Windows: \\?\GLOBALROOT\device\harddisk3\partition5\Recovery\WindowsRE
Identificatore dati di configurazione di avvio (BCD): b229eba4-2206-11ec-9332-9c5c8ebce330
Percorso immagine di ripristino:
Indice immagine di ripristino: 0
Percorso immagine personalizzata:
Indice immagine personalizzata: 0
REAGENTC.EXE: operazione riuscita.
Hi, thx for infos so much.
thank-you.. my windows 10 is having issues.. I tried to use media creation tool to do an in-place installation, but that gave this error “sorry we’re having trouble determining if your pc can run windows 10” (even though the pc is ALREADY running windows 10)..
using Everything search (a program) I was able to locate the winre.wim and made the folder you mentioned myself and copied the file inside and ran your 2 recovery commands after…
After that the Recovery Drive creation seems to say “please wait” a bit longer than usual… really would be nice if they told more information to be honest..
Anyways my msconfig currently is not showing any bootable drives.. I have a UEFI drive.. so not sure how to fix the boot.. my pc boots up.. but very slow I have a feeling the boot stuff is messed up or failling hard drive
Thanks, your articles are so useful! Learning a lot from them. Invaluable well done job.
Muito boa as suas postagens, parabéns! Fui executar o comando para habilitar o WINRE e apresentou a mensagem:
reagent.exe não é possivel atualizar os dados de configuração de inicialização
meu SO é um windows 11 22h2
Your posts are very good, congratulations! I ran the command to enable WINRE and the message appeared:
reagent.exe cannot update boot configuration data
my OS is Windows 11 22h2
Make sure you run the command in an elevated command prompt.
Get the current WinRE status:
reagentc /infoCheck that the “Windows RE location” path exists and is accessible.