Built-in Windows tools allow you to backup (export) all third-party device drivers installed on your computer to a specified directory. This eliminates the need to manually search for and download drivers when you install (reinstall) Windows on a machine.
How to Export Drivers from Windows with Command Prompt
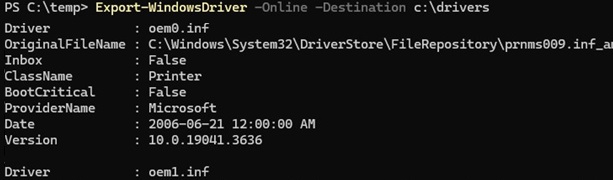
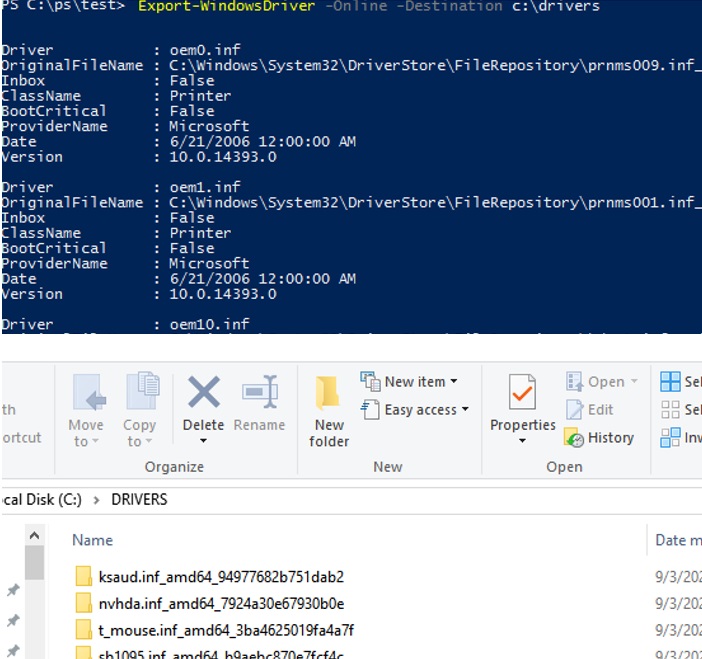
To export all third-party (non-Microsoft) drivers installed on Windows to the C:\drivers directory, open an elevated PowerShell console and run the command:
Export-WindowsDriver –Online -Destination c:\export-drivers
A similar DISM command to export the installed drivers:
dism /online /export-driver /destination:C:\Drivers
This command extracts all third-party drivers from the Windows Drivers Store. Each driver and its dependency files (SYS, DLL, EXE, etc.) are saved in their own directory, which is named according to the name of the driver’s INF file.
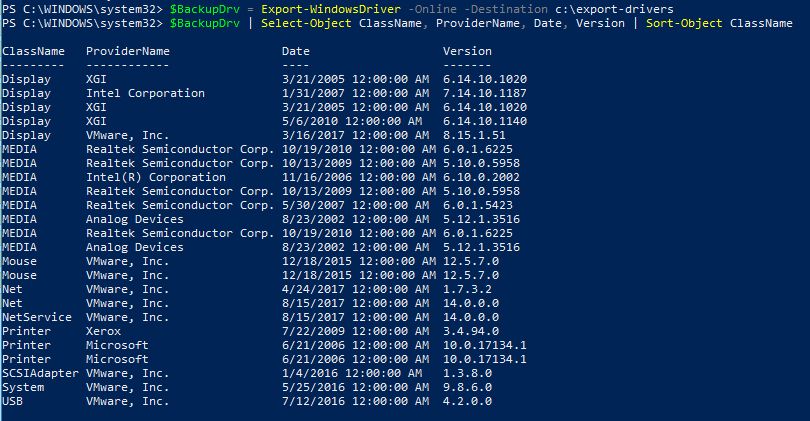
You can create a table containing the class, manufacturer, version, and date of the driver, and then export the list of drivers to a CSV file:
$BackupDrv = Export-WindowsDriver -Online -Destination c:\drivers
 $BackupDrv| Select-Object ClassName, ProviderName, Date, Version |Export-Csv c:\drivers\backup_drivers_list.txt -NoTypeInformation -Encoding UTF8
If you need to extract drivers from an offline Windows image mounted in the c:\mount\winimage directory:
Export-WindowsDriver -Path c:\mount\winimage -Destination c:\drivers
or
DISM /Image:c:\mount\winimage /Export-Driver /Destination:C:\drivers
Exporting Windows Drivers Using PNPUtil
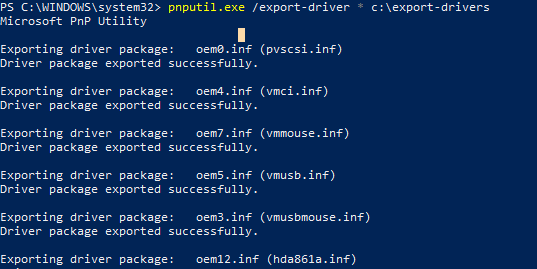
To manage drivers in Windows, you can also use the PNPUtil.exe command-line tool (available on older versions of Windows). Run the command to export all installed drivers from the Driver Store:
pnputil.exe /export-driver * c:\export-drivers
The Export-WindowsDriver and DISM commands allow you to backup all the installed drivers at once. The pnputil command allows you to export only the specific device driver.
List the installed drivers:
pnputil.exe /enum-drivers
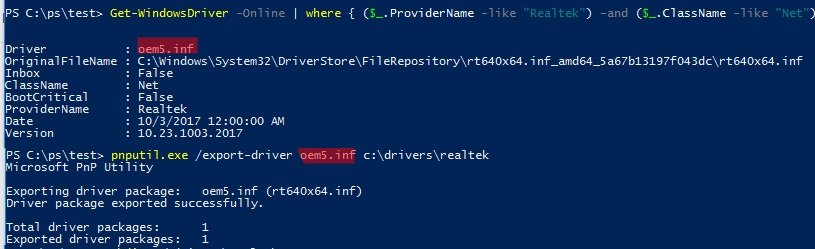
Or use PowerShell to filter drivers by type and/or vendor (in this example, we are looking for Realtek NIC drivers):
Get-WindowsDriver -Online | where { ($_.ProviderName -like "Realtek") –and ($_.ClassName -like "Net")}
Copy the INF file name of the driver you want to export and run the commands:
mkdir c:\drivers\realtek
 pnputil.exe /export-driver oem5.inf c:\drivers\realtek
pnputil, you can remove old, outdated, and unused drivers from the Windows Driver Store.Extracting a Specific Device Driver from Windows
The methods described above only support the bulk export of all the installed third-party drivers from the Driver Store at once. Now, let’s look at how to extract a driver for a specific device.
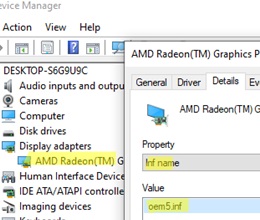
- Open the Device Manager console (
devmgmt.msc) - Find the device whose driver you want to extract. If the device is currently disconnected, enable the option to show hidden devices: View -> Show hidden devices.
- Open the device properties and go to the Details tab. Then, select the Inf Name property from the drop-down list.
- Copy the name of the INF file (
oem5.infin my example)
- Use the following command to export a driver package by its INF file:
mkdir "%userprofile%\desktop\BackupDriver"
pnputil /export-driver oem5.inf "%userprofile%\desktop\BackupDriver"

As a result, a folder containing the single driver package will be created on the desktop (the folder will contain INF files along with driver files with CAB, DLL, SYS, and CAT extensions).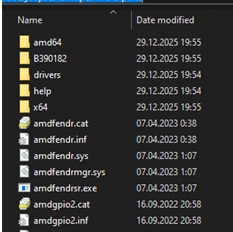
printmanagement.msc or printui /s graphical snap-ins to extract drivers for a specific printer.How to Install (Restore) Drivers from a Backup on Windows
You can use the driver backup directory to quickly reinstall device drivers or install them on a new device after a clean Windows installation.
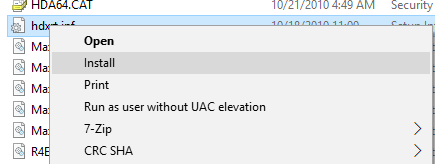
The device drivers in Windows can be installed one by one. To do this, right-click on the driver INF file and select Install.
Or you can install all the drivers from the specified folder (including subdirectories) at once:
pnputil.exe /add-driver C:\export-drivers\*.inf /subdirs /install

You can import drivers into an offline Windows image by using the Add-Driver parameter of the DISM command (in this example, we allow unsigned driver installation):
DISM /image:c:\win_image /Add-Driver /Driver:C:\export-drivers /Recurse /ForceUnsigned
6 comments
Thanks so much! I was looking for something exactly like this. Just did the backup, and next week when my new ssd arrives, I will test how it will work on the restore part. Thanks again
How can I then export that list into something else, like csv?
Use this Powershell command to export output of Export-WindowsDriver to CSV file:
$BackupDrivers | Select-Object ClassName, ProviderName, Date, Version |Export-Csv c:\temp\test.txt
Cómo hago para importarlos a Windows 10, tras haber exportado los drivers?
Awesome!
Thanks for this.
Found that recently the manufacturer pulled all the drivers for older machines, so this lets me grab them from my old 10 install.