You can use the built-in OpenSSH package in Windows to easily enable secure file transfers between the client and Windows server using the SFTP (Secure FTP) protocol. In this article, we will show how to install and configure an SFTP server on Windows 10 or Windows Server 2022/2019/2016/2012R2.
The main advantages of SFTP:
- Files and commands are transferred within a secure SSH session;
- One connection is used to send both files and commands;
- Symbolic links, interrupt/resume the transfer, file delete functions, etc. are supported;
- SFTP connection is much faster and more reliable on WAN links where FTP is slow or intermittent;
- Possibility to authenticate using SSH keys.
The win32 port of OpenSSH (Win32-OpenSSH) is built into all modern versions of Windows by default. You can use it to configure a secure SFTP server instead of using third-party products like Core FTP, FileZilla, CYGWIN, FTP Shell, IPSwitch, etc.
How to Install OpenSSH on Windows?
The OpenSSH package is a part of the operating system in modern builds of Windows 10 (starting from 1803), Windows 11, and Windows Server 2022/2019 as a Feature on Demand (like RSAT).
On these versions of Windows, you can install the OpenSSH server using PowerShell:
Add-WindowsCapability -Online -Name OpenSSH.Server*
Or using DISM:
dism /Online /Add-Capability /CapabilityName:OpenSSH.Server~~~~0.0.1.0
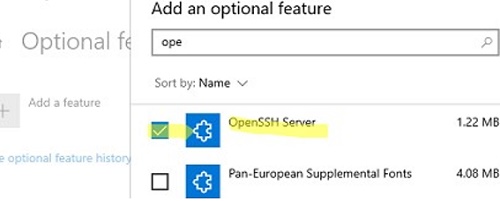
Also, you can install OpenSSH server from Windows 10 GUI (Settings -> Apps -> Optional Features -> Add a feature -> Open SSH Server -> Install).
To check if a package is installed:
Get-WindowsCapability -Online | ? Name -like 'OpenSSH*'
- OpenSSH executables are located in the directory:
c:\windows\system32\OpenSSH\; - The sshd_config configuration file is located in
C:\ProgramData\ssh(this directory is created after the first start of the sshd service); - Log file:
c:\windows\system32\OpenSSH\logs\sshd.log; - The authorized_keys file and keys are stored in a directory:
%USERPROFILE%\.ssh\.
On the previous earlier builds of Windows 10, Windows 8.1, and on Windows Server 2016/2012 R2, you will have to download Win32-OpenSSH for Windows from GitHub and install it manually (https://github.com/PowerShell/Win32-OpenSSH/releases). We need a version for Windows x64: OpenSSH-Win64.zip (4,15 MB).
- Extract the archive to the target folder: C:\OpenSSH-Win;
- Open an elevated PowerShell prompt and switch to the OpenSSH folder:
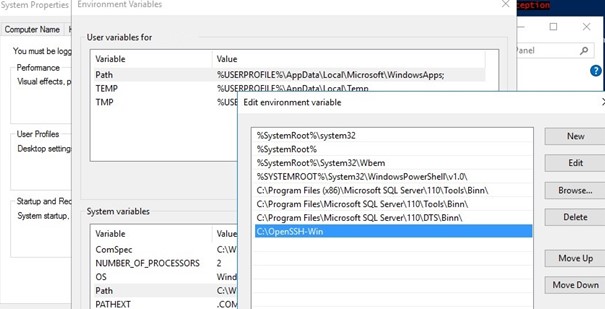
Cd C:\OpenSSH-Win - Add the path to the OpenSSH directory to the Path environment variable (System Properties -> Advanced tab -> Environment Variables -> Select and edit the Path system variable -> Add the path to the OpenSSH folder);

- Install the OpenSSH server:
.\install-sshd.ps1(a green message should appear “sshd and ssh-agent services successfully installed”);If running PowerShell scripts on your computer is blocked by your PowerShell Execution Policy, you can run the script with this command:powershell.exe -ExecutionPolicy Bypass -File install-sshd.ps1

How to Configure SFTP Server on Windows Using OpenSSH?
Now you need to configure OpenSSH on Windows for SFTP mode.
Enable autostart for the SSHD service and start it using the following PowerShell commands:
Set-Service -Name sshd -StartupType 'Automatic'
Start-Service sshd
Use the PowerShell to open TCP port 22 in the Windows Firewall for incoming SSH traffic:
New-NetFirewallRule -Protocol TCP -LocalPort 22 -Direction Inbound -Action Allow -DisplayName SSH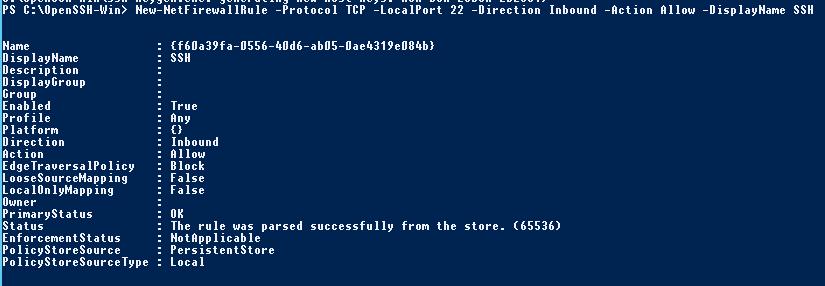
netsh advfirewall firewall add rule name='SSH Port' dir=in action=allow protocol=TCP localport=22Open the SSHD configuration file (C:\ProgramData\SSH\sshd_config) in any text editor. Find and check the value of the Subsystem sftp directive. The sftp-server.exe file should be specified here.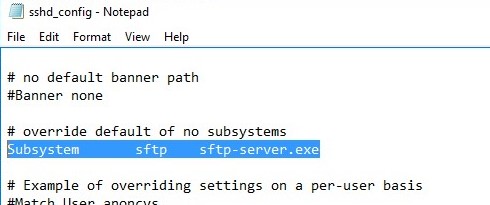
# only allow users in this domain group to connect to OpenSSH
AllowGroups corp\sftp_users
# enable password authentication (SSH keys cannot be used)
AuthenticationMethods password
#default (chrooot) directory for SFTP users  (by default, the user connects to the directory with his profile in the C:\users\username folder)
ChrootDirectory C:\SFTP
ForceCommand internal-sftp
#You can set an individual chrootdirectory for each user:
Match User abrown
ChrootDirectory c:\SFTP\abrown
ForceCommand internal-sftp
X11Forwarding no
AllowTcpForwarding no

Match User jsmith
ChrootDirectory c:\SFTP\jsmith
ForceCommand internal-sftp
X11Forwarding no
AllowTcpForwarding no
Connecting to SFTP Server Using WinSCP or PowerShell
Now you can connect to your Windows SSH server using the SFTP protocol. Next, we’ll show you how to connect to an SFTP server using the free WinSCP client, the PowerShell console, and the built-in sftp.exe tool.
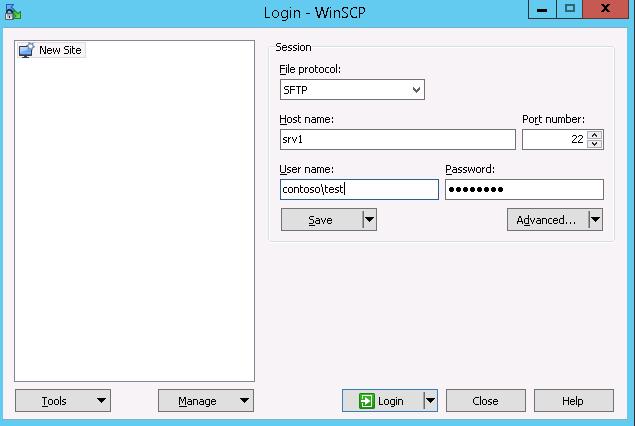
In the connection configuration window, select the SFTP as the file transfer protocol, specify the server name and the credentials of the Windows account (use the user@domain format for domain users), which is used for connection (it is also possible to configure public key authentication).
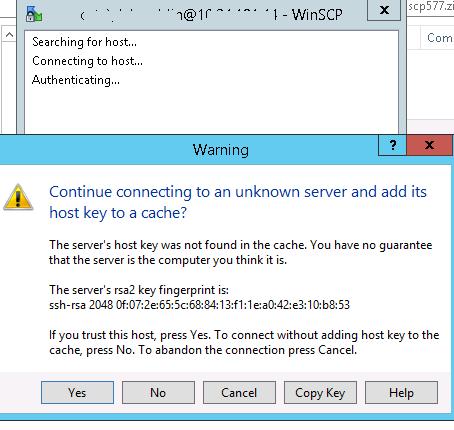
When you try to connect for the first time, the following notification of the host key not found in the local cache appears.
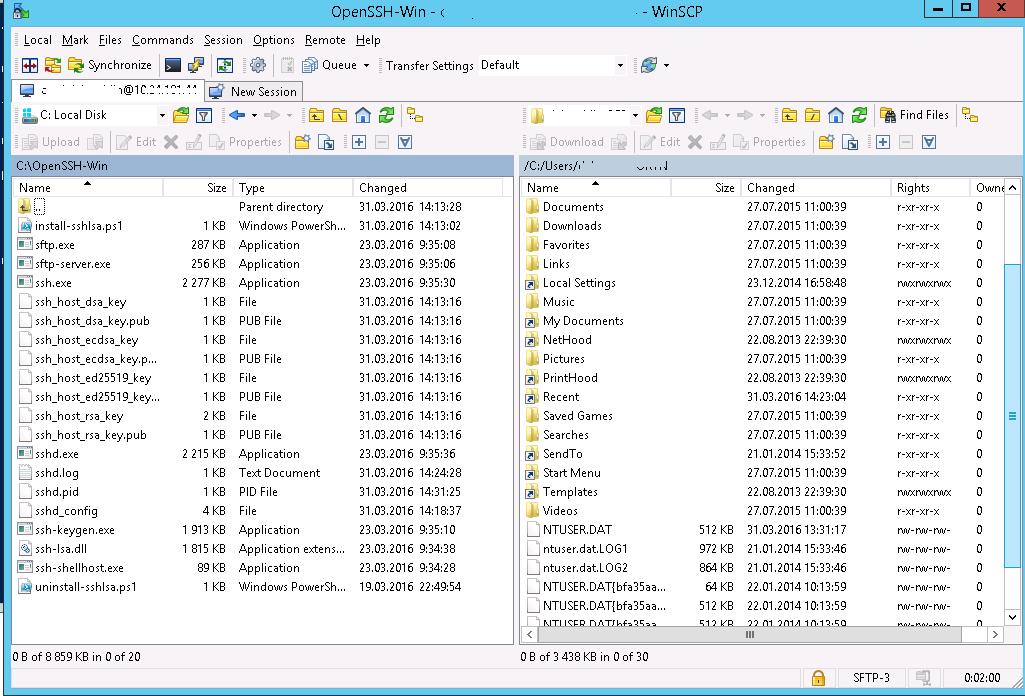
If everything is configured correctly, a client should connect to the SFTP server and display the list of files in the user’s home chroot directory (by default, it is the user’s profile directory).
Using the familiar file manager interface (like Total Commander), you can copy files between the server and the client using the secure SFTP protocol.
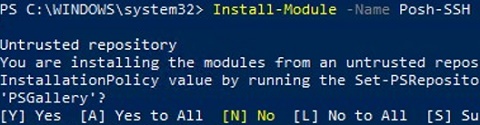
You can use the Posh-SSH module to connect to an SFTP server from PowerShell. You can download and install the module from the PowerShell Gallery or offline:
Install-Module -Name Posh-SSH
To connect to the SFTP server using a password, you need to get the username and password via Get-Credential:
$usrCreds= Get-Credential
SecretManagement to securely retrieve a saved password from a Windows Credential Manager or external vault (KeePass, HashiCorp Vault, Azure Key Vault, Bitwarden, etc.).Now you can connect to your SFTP server:
$SFTPSession = New-SFTPSession -ComputerName 192.168.3.20 -Credential $usrCreds
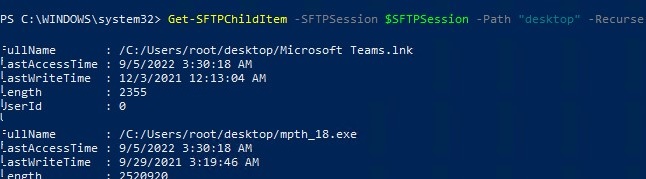
Now you can list the files in the remote directory on the SFTP server. In this example, I will get a list of files on the user’s Desktop (the user’s profile will be the root user folder/chroot in this case)
Get-SFTPChildItem -SFTPSession $SFTPSession -Path "desktop" –Recurse
Download a file from a remote SFTP server:
Get-SFTPItem -SessionId $SFTPSession.SessionId -Path "desktop/OpenVPNScript.log" -Destination c:\PS
To upload a file from your computer to a remote SFTP host:
Set-SFTPItem -SessionId $SFTPSession.SessionId -Path C:\PS\mytestfile.log -Destination "desktop"
![]()
Close the SFTP session:
Remove-SFTPSession -SFTPSession $SFTPSession
On Windows, you can use the built-in sftp.exe console command (installed with the OpenSSH client) to connect to an SFTP server.
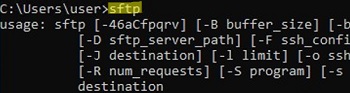
Connect to sftp server:
sftp user1@192.168.3.20
Connect using ssh private key:
sftp -i .ssh/id_rsa user1@192.168.3.20
List files in a remote directory:
pwd
Download the file from SFTP to a local directory on your computer:
get download_this_file_from_sftp.txt
Upload a file from your computer to an SFTP server:
put file_to_uplodad.txt
Close session:
exit
Configuring SFTP Public Key Authentication
You can enable SFTP key-based authentication in Windows. In this case, you can authenticate to the SFTP server without entering a password.
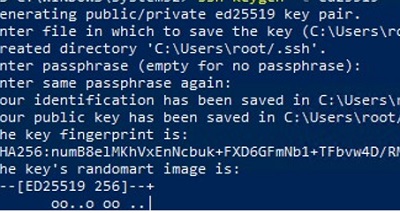
- Create SSH keys on your computer (SFTP client) for the user under which you will connect to the server:
ssh-keygen -t ed25519
- The ssh-keygen tool will generate two files id_ed25519 (private key for the client computer) and id_ed25519.pub (public key for the SFTP server);
- Now you need to add your SSH key to the Windows server (SFTP host). Copy the file id_ed25519.pub (or id_rsa.pub depending on the key type) to the .ssh directory of the user profile under which you will connect to the SFTP. Rename the file to authorized_keys (for example, the following key file is used for the user
max1:C:\Users\max1\.ssh\authorized_keys)
Now you can use the id_ed25519 file to authenticate on the SFTP server. You can set your key in the WinSCP settings (Advanced -> to SSH connection settings > Authentication page -> Private key file).
If you want to use an SSH key when connecting to SFTP from PowerShell, use the following command:
New-SFTPSession -ComputerName 192.168.3.20 -Credential remoteuser1 -KeyFile C:\Users\max1\.ssh\id_ed25519" -Verbose
27 comments
After following your instructions above I am now testing the SSH connection via Putty from Windows 7 to Windows Server 2012 where SFTP is hosted. How do I setup a general password that is not connected to a specific user?
Excellent posting. Is the bug already fixed?
Using this software, if we already have something using port 22, is it possible to set up using a different port?
uncomment and change Port in sshd_config
This worked great on my 2012 server, with one problem. When the I start up the service, the sshd log file that is created in C:\Windows\System32 grows incredibly fast with the following lines:
116 error: accept: The operation completed successfully.
Is there advanced logging going on that I can turn off, as over the course of a few hours, the size of the file had grown to over 18 G.
Check this thread:
https://github.com/PowerShell/Win32-OpenSSH/issues/155
Or simple enable NTFS compression on the file sshd.log
Help!
I’m following these instructions but on step 5:
To enable authentication using keys:
powershell.exe .\install-sshlsa.ps1
I get the following error:
.\install-sshlsa.ps1 : File C:\OpenSSH-Win\OpenSSH-Win64\install-sshlsa.ps1 cannot be loaded. The file
C:\OpenSSH-Win\OpenSSH-Win64\install-sshlsa.ps1 is not digitally signed. You cannot run this script on the current
system. For more information about running scripts and setting execution policy, see about_Execution_Policies at
http://go.microsoft.com/fwlink/?LinkID=135170.
At line:1 char:2
+ .\install-sshlsa.ps1
+ ~~~~~~~~~~~~~~~~~~~~
+ CategoryInfo : SecurityError: (:) [], PSSecurityException
+ FullyQualifiedErrorId : UnauthorizedAccess
any ideas on how to resolve this?
KEELA try this one:
powershell.exe -ExecutionPolicy Bypass -File install-sshd.ps1
SOURCE is from the WinSCP site which gives a pretty decent set of How-To’s and F.A.Q. guides in this realm. (https://winscp.net/eng/docs/guide_windows_openssh_server)
I really like this solution but is there any way to change the user home directory. Most SFTP servers you can set a path per user and set permissions on the local share.
I agree with RobF, I have few questions,
1) How do we use local account?
2) how do we set to a diff path than the User Profile path?
I was able to install sftp server using above procedure, however I am getting the below error while attempting to connect to the server from sftp
756 02:52:27:692 Accepted password for Administrator from 24.62.197.248 port 52064 ssh2
756 02:52:28:169 fatal: ERROR. Cannot create process (1314).\n
When start the server using Start-Service sshd, I am getting below errors in the log:
2592 02:28:09:656 error: Could not connect to agent “\\\\.\\pipe\\openssh-ssh-agent”: No such file or directory
2592 02:28:09:715 Server listening on :: port 22.
2592 02:28:09:716 Server listening on 0.0.0.0 port 22.
1796 02:36:13:823 Server listening on :: port 22.
1796 02:36:13:823 Server listening on 0.0.0.0 port 22.
1796 02:36:13:823 error: Couldn’t create pid file “./sshd.pid”: Permission denied
Does anyone know how to tackle with this??
Hello,
I have completed the installation process.
Please guide on how to create new users.
Can you please explain in dept “specify the server name and the credentials of the Windows account, which is used for connection. (It is also possible to configure authentication using keys.)”
Eagerly waiting for your response.
Warm Regards,
Unfortunately, the procedure fails from the start. When trying to run install-sshlsa.ps1 as administrator, I receive a string of errors stating :
.\install-sshlsa.ps1 : The term ‘.\install-sshlsa.ps1’ is not recognized as the name of a cmdlet, function, script
file, or operable program. Check the spelling of the name, or if a path was included, verify that the path is correct
and try again.
At line:1 char:1
+ .\install-sshlsa.ps1
Looking at the extraction directory, I see that the mentioned ps1 file is not resident in the extracted files. I downloaded the 32 & 64 bit versions, and install-sshlsa.ps1 are not contained in either zip. I haven’t been able to locate it in any of the files from github or from openssh directly.
Any help would be appreciated.
Where can I find this file?
This is quite strange. I think you downloaded the wrong file.
Try to download the version of OpenSSH-Win64 0.0.24.0 using this reference:
_https: //github.com/PowerShell/Win32-OpenSSH/releases/download/0.0.24.0/OpenSSH-Win64.zip
Sometimes a native Windows SFTP server might be less hassle then Linux-based OpenSSH. You can find a list of SFTP servers for Windows at https://sftp.net/servers
Hi, i configured the SFTP in our server. But requirement is, i want to publish only one folder through this SFTP. Please update me how i can enable the access to only particular folder
You can set the default SFTP directory in the sshd_config file.
Set the folder path in the ChrootDirectory option.
is it possible to configure more than one chrootdirectory in a sftp server only with openssh?
You can set a separate chrootdirectory on a per-user basis. Add the following config to the sshd_config file:
Match User dave
ChrootDirectory c:\sftp\dave
ForceCommand internal-sftp
X11Forwarding no
AllowTcpForwarding no
Match User ron
ChrootDirectory c:\sftp\ron
ForceCommand internal-sftp
X11Forwarding no
AllowTcpForwarding no
Thanks !!!
Hello,
I have setup sftp server on windows2019 with openSSH.
All my users land in a folder which is d:\sftproot.
My users are local users with different user rights in subfolders (can delete in most folders but ‘Archive’, etc) but when i connect through ssh, these rights do not exist eny longer and a user that could not delete can, one that could not create can, …
Any idea how to respect windows user access rights through ssh connection?
Can we integrate with the Active Directory if so can you share the sshd_config changes.
Is this SFTP can support the symbolic link in windows.
1.I have many share folders from different Server.
2.I want it to put a main folder SFTP under this i need to mount the share folders using symbolic link.
NOTE:- THIS IS DONE IN Windows OS
Hi All,
I have configured OpenSSH service using password authentication just fine on Windows Server 2019. Now I am trying to set Public Key authentication but I cannot see any .ssh folder in user profiles. Where is this folder?
You have to create the .ssh directory manually.
The
%USERPROFILE%\.sshfolder is created automatically if you generated a key pair using the built-in ssh-keygen toolhttps://woshub.com/using-ssh-key-based-authentication-on-windows/
On 2019 the powershell command to install openSSH is not sufficient, and i did not find it in the features.
After doing the dism command it was ok, but it took a long time.
Have SFTP set up and working. I need to lock this down for everyone except one specific user. Posts say to use these lines:
DenyUsers *
AllowUsers webteam
This does not appear to be working – webteam can access but so can others. How do I lock this down?