By default, all Windows operating systems automatically update root certificates from the Microsoft website. As part of the Microsoft Trusted Root Certificate Program, the company maintains and publishes root certificates for Windows clients and devices in its online repository. If a verified certificate in its certification chain refers to the root CA participating in this program, the system automatically downloads this root certificate from Windows Update servers and installs it in the trusted store
In this article, we explore manual and automatic methods to update the Trusted Root Certification Authorities store on isolated networks, offline computers/servers, and legacy Windows versions that are no longer supported (Windows 7, XP, Server 2003/2008).
- Managing Trusted Root Certificates in Windows 10 and 11
- How to Disable or Enable Automatic Root Certificate Updates in Windows
- How to Manually Update Root Certificates on Windows 11 or 10
- Certificate Trust List (STL) in Windows
- Update Root Certificates Automatically via GPO in an Isolated Environment
- Publishing Offline Root Certificates in Active Directory
- How to Update Trusted Root Certificates in Windows 7
- Updating Root Certificates on Windows XP Using the Rootsupd.exe
Managing Trusted Root Certificates in Windows 10 and 11
How to see the list of trusted root certificates on a Windows computer?
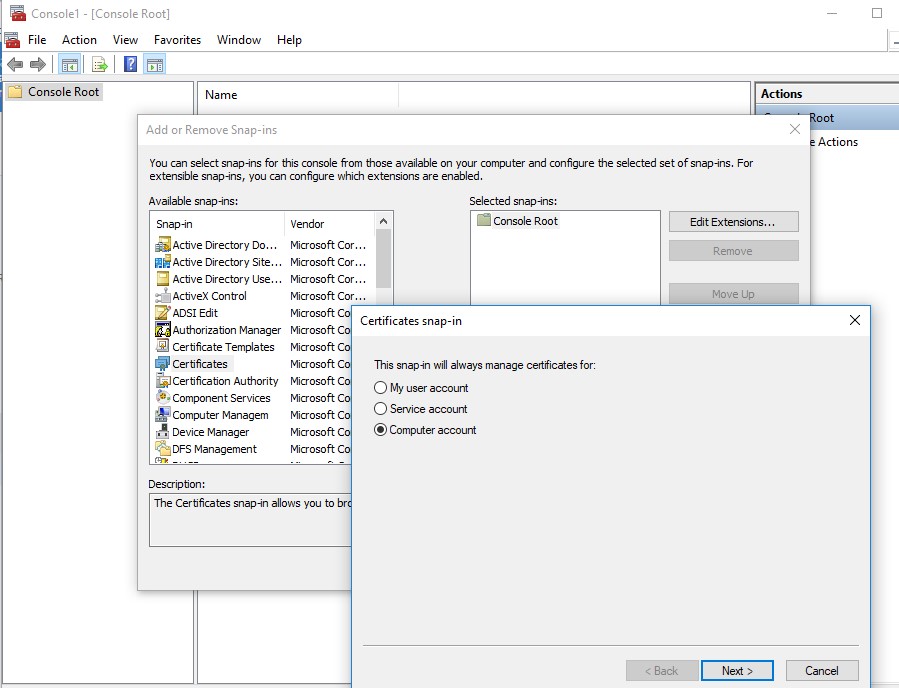
- To open the root certificate store on a Windows computer, run the
mmc.execonsole. - Select File -> Add/Remove Snap-in, select Certificates (certmgr) in the list of snap-ins -> Add;
- Select that you want to manage certificates of the local Computer account;

- Next -> OK -> OK;
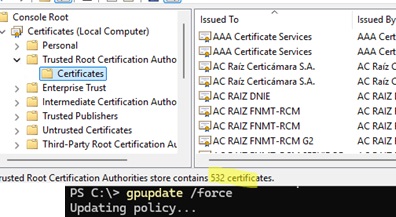
- Expand the Certificates node -> Trusted Root Certification Authorities Store. This section contains a list of the trusted root certificates installed on a computer.
In this graphical MMC console, you can view information about any certificate or remove it from the trusted ones.
You can also use PowerShell to get a list of trusted root certificates and their expiration dates.
Get-Childitem cert:\LocalMachine\root |format-list
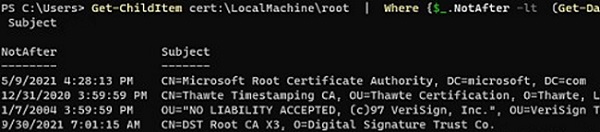
To list only expired certificates and certificates that will expire within the next 60 days:
Get-ChildItem cert:\LocalMachine\root|Where {$_.NotAfter -lt (Get-Date).AddDays(60)}|select NotAfter, Subject
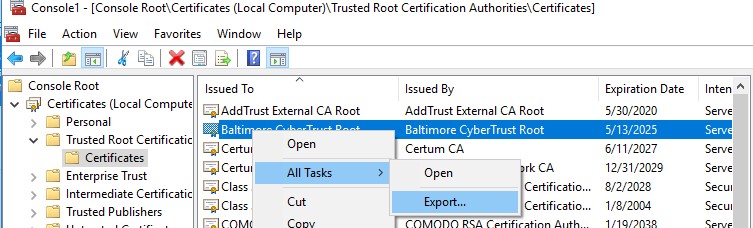
authrootstl.cab).The root certificate file can be transferred manually between Windows computers using the Export/Import options in the cert manager snap-in:
- To export any certificate to a .CER file, click on it and select All Tasks -> Export.

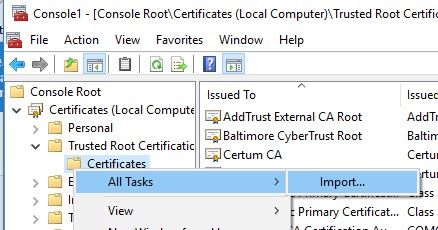
- Then you can import this certificate on another computer using the All Tasks -> Import option.

How to Disable or Enable Automatic Root Certificate Updates in Windows
As we mentioned, Windows automatically updates root certificates. You can enable or disable certificate renewal in Windows through a GPO or the registry.
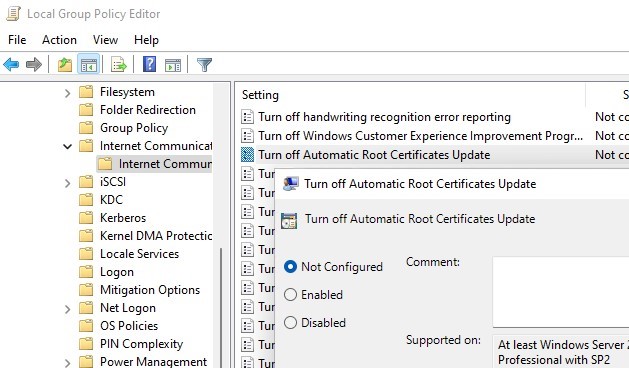
Open the Local Group Policy Editor (gpedit.msc) and go to Computer Configuration -> Administrative Templates -> System -> Internet Communication Management -> Internet Communication.
The Turn off Automatic Root Certificates Update GPO option allows you to disable automatic updating of root certificates through Windows Update. By default, this policy is not configured, and Windows always tries to automatically renew root certificates.
If this GPO option is not configured, but root certificates are not automatically renewing, verify whether the setting has been manually enabled in the registry. Check the value of the registry parameter using PowerShell:
Get-ItemProperty -Path 'HKLM:\Software\Policies\Microsoft\SystemCertificates\AuthRoot' -Name DisableRootAutoUpdate
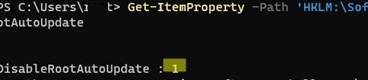
If the command returns that the value of the DisableRootAutoUpdate registry parameter is 1, this means that automatic root certificate updates are disabled on your computer. To enable it, change the parameter value to 0.
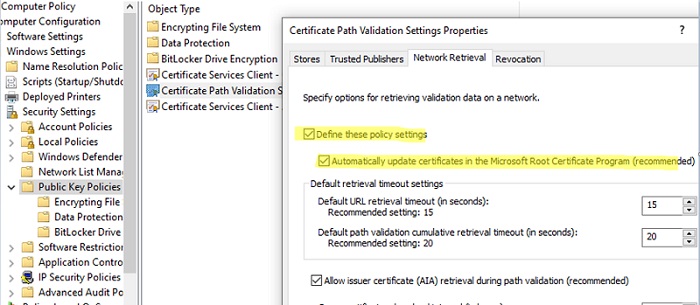
There is another GPO option that allows you to forcefully enable or disable automatic certificate updates.
- Go to Computer Configuration -> Windows Settings -> Security Settings -> Public Key Policies
- Open the Certificate Path Validation Settings option and navigate to the Network Retrieval
- The policy is not configured by default. However, if you check the box ‘Define these policy settings‘ and disable the ‘Automatically update certificates in the Microsoft Root Certificate Program (recommended)‘ option, the computer will not attempt to automatically update root certificates.

How to Manually Update Root Certificates on Windows 11 or 10
The built-in Certutil.exe CLI tool (native to Windows 10 and 11) can be used to download the latest root certificates from Windows Update and save them to an SST (Serialized Certificate Store) file.
To generate an SST file on a computer running Windows 10 or 11 and having direct access to the Internet, open an elevated command prompt and run the command:
certutil.exe -generateSSTFromWU C:\PS\roots.sst
Updated SST file.
CertUtil: -generateSSTFromWU command completed successfully.
As a result, an SST file containing the latest root certificates will appear in the target directory. Double-click to open it. This file is a container containing trusted root certificates from Microsoft.
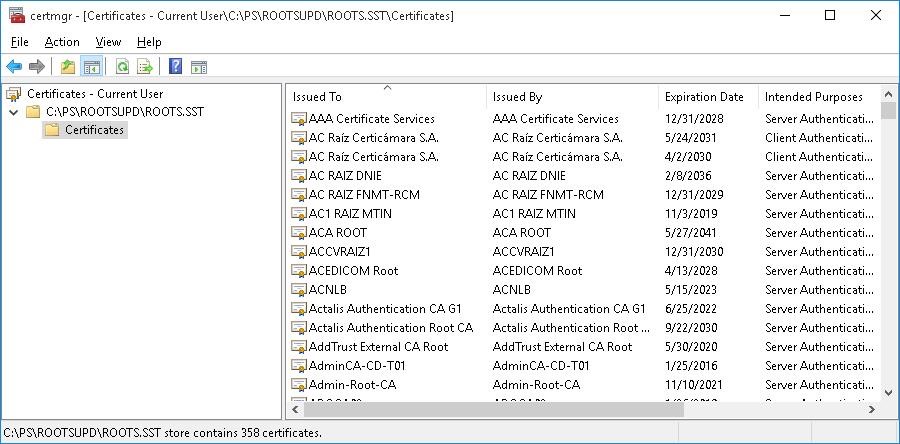
As you can see, a familiar Certificate Management snap-in opens, from which you can export any of the certificates. In my case, the list of certificates contained 358 items. Obviously, it is not rational to export the certificates and install them one by one.
certutil -syncWithWU c:\cert command can be used to generate individual root certificate files (*.CRT).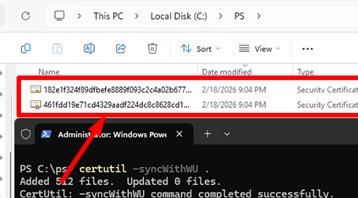
These certificates can then be deployed to Windows devices using GPO.
You can use a PowerShell script to install all certificates from the SST file and add them to the list of trusted root certificates on a computer:
$sstStore = ( Get-ChildItem -Path C:\ps\rootsupd\roots.sst )
 $sstStore | Import-Certificate -CertStoreLocation Cert:\LocalMachine\Root
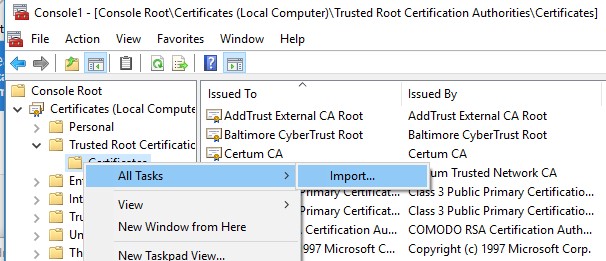
Certificates can also be imported manually using the graphical certlm.msc console:
- Select the Trusted Root Certification Authorities store -> Import

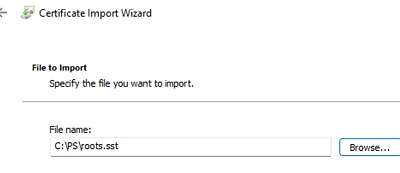
- Click Browse, then select All files or Microsoft Serialized Certificate Store from the file type filter. Select your SST file.


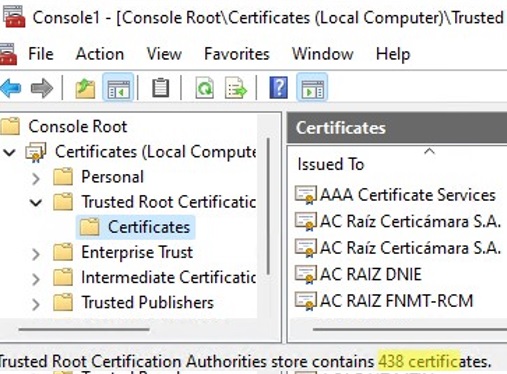
Open the certmgr.msc snap-in and make sure that all certificates have been added to the Trusted Root Certification Authorities. In my example on Windows 11, the number of root certificates increased from 34 to 500+.
Certificate Trust List (STL) in Windows
A Certificate Trust List (CTL) is simply a list of data (such as certificate hashes) that is signed by a trusted party (by Microsoft in this case). The Windows client periodically downloads from Windows Update this CTL, which stores the hashes of all trusted root CAs. Note that this CTL doesn’t contain the certificates themselves, only their hashes and attributes (for example, Friendly Name). Windows devices download a trusted certificate from the Certificate Trust List on demand.
You can download and install the CTL file manually. To do it, download the file http://ctldl.windowsupdate.com/msdownload/update/v3/static/trustedr/en/authrootstl.cab (updated twice a month). Extract the contents of the authrootstl.cab archive using any archiver (or even Windows Explorer). It contains a single authroot.stl file.

The Authroot.stl file contains a list of trusted certificate thumbprints in Certificate Trust List format.
You can install this CTL file to a Trusted Root Certificate Authority using the certutil command:
certutil -enterprise -f -v -AddStore "Root" "C:\PS\authroot.stl"

root "Trusted Root Certification Authorities"
CTL 0 added to store.
CertUtil: -addstore command completed successfully.
Or import certificates using the certificate management console (Trust Root Certification Authorities -> Certificates -> All Tasks -> Import). Specify the path to your STL file with certificate thumbprints.
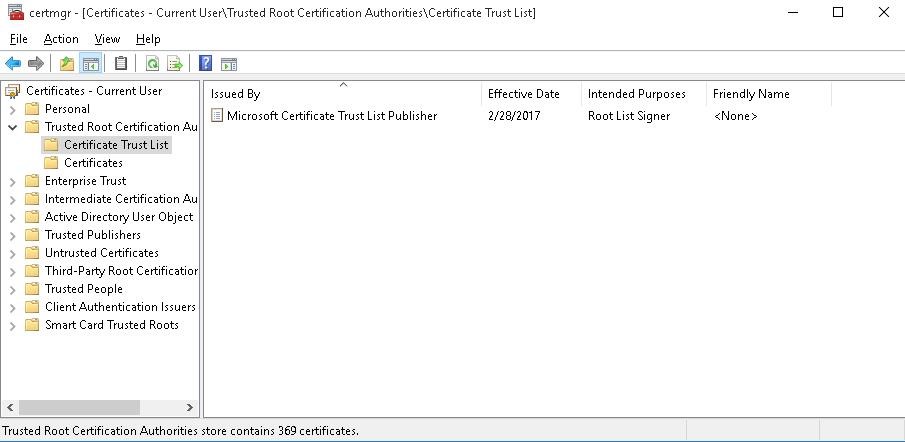
After you have run the command, a new section Certificate Trust List appears in the Trusted Root Certification Authorities container of the Certificate Manager console (certmgr.msc).
In the same way, you can download and install the list of revoked (disallowed) certificates that have been removed from the Root Certificate Program. To do it, download the disallowedcertstl.cab file (http://ctldl.windowsupdate.com/msdownload/update/v3/static/trustedr/en/disallowedcertstl.cab), extract it, and add it to the Untrusted Certificates store with the command:
certutil -enterprise -f -v -AddStore disallowed "C:\PS\disallowedcert.stl"
Update Root Certificates Automatically via GPO in an Isolated Environment
If you have the task of regularly updating root certificates in an internet-isolated Active Directory domain, there is a slightly more complicated scheme for updating local certificate stores on domain-joined computers using Group Policy. There are several ways to configure root certificate updates on user computers in disconnected Windows networks..
The first way assumes that you regularly manually download and copy a file with root certificates to your isolated network. You can download the file containing the latest Microsoft root certificates as follows:
certutil.exe –generateSSTFromWU roots.sst
The root certificates in this file can then be deployed via SCCM or a PowerShell startup script in a GPO.
$sstStore = (Get-ChildItem -Path \\fr-dc01\SYSVOL\woshub.com\rootcert\roots.sst )
 $sstStore | Import-Certificate -CertStoreLocation Cert:\LocalMachine\Root
The second way is to download the actual Microsoft root certificates using the command:
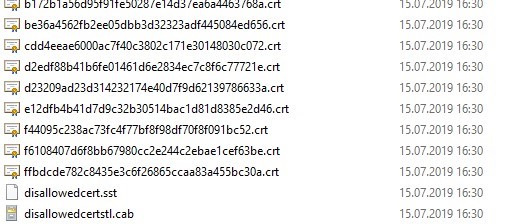
Certutil -syncWithWU -f \\fr-dc01\SYSVOL\woshub.com\rootcert\
A number of root certificate files (in CRT file format) will appear in the specified shared network folder (including files authrootstl.cab, disallowedcertstl.cab, disallowedcert.sst, thumbprint.crt).
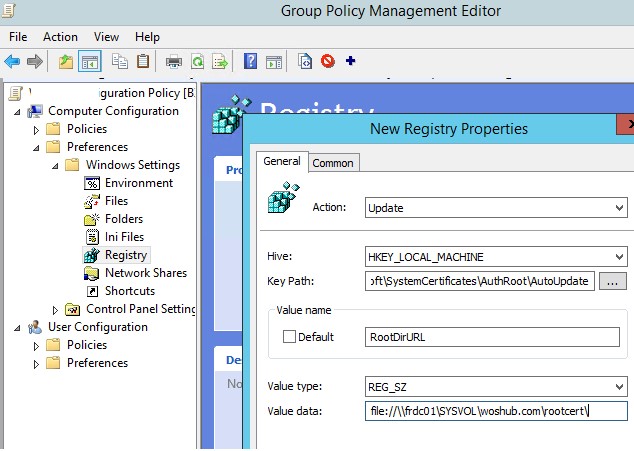
Then, configure the Group Policy Preferences to change the value of the registry parameter RootDirURL under HKLM\Software\Microsoft\SystemCertificates\AuthRoot\AutoUpdate. This parameter should point to the shared network folder from which your Windows computers will receive new root certificates. Open the domain GPMC.msc console, create a new GPO, and switch to the edit policy mode. Expand the section Computer Configuration -> Preferences -> Windows Settings -> Registry. Create a new registry property with the following settings:
- Action:
Update - Hive:
HKLM - Key path:
Software\Microsoft\SystemCertificates\AuthRoot\AutoUpdate - Value name:
RootDirURL - Type:
REG_SZ - Value data:
file://\\fr-dc01\SYSVOL\woshub.com\rootcert\
Link the GPO to the OU containing computer objects. After updating GPO settings on the client, check for new root certificates in the certstore.
Now, when accessing a site or launching an application with an unknown certificate, Windows verifies its chain of trust by retrieving CTL lists from the specified local folder via RootDirURL and automatically installs the corresponding root certificate into the trusted store
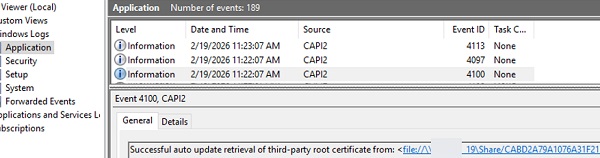
In my example, the successful update of the root certificate from the local store can be confirmed by the presence of the following events from the CAPI2 source in the Application log of the Event Viewer:
Event ID: 4100
Successful auto update retrieval of third-party root certificate from: <file://\\fr-dc01\SYSVOL\woshub.com\rootcert/CABD2A79A1076A31F21D253635CB039D4329A5E8.crt>
Event ID: 4097
Successful auto update of third-party root certificate: Subject: <CN=ISRG Root X1, O=Internet Security Research Group, C=US> Sha1 thumbprint: <CABD2A79A1076A31F21D253635CB039D4329A5E8>.
Use the command below to find out when the root certificate store was last synchronized:
certutil -verifyctl AuthRoot | findstr /i "lastsynctime"
![]()
Publishing Offline Root Certificates in Active Directory
There’s another way to publish root certificates in Active Directory. The approach involves adding root certificates to the Active Directory configuration partition, from which all domain computers automatically retrieve and install them (Deploying Active Directory Certificate Services PKI is not required).
To publish one root certificate in AD, use the command:
certutil -f -dspublish myRootCA.crl
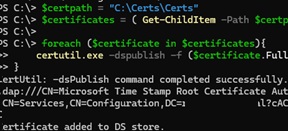
To install all certificates from a specified folder into AD at once, you need to use a PowerShell script.
Generate a list of the latest root certificates (*.crt files) and save them to the directory.
$certpath = "C:\Certs\"
 Certutil -syncWithWU $certpath
Deploy all certificates from the directory to AD:
$certificates = ( Get-ChildItem -Path $certpath -Filter "*.crt" )
 foreach ($certificate in $certificates){
 certutil.exe -dspublish -f ($certificate.FullName) RootCA
 }
Open the ADSIEdit.msc console and verify that the certificates have been added to two AD configuration partitions: AIA and Certification Authorities in CN=Public Key Services,CN=Services,CN=Configuration,DC=woshub,DC=com
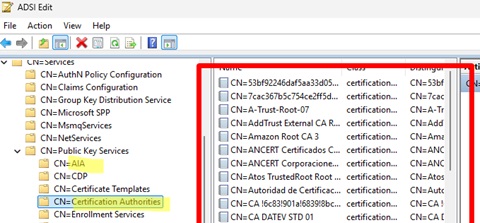
After updating the Group Policy on a domain computer, all AD-published certificates are automatically installed into its root certificate store.
You don’t even need to configure a GPO to deploy certificates. However, this method has significant drawbacks: it increases the AD database size (storing 500+ certificates), forcibly installs certificates on all domain computers (unlike on-demand installation via GPO and RootDirURL), and makes it more difficult to manage large numbers of published root certificates.
Therefore, this method should only be used in rare cases, such as when you need to publish or update one or two critical root certificates on computers.
How to Update Trusted Root Certificates in Windows 7
Even though support for Windows 7 has ended, many users and companies still use it.
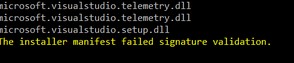
After installing a clean copy of Windows 7, you may find that many modern programs and tools do not work on it as they are signed with new certificates. There have been particular complaints that the .NET Framework 4.8 or the Microsoft Visual Studio (VS_Community.exe) cannot be installed on Windows 7 SP1 x64 unless the root certificates are updated.
The installer manifest failed signature validation.
Or
NET Framework has not been installed because a certificate chain could not be built to a trusted root authority.
To update the root certificates in Windows 7, you must first download and install the MSU update KB2813430 (https://support.microsoft.com/en-us/topic/an-update-is-available-that-enables-administrators-to-update-trusted-and-disallowed-ctls-in-disconnected-environments-in-windows-0c51c702-fdcc-f6be-7089-4585fad729d6)
After that, you can use certutil to generate an SST file with root certificates (on the current or another computer):
certutil.exe -generateSSTFromWU c:\ps\roots.sst
Then import the certificates into the Trusted Root Store.
Run MMC -> add snap-in -> certificates -> computer account > local computer. Right click Trusted Root Certification Authority, All Tasks -> Import, find your SST file (in the file type select Microsoft Serialized Certificate Store — *.sst) -> Open -> Place all certificates in the following store -> Trusted Root Certification Authorities.
Updating Root Certificates on Windows XP Using the Rootsupd.exe
The rootsupd.exe tool can be used to update the root certificates on a computer running Windows XP.
- The rootupd.exe download link was removed from the Microsoft website, but it can still be downloaded from the Kaspersky website (http://media.kaspersky.com/utilities/CorporateUtilities/rootsupd.zip).
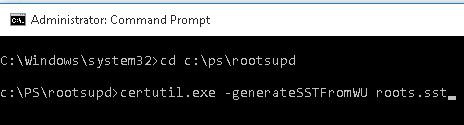
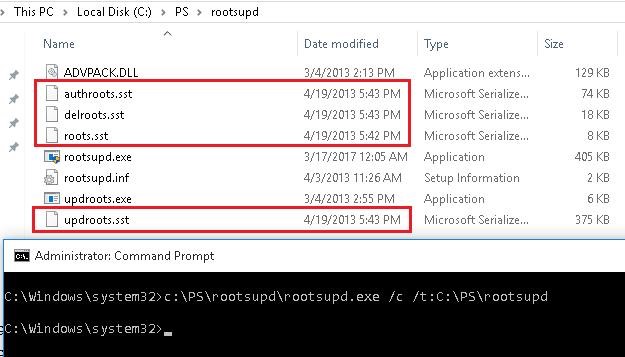
- Extract the contents of rootsupd.exe into a local directory using the command:
rootsupd.exe /c /t: C:\PS\rootsupd
- The utility contains outdated SST root certificate files (evident from their creation date of April 4, 2013, nearly a year before the official end of support for Windows XP).
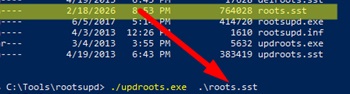
- Therefore, you need to replace the roots.sst file with a newer version of the root certificate file generated on any Windows 11 computer with the command:
certutil.exe -generateSSTFromWU roots.sst - After this, to install new root certificates from the new SST file in XP, use the command:
updroots.exe roots.sst
This article covers several methods for updating trusted root certificates on internet-isolated Windows networks, including manual updates and centralized management via domain Group Policy.
46 comments
thanks for the very good article. And further what about using Powershell Import/Export-certificate ?
PoSh PKI module is available only since Windows Server 2012/ Win 8. To export all certs from trusted root certificate authorities on Windows machine on Windows 2008 r2/ Win 7 to the files you can use this script:
$type = [System.Security.Cryptography.X509Certificates.X509ContentType]::Cert
$certs = get-childitem -path cert:\LocalMachine\AuthRoot
foreach($cert in $certs)
{
$hsh = $cert.GetCertHashString()
$path = “c:\certs\” + $hsh + “.der”
[System.IO.File]::WriteAllBytes($path, $cert.export($type) )
}
1. Install CTL does not exist as Context menu in Windows 10
2. certutil -addstore -f root authroot.stl
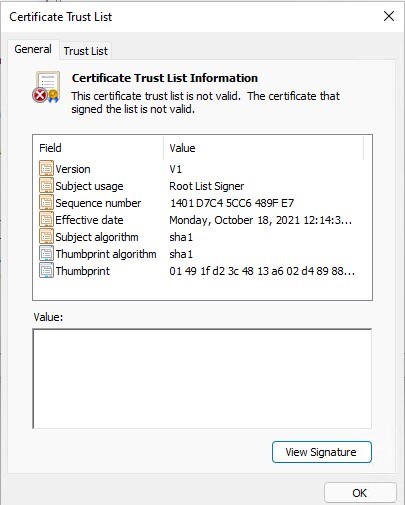
works OK, but then Microsoft Certificate Trust List Publisher shows error: “This certificate trust list is not valid. The certificate that signed the list is not valid
Apparently in your case, it’s easiest way to download the certificates from WU using the command:
certutil.exe -generateSSTFromWU roots.sst
Then you can import them using Import-Certificate cmdlet:
$sst = ( Get-ChildItem -Path C:\certs\roots.sst )
$sst| Import-Certificate -CertStoreLocation Cert:\LocalMachine\Root
Absolutely, that is exactly the way I done it
Still would like to understand where the error comes from & why…
Thank you! Reading how to do this on the MS site was pure obfuscation. Your method is so simple and 1/30th the size of MS completly useless article on doing the same.
Why would you post a url for root certificates from Microsoft over standard insecure http?
I was having trouble with this one as well until I realized that if you’re downloading certificates you might not get the HTTPS to establish without the certificates you need to download…
Would be nice if it was available via both HTTP and HTTPS though. My end user devices are behind a firewall that disallows HTTP but they can get to any HTTPS.
A lot of it is the redistribution licenses are tougher to get through than just hosting a verified file by https. But yeah, doesn’t make tons of sense.
Do you need disallowedcert.sst if you have disallowedcert.stl? Are they the same?
Sst and stl are two different file formats for transferring root certificates between computers. It is better to use disallowedcert.sst.
What makes SST better?
THREE things:
FIRST, on my Win 10 Pro 64-bit machine (version 1803), the ONLY .sst file I have is
Connected Devices Platform certificates.sst
in
C:\Users\[My Name]\AppData\Local\ConnectedDevicesPlatform
►Is that correct?
SECOND, after running certmgr.msc, I see a few lists of certificates, in which the two certificates that are issue BY my own computer TO my own computer are actually expired. What are they?
THIRD, which is how I found this excellent website, I am getting two to four AUDIT FAILURES on every reboot, Event 5061, for Cryptographic Operation, and they sometimes mention the same Microsoft Connected Devices Platform.
I have posted about these AUDIT FAILURES in detail at the following thread in technet – please go there to suggest answers:
https://social.technet.microsoft.com/Forums/windows/en-US/48425e2a-54c2-480d-8957-383415be2381/audit-failures-every-reboot-event-5061-cryptographic-operation-win-10-pro-64bit?forum=win10itprosetup
I have also received a possibly good hint at this link ABOUT CERTIFICATES POSSIBLY BEING RELATED but need more info:
https://social.technet.microsoft.com/Forums/windows/en-US/3e88df37-d718-4b1f-ac90-e06b597c0359/event-5061-audit-failures-every-reboot-cryptography-win-10-pro-64bit?forum=win10itprogeneral
WOuld appreciate your help – thanks.
Steam wasn’t working properly for me. Impossible to connect to the friend list. I had to run it in no-browser mode.
Then a video game (BDO) was failing at start: the DRM system couldn’t connect to endpoint.
Then another game was failing with no reason. No meaningful error message, no log.
And then I’ve check my certificates, noticed some were outdated, and found your post about how to do it. Guess what? Everything is fixed now. From Steam itself to other application issues. Thanks a lot!
This is very helpful, but it’s also a bit confusing about the authroot.stl file.
That isn’t a file that **contains** certificates – it really is just a **list** of certificates.
I’ve wasted days of testing based on that misunderstanding.
You need to get the actual certificates onto your device, which there seem to be many ways of accomplishing (and none that I’ve settled on yet.)
Anyhow, thanks for the info, and you might want to add some clarity around that.
Warning quote
“The rootsupd.exe (and the updroots.exe inside of it) are outdated and should not be used. In fact, they break the “Microsoft Root Certificate Authority” root certificate on modern systems (at least Windows 10 1803+). – Koraktor Jan 9 at 12:34″
Src: https://serverfault.com/questions/760874/get-the-latest-ctl-or-list-of-trusted-root-certificates#
I’ve used the “`certutil.exe -generateSSTFromWU d:\roots.sst“` command to get what I was thinking to be an updated list of ROOT CA certificates, but when I’ve loaded the file and checked I can still see some expired ROOT CAs … should it be that way ? is it safe to keep them ? is it safe to delete them ?
I’ve windows 7 but when i use the -generateSSTFromWU command, the certutil utility return an error and say that the command doesn’t exist. Guess is valied only for win 10.
Can you please add the correct command to retrieve the certificates but for windows 7 x64?
Downloading the cab with the etl certificates and add them manually have no effect, my system said that the operation was succesfull executed but if i open the mmc console i still have the old one and nothing is added.
Thank you.
ps: Without updated certificates i can’t install net frameworks and some utilities that use SSL don’t work properly (like gpu-z that return a certificate error).
Update:
was able to update certificates, importing them individually in mmc, however i got several capi2 errors doing so, to solve this i execute the “certutil -urlcache * delete” to clean the cache.
However, is very annoying that every now and then i’m force to manually update the certificates, some tools never told me why they have issue working, like the .net Framework, the installation fail and only after several hours later i realized that issue was certificate not up to date.
Indeed is better that when a tool or website need such certificates to work properly the system update aumatically itself, but windows update don’t work and i also disabled it since i do not want ms crap telemetry into my clean system, so maybe this is the root cause and work as intended, aka force the users to abandon win 7 for win 10.
I wont do it since i have many tools and hardware pre 2000 that works only on XP and win 7 since they are old, this is a very bad move from MS, and my system is 100% genuine with a oem valid key.
If only Linux was more mainstream and more compatible, and more software and hardware manufacturer support it i could finally abandon this damn mess.
You guys are awesome ©
Actually, I had a problem which I even asked for both Microsoft Community and Support Center, I just wanted to know WHY the KB4014984 update couldn’t install on Vista Business (after 3 no-problem years). There was 0x800B0109 error (lack of trusted certificate), and I really didn’t know what to do until I followed your advice and downloaded [that magic utility] from Kaspersky store.
Now that’s fine, the only thing is that I did Run/MMC/Snap-in…etc. and had a look at the amount of trusted certificates which I have now. It is…I suppose 5 times bigger, and there are namigs like Big Daddy or Santa Luis Cruz…they can be hardly related to what we used to call Windows area 🙂
So I’m really glad that with your help the 0x800B0109 problem has been overcome, and hope that increased amount of certificates will go only right. Thank you. Peter.
Hi,
If you want, you can check all certificates in your trusted cert ctore using the Sigcheck tool. See the article https://woshub.com/how-to-check-trusted-root-certification-authorities-for-suspicious-certs/
Update 2:
Finally updated correctly the certificates under Win 7 x64 and i was able to flawlessy install Netframework 4.8 and have some tools that use SSL to work properly. Now i understand the issues i had i do not need to import registry files from another pc.
In a fresh Win 7 installation, if you do not allow windows auto updates, like i do since i do not want to install tons of useless and bugged crap , you have to indeed update manually some of your system files since they are old and miss some functions.
The certutil.exe tool need to be upgraded to use new commands, to do so you have to install the KB2813430 update:
https://support.microsoft.com/en-us/help/2813430/an-update-is-available-that-enables-administrators-to-update-trusted-a
Once you do this your certutil.exe file is updated and you can use the -GenerateSSTFromWU command.
Then go to the dos window (cmd) and type command “certutil.exe -generateSSTFromWU x:\roots.sst” where x is the drive where you want the file sst to be created.
The operation need 1-2 minutes, after the file is created load the MMC console.
MMC -> add snap-in -> certificates -> computer account > local computer.
Then expand the +Trusted root certifaction authory folder, select certificates, right click all task -> import, choose the SST file create before, press the browse button and chose the Trusted root certification authority from the list. Finish.
Then you have succesfully update the certificates.
For some reasons, probably i miss some other updated files, the file STL extracted from authrootstl.cab refuse to install directly, so this method is the only alternative possible along export/import certificates from others up to date pc with already updated certificates.
On a side note, you do not need to install this KB update in all your pc, once you have created the file.SST, you can do the same procedure in all your pc without the update, since the KB just update certutill.exe file and add auto certificates updates in the registry (that i disabled since i prefer to manually update the certificates).
Once you have updated the certificates you do not need to update them again since the expiration update is something like 2038 or more. Just keep the file SST you created in a safe place and load it if you need to install a fresh win 7 installation again in future.
That’s all.
thank you man you helped me a lot
miki i was having certificates problems for a year only your solution that worked thank you MIKI for shearing
Congrats MIKI, your solution has worked for many people who want to install different software products.
I wrote down your guidelines in a forum post and it has gotten on the first page in google search :
https://forum.planetchili.net/viewtopic.php?f=3&t=5738
But dude, why are you encouraging people to install some random file for their root certificates? No one should trust that! Explain why it is safe?
Wonderful, very helpful. Thanks a lot.
Pretty, pretty GOOD! (pardons to Larry David)
Wonderful. Perfect
This was HUGE. Had issues with Windows Update and some apps not working for a couple of years now, and it was due to out of date certs– this fixed me right up…
Many thanks! Downloading http://ctldl.windowsupdate.com/msdownload/update/v3/static/trustedr/en/authrootstl.cab and installing helped on Win7 right after reboot.
Thank you very much !!!
Good information here, thanks. One of the things I find a bit odd is that when Windows (10 in my case) has internet connection and can access the MS updates URL(s) that provide the updated trusted root info, that is seems to download/refresh only certain root certificates. When you run the “certutil.exe -generateSSTFromWU x:\roots.sst” command and then import that result you end up with many many more trusted root entries.. Is this because the Windows OS will install/update the trusted-root-cert on demand when you as a user (or the system-account in case of some app/service) access an https-website and that https-certificate issuer root cert is not in your store but trusted by MS that some trusted-installer process then only installs that particular trusted-root-cert? I couldn’t find any useful information about this exact process.
We have systems in networks that do not have internet access and thus require an automated approach to update the trusted-roots to be able to connect to some internal webservers with an external issued certificate. Importing that full roots.sst does work of course.
Should the “second way” under the “Updating Trusted Root Certificates via GPO in an Isolated Environment” section actually import the certificates into the Trusted Root Certification Authorities folder? I’ve used the second way and see the registry keys getting dropped on the client (and some of the others created like DisallowedCertEncodedCtl, DisallowedCertLastSyncTime and PinRulesEncodedCtl and PinRulesLastSyncTime), but no new certificates show up in the certlm.mmc. I verified the computer in question can access the file share containing the Certificates by manually importing one from the network share I created for this GPO. This “second way” is actually fixing a problem I had with apps not downloading from the Microsoft Store because of the download attempt the Store makes for the the disallowedcertstl.cab file before the download begins (our network team is blocking the msdownload site). So the client is obviously finding the dissallowedcertstl.cab file on my RootDirURL network share, so my only question is why does it not import the root certificates with this process?
I’m having the same issue as well. I have a disconnected domain and although I have a mechanism to get the certs into a directory in my SYSVOL folder on the DCs weekly (which is working fine), the domain members aren’t importing them automatically. Registry entries are present on the domain members (RootDirURL and TUrn of Automatic Root Certificates Update is Disabled).
It would be nice to hear from someone who has it working to get details and clue (logs file entries, etc.) about how to check if it is working and what the behavior is supposed to be. What happens if you trigger WU client manually on domain client?
Same issue here, all set up as documented, Registry keys are being set by GPO but no Trusted or Disallowed Certs are appearing in the local Cert Manager on any devices.
Did anybody get this working ?
Facing the same exact issue here.
Regarding Testing/Validating the updates process: As of 11th August 2022, there are 20 Certs in the Disallowed.sst. They are listed by Thumbprint/Fingerprint (SHA1?) only.
Has anyone got a cross reference point?
Presumably there are non-Microsoft Root CA such as Symantec/Verisign compromised CAs that DigiCert has worked with -Mozilla-Firefox/Microsoft to revoke through their programs.
For example, at the top of the list is: “25 fb 7a 5d 86 f7 2f 5e 67 28 8f 79 73 05 fe 94”
Unless we can come up with a way to validate that Compromised/Publicly Revoked certificates are contained in the Disallowed cert list, and verify Code Signing Cert and/or Root CA Validity validation is denied, then I suppose technically (not cynically) it is more secure to have the default/empty root CA as opposed to potentially trusting RootCA that has a compromised Sub/Intermediate signing CA
I meant to add, “For Air gapped/offline environments, In the absence of access to OCSP and CRL distribution points, then it is more secure to… ^^^”
One option that was not described here is to use a GPO to distribute Root CA certs without using the RootDirURL and Auto Update.
I did not test but it sounds to be as if then the existing root CA certs would be gone as everything is pointing to the file share. If you then have prev installed root CA certs that are not in the new file share location you could lose those.
Hence, the other option would be to use the Windows Settings->public key settings to distribute root CA certs.
how to stop Windows from downloading a list of trusted roots during the TLS handshake and force trust of the server certificate presented by RDS. These RDS hosts do not have any access to the public internet, so the download times out
new-item hklm:\SOFTWARE\Policies\Microsoft\SystemCertificates\AuthRoot -ItemType Container
set-itemproperty HKLM:\SOFTWARE\Policies\Microsoft\SystemCertificates\AuthRoot -Name DisableRootAutoUpdate -Value 1
Certutil was part of Win2K server, Win2K3 server, and 2K3 admin tools for WinXP Pro. Dunno about NT 3.5. For some reason, 2K3 admin tool pack is still available for download from MS, (and although the admin pack shouldn’t install on XP home, certutil can be extracted from it). New certutil options may be missing
Thanks for the informative post.
Is there a non-manual approach in case we have created our own CA as root CA and then want to update the TLS certificates of devices in an isolated network?
Do you have an isolated network with on-premises Active Directory domain?
The root CA can be published in AD with the command:
certutil –dspublish -f rootca.cer RootCAThis will deploy the root certificate to the Trusted Root store on all domain clients via autoenrollment.
Publish intermediate CA certificates in AD:
certutil –dspublish -f ca.cer SubCA