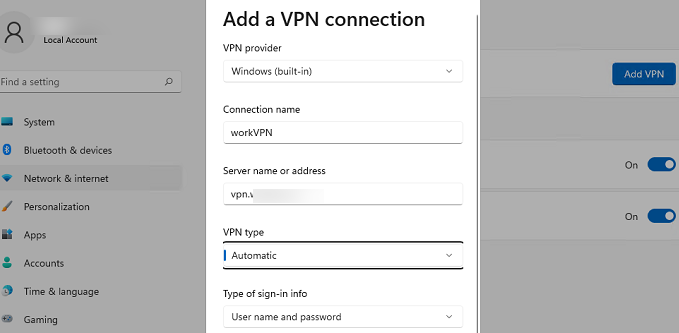
In the Windows 10/11 GUI, only the lightweight interface for configuring VPN connections is available, which does not allow you to configure some VPN settings. You can use both the classic VPN connection settings interface in the Control Panel and the modern network configuration app in the Settings panel (the ms-settings:network-vpn URI command for quick access settings) to set up your VPN connection settings. In this post, we will take a look at how to manage VPN connections in Windows using PowerShell: how to create/change/remove a VPN connection and connect to/disconnect from a VPN server.
In order to create a new VPN connection in Windows, use the Add-VpnConnection cmdlet. In the simplest case, you need to enter a connection name and VPN server address.
Add-VpnConnection -Name VPNname1 -ServerAddress "vpn.woshub.com” -PassThru
To configure custom settings for a VPN connection, use the following options (the most popular ones):
- TunnelType –VPN tunnel type. The following types are available:
Automatic– Windows tries to detect a VPN tunnel type itselfIKEv2— Internet Key ExchangePPTP– Point to Point Tunneling ProtocolL2TP– Layer 2 Tunneling Protocol /IPsec with a certificate or a Pre-shared keySSTP– Secure Socket Tunneling Protocol
- L2TPPsk —pre-shared key for authentication (L2TP only). If the option is not set, a certificate is used for the L2TP authentication
- AuthenticationMethod – an authentication type. You can use:
Pap,Chap,MSChapv2,Eap,MachineCertificate - EncryptionLevel – encryption settings (
NoEncryption,Optional,Required,Maximum,Custom) - SplitTunneling – sets whether all traffic of a computer must be sent through the VPN tunnel (like Use default gateway on remote network option in the VPN adapter settings)
- UseWinlogonCredential –use current user credentials to authenticate on a VPN server
- AllUserConnection – allows using VPN connection for all computer users
- RememberCredential –allows using saved VPN credentials (a user name and a password are saved in Windows Credential Manager after the first successful connection)
- PassThru – allows displaying a command output (it is recommended to use for all commands)
Here are some examples of PowerShell commands to create different types of VPN connections.
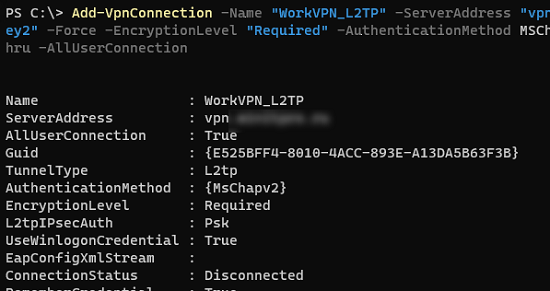
- L2TP/IPsec:
Add-VpnConnection -Name "VPN_L2TP" -ServerAddress "vpn.woshub.com" -TunnelType L2TP -L2tpPsk "My1pre-SharedKey2" -Force -EncryptionLevel "Required" -AuthenticationMethod MSChapv2 -UseWinlogonCredential -RememberCredential -AllUserConnection –PassThru - PPTP:
Add-VpnConnection -Name "VPN_PPTP" -ServerAddress "vpn.woshub.com" TunnelType "PPTP" -EncryptionLevel "Required" -AuthenticationMethod MSChapv2 -SplitTunneling -PassThru - SSTP: first of all, you need to import a root CA of a VPN server to the computer certificate store and use the FQDN of the VPN server specified in the certificate (CN — Common Name, or Subject Alternative Name) as its address:
Add-VpnConnection -Name "VPN_SSTP" -ServerAddress "vpn.woshub.com" -TunnelType "SSTP" -EncryptionLevel "Required" -AuthenticationMethod MSChapv2 -RememberCredential -SplitTunneling -PassThruWhen using self-signed certificates, you can add multiple names (SAN) to a certificate using PowerShell. - IKEv2: you must first import the root CA to Windows trusted root certificate store, and import the computer certificate to the personal certificate store:
Import-PfxCertificate -FilePath $comp_certificate -CertStoreLocation Cert:\LocalMachine\My\ -Password $password
 Import-Certificate -FilePath $ca_cert -CertStoreLocation Cert:\LocalMachine\Root\
 Add-VpnConnection -Name "VPN_IKEv2" -ServerAddress "vpn.woshub.com" -TunnelType Ikev2 -EncryptionLevel "Maximum" -AuthenticationMethod MachineCertificate -SplitTunneling $True -PassThru
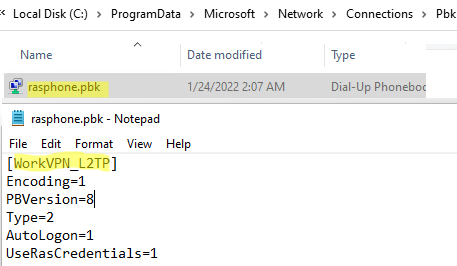
VPN connections available to all users (created using the AllUserConnection option) are displayed in the Network Center with System as an Owner. The user’s connection will have domain\username listed here.

Shared VPN connections are saved to a text file: %ProgramData%\Microsoft\Network\connections\Pbk\rasphone.pbk.
To change the settings of an existing VPN connection, use the Set-VpnConnection command:
Set-VpnConnection -Name "VPN_SSTP" –splittunneling $false –PassThru
If you want to change IPsec options for an existing VPN connection, use the Set-VpnConnectionIpsecConfiguration cmdlet (for IKEv2 or L2TP VPN only):
Set-VpnConnectionIPsecConfiguration -ConnectionName "VPN_IKEv2" -AuthenticationTransformConstants SHA256128 -CipherTransformConstants AES256 -DHGroup Group14 -EncryptionMethod AES256 -IntegrityCheckMethod SHA256 -PfsGroup PFS2048 –PassThru
You can use the VPNCredentialsHelper module to save credentials for a VPN connection.
Install the module on your computer from the PowerShell Gallery (you can also install a PowerShell module offline):
Install-Module -Name VPNCredentialsHelper
Then you will be able to save a user name and a password for your VPN connection in Windows Credential Manager:
$user = "vpn_username1"
 $plainpass = "vpn_password1"
 Set-VpnConnectionUsernamePassword -connectionname "VPN_SSTP" -username $user -password $plainpass
In modern Windows versions, you can dynamically add static routes to the routing table when you connect to a VPN.
Add-VpnConnectionRoute -ConnectionName "VPN" -DestinationPrefix 192.168.31.0/24 –PassThru
The route will be enabled only after a successful connection to a VPN server.
To display a list of all VPN connections available to a user:
Get-VpnConnection
To remove a VPN connection:
Remove-VpnConnection -Name "VPN_SSTP"
To connect to a VPN server using a VPN profile configured earlier:
rasdial "VPN_SSTP"

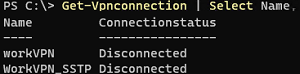
To get statuses of all VPN connections:
Get-Vpnconnection | Select Name, Connectionstatus