When you perform a clean installation of Windows, the system prompts you to create a user account and automatically grants it local administrator privileges. However, Windows installation creates another built-in (hidden) Administrator account that is disabled by default. In this article, we’ll look at the built-in Windows Administrator account, what it’s used for, how to enable or disable it, and how to reset its password.
What is the Built-in Administrator Account in Windows
The Administrator account is automatically created during Windows installation and is used to initialize the operating system. This built-in account is then disabled, and the user is prompted to create their own account, which is automatically added to the local Administrators group.
In earlier versions of Windows, the built-in Administrator account had full administrative privileges and was not affected by the User Account Control (UAC) restrictions. This made it possible to run programs or perform any action with elevated privileges without any restrictions or prompts from the UAC.
The built-in Administrator account in Windows is disabled by default. This user cannot be deleted or removed from the local Administrators group.
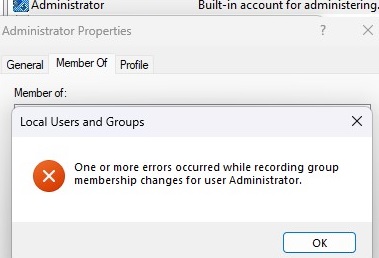
The following error occurred while attempting to save properties for user Administrator:
Cannot perform this operation on built-in accounts.
For security reasons, it is recommended to rename this built-in administrator account. This can be done manually, using LAPS, or using the GPO option Accounts: Rename administrator account under Computer Configuration -> Policies -> Windows Settings -> Security Settings -> Local Policies -> Security Options
Renaming the Administrator account slightly increases its security against password brute-force attacks. However, the built-in Administrator account always has a well-known Security Identifier (SID), S-1-5-domain-500which can be used to find out the new name of the administrator account.
How to Enable the Built-in Administrator Account on Windows
Let’s look at simple ways to enable the built-in Administrator account in Windows 11 and 10. You can:
- Activate the Administrator account from the command prompt (started in Run as Administrator mode):
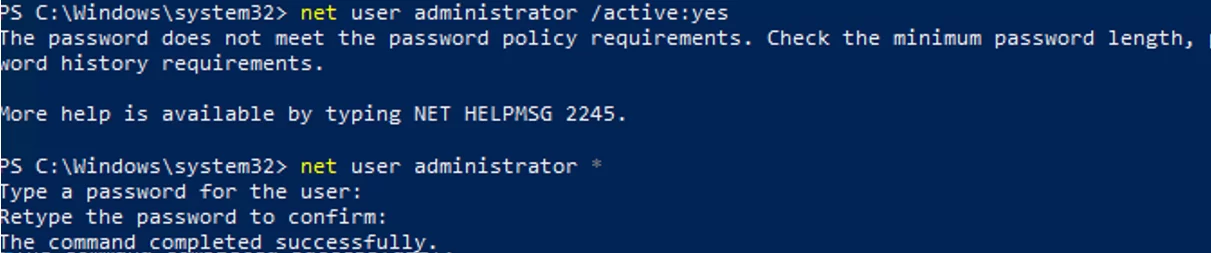
net user administrator /active:yes
- Use PowerShell to enable local account:
Get-LocalUser -Name "Administrator" | Enable-LocalUser - With the Local Users and Groups graphical MMC snap-in (
lusrmgr.msc). In the console, expand the Users section. Open the properties of the account named Administrator and uncheck the Account is Disabled checkbox. Save the changes.
- Using the Group Policy Editor. Open the local GPO editor
gpedit.msc(or the local security policy editorsecpol.msc). Go to Computer Configuration -> Windows Settings -> Security Settings -> Local Policies -> Security Options. Find the Accounts: Administrator account status policy and set it to Enabled. Update the Group Policy settings with thegpupdate /forcecommand, or simply reboot a computer.


As mentioned earlier, the built-in Administrator account does not have a password by default. You can set the administrator account password by using the command:
net user administrator *
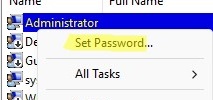
Or from the user management snap-in (Set Password)
It is recommended to use a complex and strong password that complies with the default Windows password policy (you can generate it using a simple PowerShell script).
If the previous command returns The user name could not be found, the administrator account on the computer has probably been renamed.
You can find out the name of the built-in administrator account on your computer by looking at its known SID ( it must have -500at the end of the SID). Use the command:
wmic useraccount where "SID like 'S-1-5-%-500'" get name
or
Get-LocalUser | Where-Object {$_.Sid -Like "*-500"}

In this case, the built-in account has been renamed to admin. To enable it, run:
net user admin /active:yes
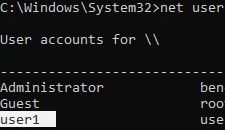
To list all local accounts:
net user
If you receive the message System error 5 has occurred. Access is denied when trying to enable the built-in Administrator , make sure that the cmd.exe or PowerShell console is running elevated (as an administrator). Also, ensure that your account is a member of the local Administrators group.

List users in the local Administrators group:
net localgroup administrators
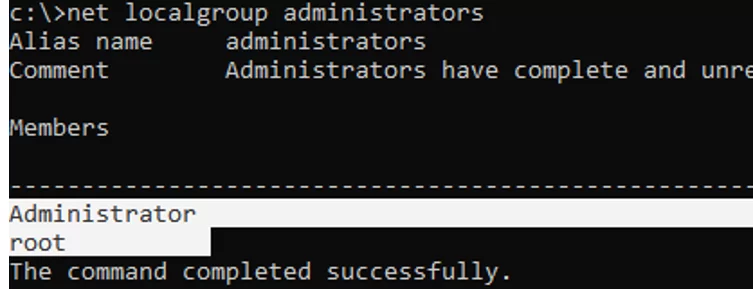
Check that your account is a member of this group.
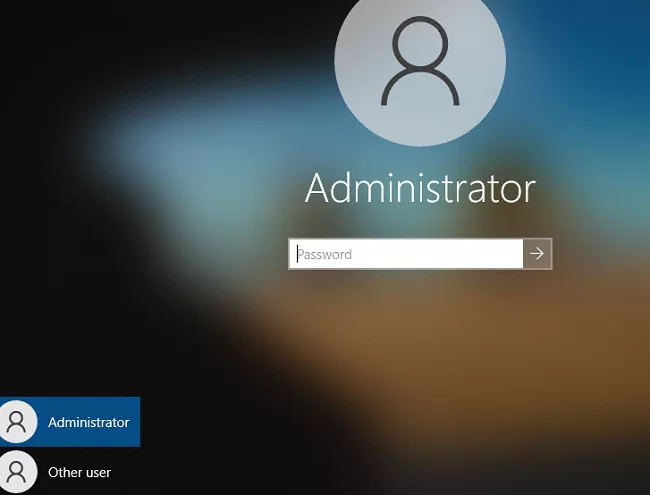
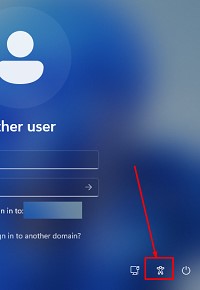
After enabling the Administrator account using one of the methods described above, it will appear on the Windows logon screen.
To disable the built-in administrator:
net user administrator /active:no
If you enabled the built-in Administrator through the Accounts: Administrator account status policy, you must disable it through the same policy (or completely reset all local GPO settings).
Reset Admin Password When Administrator Privileges Are Lost
There are situations where you might accidentally disable your administrator account, remove it from the local Administrators group, or lose its password. How to regain local administrator privileges? Let’s look at how to enable the built-in Administrator account, reset its password, or add your account to the local Administrators group if you’re unable to log in to Windows.
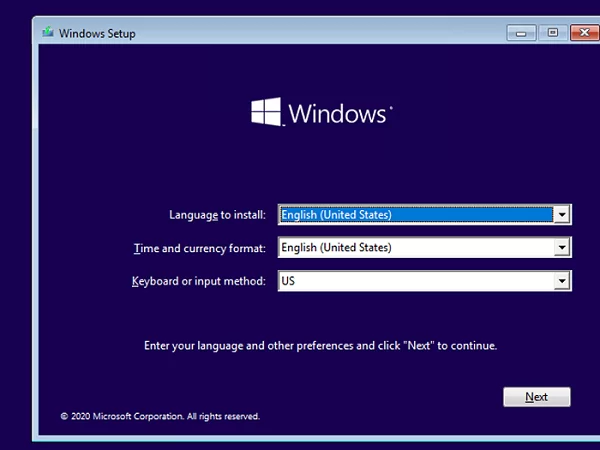
Boot your computer from a LiveCD, into WinRE recovery environment, from an MSDaRT recovery image, or a Windows installation media. The easiest way to create a bootable USB stick with a Windows 10 (11) installation image is to use the Media Creation Tool.
Press Shift + F10 on the Windows Setup screen. A command prompt will open
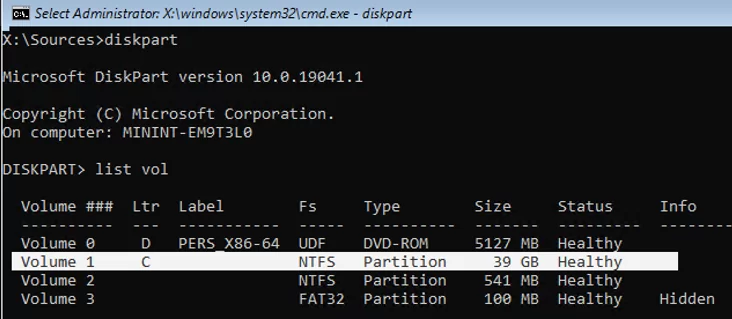
Now you need to determine which drive your Windows is installed on. Run diskpart and enter list vol. In my example, Windows is on the C: drive. I will use this drive letter in the following commands. Type exit to close the diskpart session.
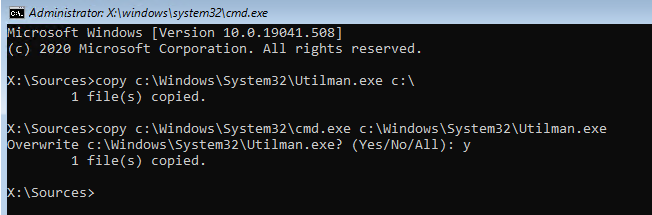
Run the following commands to create a copy of utilman.exe (Ease of Access applet) and replace it with the cmd.exe executable:
copy c:\windows\System32\utilman.exe c:\
 copy c:\windows\System32\cmd.exe c:\windows\System32\utilman.exe
Restart a computer:
wpeutil reboot
Boot Windows normally. On the Windows login screen (with the list of accounts), press Win + U (or click the Ease of Access/ Accessibility button).
This will open a command prompt with NT Authority\SYSTEM privileges. List local users:
net user
To add your account to the local Administrators group (for example, user1), enable the built-in Windows administrator and reset its password:
net localgroup administrators user1 /add
 net user Administrator /active:yes
 net user administrator *

You can now log on to the computer as the built-in Administrator or using your account with local administrator privileges.
Be sure to replace the original utilman.exe file. Boot from the rescue media again and run the command:
copy c:\utilman.exe c:\windows\System32\utilman.exe
4 comments
For all of the commands, I got a message indicating Access denied.
Its all about the built in administrator password. I inherited a work machine and I can’t get past anything to get stuff installed without this password. I have no access to the person that may have set this password up. Any help would be SO appreciated!
Jennifer
U have allowed someone to be Admintrator of my PHINE IW I CAN’T ACCESS IT OR CONTROL I BSRELY HAD THE PHONE WHEN APPS HIDDEN , EMAILS PASSCODES AND ACCTS HAVE BEEN COMPROMISIZE . PLZ HELP ME GET THiS PHONE F I X THIS US MY SECOND PHONE TO BE COMPROMIZED
I think the boot in safe mode / enable built-in Administrator doesn’t work for Windows 11 anymore?
This method when you are locked out does not work. Windows+U let me enter one command, then fails to open ever again.