In this article, we’ll cover the specifics of migrating existing Windows machines to a Proxmox virtualization environment, including migrating physical computers (Physical-to-Virtual, P2V) and virtual machines from other hypervisors (Virtual-to-Virtual, V2V). This post covers the most common migration scenarios, available administrative tools, and potential issues that could occur when virtualizing a configured Windows host into a Proxmox virtual machine.
Preparing an Existing Windows Host for Migration to a Proxmox VM
Let’s start by preparing the Windows host you are going to migrate to Proxmox:
- Create a full backup of your Windows machine to prevent accidental data loss.
- Clean up the source Windows machine: review the installed applications and files, and remove any that are no longer needed; clear the temporary files, cache, logs, old user profiles, the Recycle Bin, and any other unnecessary data.
Download the latest ISO image with VirtIO drivers and install it on your Windows machine before starting the migration. This adds the VirtIO storage drivers required for the system to boot correctly after the disk controller is changed, initializes the network adapters, and installs the QEMU Guest Agent and other components. If the correct storage drivers are not installed, Windows may fail to boot after migration with an INACCESSIBLE BOOT DEVICE error.
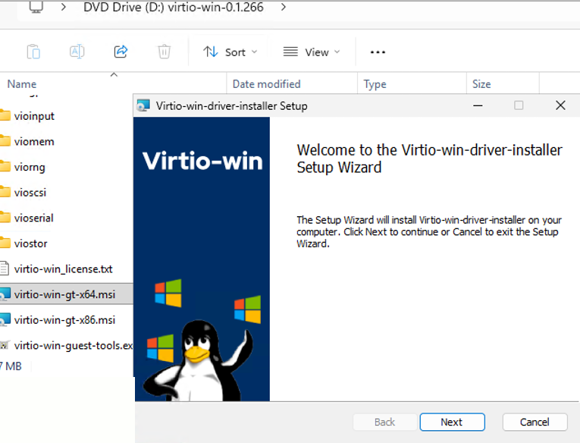
winget install RedHat.VirtIO
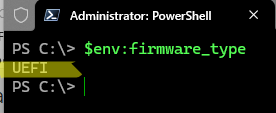
Check whether the source Windows machine is configured to boot in native UEFI mode from a GPT-partitioned disk, as used on most modern computers, or in Legacy BIOS/CSM mode from an MBR-partitioned disk. You should create the Proxmox VM with the corresponding firmware type.
$env:firmware_type
Migrating Windows VM to Proxmox from Other Hypervisors
Migrate VMware VM to Proxmox
Starting with version 8.2, Proxmox VE now includes a built-in ESXi Import Wizard that allows you to import virtual machines directly from VMware ESXi hosts or vCenter.
The ESXi host is connected to Proxmox as external storage, after which you simply select the VM you want to migrate. Proxmox automatically reads the VMX configuration file, creates the virtual machine with the same virtual hardware settings, and copies the virtual disks.
Migrate from Hyper-V VM to Proxmox
There are currently no built-in tools to import virtual machines directly from Hyper-V to Proxmox (Proxmox also doesn’t support the Hyper-V VM export format).
However, an administrator can easily mount an SMB share containing the Hyper-V virtual machine files to a Proxmox host, create a new empty VM with the same virtual hardware, and import the .VHDX virtual disks using the qm importdisk command. Before importing its disks, you must power off the Hyper-V virtual machine.
This is the same migration scenario that is covered in the following sections of this article.
Create a Virtual Image from an Existing Windows Installation
To migrate a physical Windows host to Proxmox (P2V), a virtual machine from another hypervisor (V2V), or a VPS/VDS host from an external cloud provider, you must first create virtual disk images of its storage volumes. Such virtual disk images contain a full copy of the Windows installation, including all installed roles, applications, user settings, and files.
There are a lot of tools that can be used to capture the local disks on a Windows host and convert them into a virtual disk image:
- Disk2vhd from Microsoft’s Sysinternals suite. This simple free tool allows you to convert physical hard drives into virtual hard disk files while the operating system is running. It uses the Volume Shadow Copy Service (VSS) to capture the disks and save them in the VHDX virtual disk format. You can save the system image to an external drive or network share via SMB, NFS, or SFTP.
- Clonezilla – allows capturing a local disk image by booting the Clonezilla Live environment from a USB stick. Then create a new virtual machine in Proxmox, boot it from the Clonezilla ISO, and restore the captured machine image.
- Veeam Agent for Microsoft Windows – this free backup agent can be installed on a physical machine to back up its local disks to external media. Then boot a clean VM from the Veeam Recovery Media ISO and restore the system from the backup.
- VMware vCenter Converter Standalone is another free tool that can capture live physical Windows machines over the network and convert them into VMDK virtual disk files, which can then be imported into Proxmox.
- StarWind V2V/P2V Converter.
In this example, I will use the Disk2VHD tool to convert a live physical disk into a virtual hard disk. Download the utility and run it directly on the Windows host that you want to migrate to Proxmox. If the Windows host is running production workloads, make sure that the relevant services have been properly stopped to obtain a consistent copy.
Select the VHDX virtual disk format, allow using the Volume Shadow Copy service, and specify the target location where you want to save the resulting virtual disk files. The destination can be a local drive, an external USB storage device, or a shared network folder. Select all the local volumes that need to be captured, including the EFI boot partition, the Windows Recovery Environment partition, and the main volume that contains Windows.
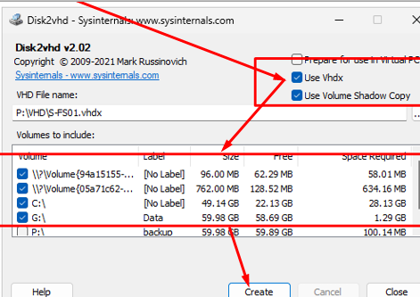
Once the virtual disk images have been captured, the resulting VHDX files can be copied to the Proxmox host.
scp -r F:\VHDX\mufs01.vhdx root@munpve1:/tmp/
After copying the virtual disk file, check its integrity from the Proxmox console using the command:
# qemu-img check -r all /tmp/mufs01.vhdx
No errors were found on the image.

Prepare a New Windows Virtual Machine in Proxmox
Create a new virtual machine on the Proxmox host without a virtual disk. When selecting the guest operating system type, make sure to choose Windows and select the version that matches the source machine.
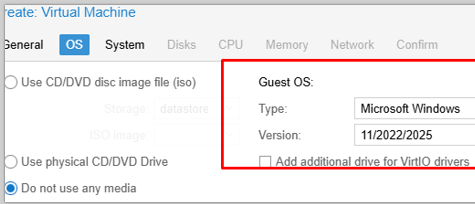
Allocate the required virtual hardware resources to the VM. The number of CPU cores and amount of RAM can be kept the same as on the source machine, or increased or decreased depending on your requirements.
Select the same boot firmware type used by the source machine: SeaBIOS or OVMF (UEFI).
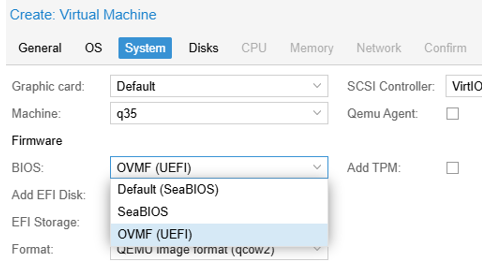
- Delete the virtual disk that is offered to be created by default.

- Select VirtIO (paravirtualizaed) as the virtual network adapter model.
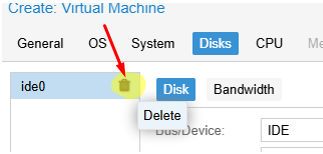
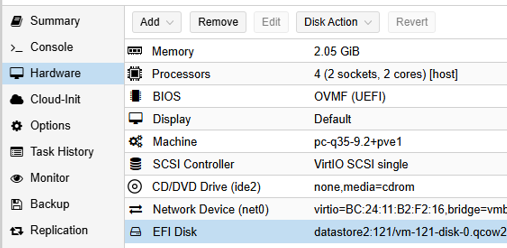
Do not power on the new virtual machine yet. Just note its VM ID (for example, 102).
Proxmox supports several common virtual disk formats without conversion, including RAW, QCOW2, VMDK (the VMware format) and VDI, but not the Microsoft VHD format. The following command can be used to convert a VHD or VHDX disk image to a compatible format:
# qemu-img convert -O qcow2 /tmp/mufs01.vhdx /mnt/pve/datastoreMSA1/images/102/vm-102-disk-1.qcow2
Recent versions of Proxmox allow you to import virtual disks directly into a VM, as the importdisk command can automatically detect the disk format and convert VHDX files on the fly.
# qm importdisk 102 /tmp/mufs01.vhdx datastoreMSA1
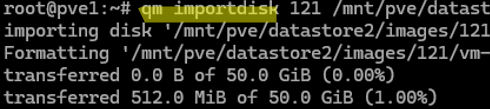
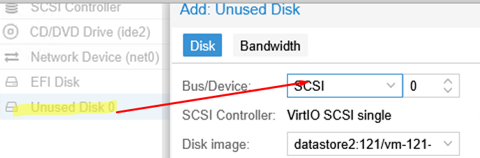
A new Unused Disk will appear in the VM configuration. Double-click the disk and attach it to the virtual machine.
For optimal performance, it is recommended to connect virtual disks to a Windows VM on Proxmox through a SCSI storage controller. However, if you immediately attach a new disk through a SCSI controller, Windows will fail to boot because it cannot detect the disk. This is because the Red Hat VirtIO SCSI controller driver is not configured to start automatically. Although this driver can be manually loaded in the WinPE environment, we’ll use a simpler, although slightly less straightforward, approach.
The idea is to temporarily attach the migrated Windows system disk through a SATA controller bus and add a small temp 1 GB disk connected through the SCSI controller.
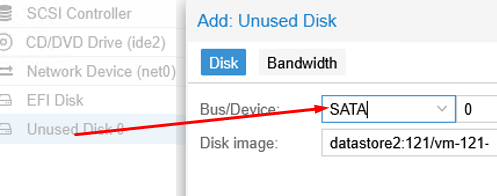
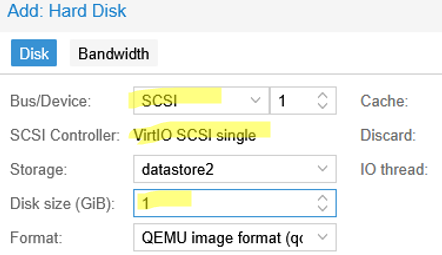
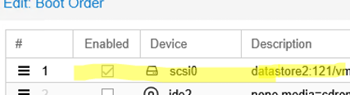
Open the VM’s properties, navigate to Options -> Boot Order, and set the SATA drive as the primary boot device. Then start the VM.
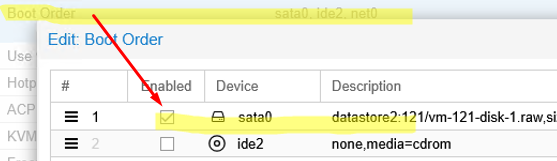
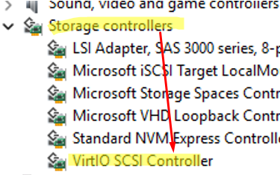
Windows should boot from the SATA controller and automatically install the VirtIO SCSI controller driver. Open Device Manager and verify that the Red Hat VirtIO SCSI pass-through controller appears under Storage controllers. The vioscsi driver should now be configured to start automatically.
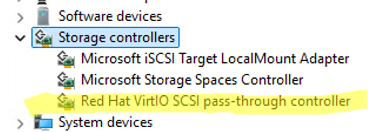
Now you can shut down the VM:
- In the VM settings, navigate to Hardware.
- Disconnect the SATA drive (Detach) and reconnect it via a fast SCSI VirtIO controller.

- Delete the small 1 GB temporary virtual disk.
- Set the virtual disk on the SCSI controller as the primary boot device.
Can a Windows machine be migrated to Proxmox without the additional steps of using temporary SATA controllers and SCSI disks? Yes, but this method is not officially supported.
The idea is to create a phantom VirtIO SCSI controller in Windows before starting the migration and capturing the Windows disk image. This can be done using the load-virtio-scsi-on-boot.ps1 PowerShell script, which is available on GitHub: https://github.com/croit/load-virtio-scsi-on-boot
Download the PS1 script and run it:
powershell.exe -ExecutionPolicy Bypass -File .\Downloads\load-virtio-scsi-on-boot.ps1
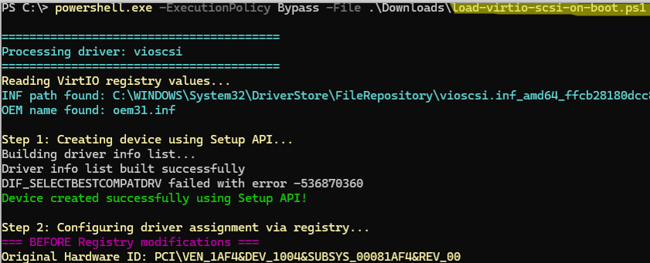
The script creates a VirtIO phantom storage controller device (Red Hat VirtIO SCSI pass-through controller ROOT\VIOSCSI\0000), loads the VirtIO SCSI driver for it, and then removes the temporary device. This will install and configure the VirtIO SCSI driver to start up when Windows boots (the driver is marked as boot-critical).
After confirming that the migrated Windows VM starts successfully in Proxmox, check the following:
- Verify the network adapter configuration. You may encounter issues caused by old or hidden (ghost) network adapters remaining from the source machine.
- Open the Device Manager to check that all the virtual hardware has been correctly detected and that there are no unknown devices.
- Remove any system tools and drivers related to the previous hardware configurations of the source environment (such as Hyper-V Integration Services, VMware Tools, or utilities for the original physical hardware, including audio, graphics, and other device-specific drivers).
- Check that the QEMU Guest Agent service is running on the Windows guest:
Get-Service QEMU-GA - Ensure that all services and applications on the guest Windows OS are operational. After replacing physical hardware with virtual hardware, licenses for some applications may be lost and may require reactivation or re-registration. Also, verify the Windows activation status in the guest.
This article covered the main steps required to successfully migrate physical or virtual Windows machines to the Proxmox virtualization platform.
1 comment
Thanks for the article every X months i have to make migration to kvm and sometimes we have idêntical but diffent problems.
This article give a lot options and explain thanks a lot