Windows OS Hub
  • Windows
    • Windows 11
    • Windows 10
    • Windows Server 2025
    • Windows Server 2022
    • Windows Server 2019
    • Windows Server 2016
  • Microsoft
    • Active Directory (AD DS)
    • Group Policies (GPOs)
    • Exchange Server
    • Azure and Microsoft 365
    • Microsoft Office
  • Virtualization
    • VMware
    • Hyper-V
    • Proxmox
  • PowerShell
  • Linux
  • Home
  • About

Windows OS Hub

  • Windows
    • Windows 11
    • Windows 10
    • Windows Server 2025
    • Windows Server 2022
    • Windows Server 2019
    • Windows Server 2016
  • Microsoft
    • Active Directory (AD DS)
    • Group Policies (GPOs)
    • Exchange Server
    • Azure and Microsoft 365
    • Microsoft Office
  • Virtualization
    • VMware
    • Hyper-V
    • Proxmox
  • PowerShell
  • Linux

 Windows OS Hub / Windows 11 / Fix Missing “Yes” Button in User Account Control Prompt on Windows

October 8, 2026

Fix Missing “Yes” Button in User Account Control Prompt on Windows

A user reported an unusual problem: when attempting to run any program as an administrator in Windows 11, the User Account Control (UAC) prompt appears and requests elevation, but the Yes button is missing or grayed out. The only available option is No. Moreover, the UAC window prompts you to enter administrator credentials, but there are no fields where those credentials can be entered.

The screenshot below shows an example of what such a strange UAC prompt looks like:

Do you want to allow this app to make changes to your device
To continue, enter an admin username and password.
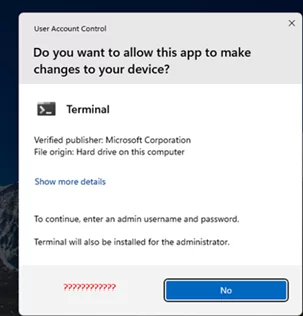
UAC Prompt YES Button missing in Windows 11

This UAC prompt behavior indicates that there are no admin accounts on the computer that can be used to approve the elevation request. This means that the account currently signed in to Windows also doesn’t have administrator privileges and has become a regular unprivileged user account.

Even if the account previously had administrator privileges, the user may have been removed from the built-in Administrators group for some reason, either accidentally or intentionally.

Open a non-elevated command prompt and find the name of the user who is currently signed in:

whoami

In this example, the username is winos. Сheck the account type using the following PowerShell command:

Get-LocalUser winos | FL

In this example, the PrincipalSource value shows that the computer used with a Microsoft Account (MSA) rather than a local Windows 11 account.
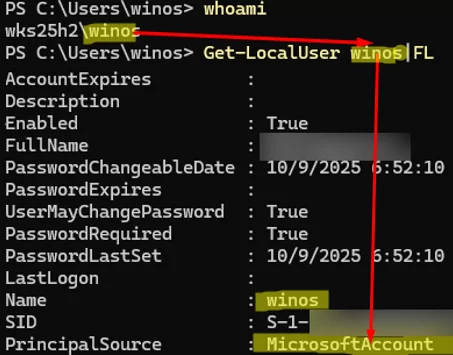
Check current Windows user account type

Now check the list of groups that the user is a member of:

net user winos

In this case, the user is only a member of the local Users group (Local Group Memberships: * Users). The local Administrators group is not listed in its memberships.
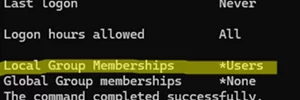
check user local membership with net user command

In order to add the user to the local Administrators group, restart the computer in the Windows Recovery Environment (WinRE). To do this, hold down the Shift key and click Restart in the Start menu, or run the following command:

shutdown /r /o /t 0
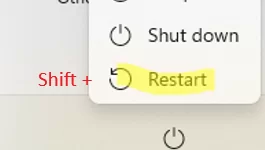
Restart Windows into Recovery Environment

After rebooting into the Windows Recovery Environment, navigate to Troubleshoot -> Advanced Options -> Command Prompt.

Note: If the Windows Recovery Environment is not working for some reason, you can boot the computer from an external USB drive and add your user account to the local Administrators group using the steps described in the article Resetting the Administrator Password in Windows.

The Windows Recovery Environment (WinRE) has a relatively little-known feature. If User Account Control (UAC) is enabled on the computer and there are no active (enabled) administrator accounts in the operating system, WinRE automatically signs in using the built-in Administrator account. This account is automatically enabled in this scenario, and no password is required to sign in.

All you need to do is add the user account whose name you found out earlier to the local Administrators group. Use this command (replace the account name with your own):

net localgroup Administrators winos /add

Restart your computer and check if UAC is now working properly.

However, if you use a Microsoft account to sign in to Windows, as in our example, you cannot add it to the local Administrators group from WinRE. The Windows Recovery Environment does not recognize Microsoft accounts.

In this case, proceed as follows:

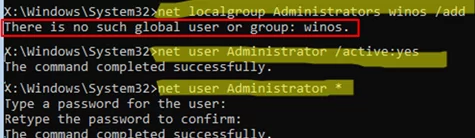
  1. Enable the built-in administrator account and set its password: net user Administrator /active:yes
    net user Administrator * Enable built-in administrator account and set its password using net user command
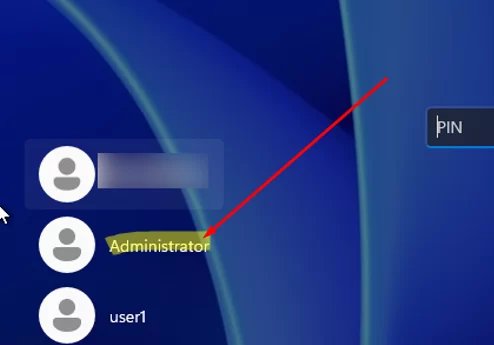
  2. Close the command prompt in WinRE and restart the computer in Safe Mode (Troubleshoot -> Advanced options -> Startup Settings -> Restart -> press F4). Select the Administrator account from the list of users on the Windows sign-in screen. Sign-in with local admin account
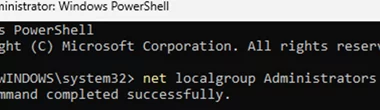
  3. Sign in with the Administrator account, open an elevated Command Prompt (by selecting Run as administrator), and add your Microsoft account to the local Administrators group: net localgroup Administrators winos /add
    add Microsoft account to local administrators group using cmd
  4. Restart Windows and then sign in using your Microsoft account.
  5. Check that the UAC prompt now displays the ‘Yes’ button. Once everything is working correctly, make sure to disable the built-in Administrator account: net user Administrator /active:no
0 comment
0
Facebook Twitter Google + Pinterest
Questions and AnswersWindows 10Windows 11
previous post
Block Specific Keyboard Shortcuts with Keyboard Filter on Windows

Related Reading

How to Move (Migrate) Windows Shares to a...

February 26, 2026

SMB over QUIC: Mount File Share over Internet...

December 24, 2025

Monitor Windows Log Files in Real Time with...

March 26, 2026

Security Warnings When Opening RDP Files in Windows...

April 20, 2026

Stop Windows Server from Auto-Shutdown Every Hour

February 11, 2026

Automate Software and Settings Deployment with WinGet Configure...

August 24, 2026

CrowdSec on Windows: From Installation to Threat Blocking

July 6, 2026

Remove the Max Path Length Limit (260-Characters) on...

November 19, 2025

Leave a Comment Cancel Reply

join us telegram channel https://t.me/woshub
Join WindowsHub Telegram channel to get the latest updates!

Recent Posts

  • Block Specific Keyboard Shortcuts with Keyboard Filter on Windows

    October 3, 2026
  • How to Set Task Priority in Windows Task Scheduler

    September 22, 2026
  • AutoStart Program at RDP Logon in Windows RDS

    September 8, 2026
  • How to Convert Windows Machine into a Proxmox VM

    August 30, 2026
  • Enable or Disable Fast User Switching in Windows 11

    August 18, 2026
  • How to Hide Wi-Fi Network in Windows with WLAN Filters (Blacklist and Whitelist)

    August 14, 2026
  • Invalid Signature Detected: Check Secure Boot Policy [Fix]

    August 5, 2026
  • Windows Installer Service Could Not Be Accessed? How to Fix It

    July 28, 2026
  • Why Windows Reports No Internet Access: How Connectivity Detection Works

    July 26, 2026
  • Inactive TS Ports in Windows: Causes and Fixes

    July 20, 2026

Follow us

  • Facebook
  • Twitter
  • Youtube
  • Telegram
Popular Posts
  • Converting Windows 10 to Enterprise LTSC Without Losing Data
  • How to Remove ‘Some Settings are Managed by Your Organization’ on Windows 11 or 10
  • Remove the Max Path Length Limit (260-Characters) on Windows
  • Installing Windows without USB/DVD or Other External Drives
  • How to Pause (Delay) Update Installation on Windows 11 and 10
  • Allow Ping (ICMP Echo) Responses in Windows Firewall
  • How to Prevent Users from Saving Files to Desktop, Downloads and Other Profile Folders
Footer Logo

@2014 - 2026 - Windows OS Hub. All about operating systems for sysadmins


Back To Top