Rclone is an open-source, Go-based command-line tool that can be used to copy, backup, and sync files stored on a local computer with various cloud storage services, including Google Drive, OneDrive, Dropbox, any S3-compatible object storage, and many other cloud storage providers. Rclone is often described as rsync for cloud storage. In this article, we will look at how to use rsync on a Windows machine to automate backup transfers and synchronize files and folders between your computer and Google Drive. Similarly, you can use any other cloud provider as the underlying cloud storage.
- Install Rclone on Windows and Connect Google Drive
- Basic Rclone Commands: A Beginner’s Guide
- How to Mount Google Drive in Windows Using Rclone
- Backup and Sync Local Files to Google Drive Using PowerShell and Rclone
- Configure Cloud Backup Data Encryption with Rclone
- Creating Client ID and Client Secret to Access Google Drive from Rclone
Install Rclone on Windows and Connect Google Drive
You can install the rclone tool on Windows using the built-in WinGet package manager, or download the installer from the official Rclone website or the Rclone GitHub repository.
winget install Rclone.Rclone
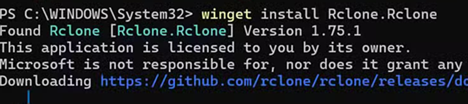
Rclone is a command-line tool, which means that it is configured and operated via a command-line interface. To start the interactive Rclone configuration wizard, run:
rclone config
The tool should display a list of the configured storages. Currently, this list is empty.
- Enter
n(New remote) to create a new connection. This will launch an interactive wizard to help you create and configure remote storage. We will connect Google Drive as remote cloud storage and perform OAuth authentication via the browser. - Set a name for the connection, for example:
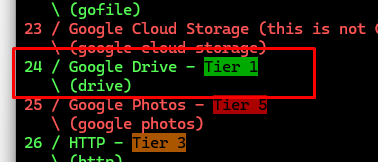
gdrive - A list of all the cloud storage providers supported by rclone will appear. Find Google Drive (
drive) in the list and enter its number. In my version of Rclone, it is available as option24.
- At the next step, you need to specify the
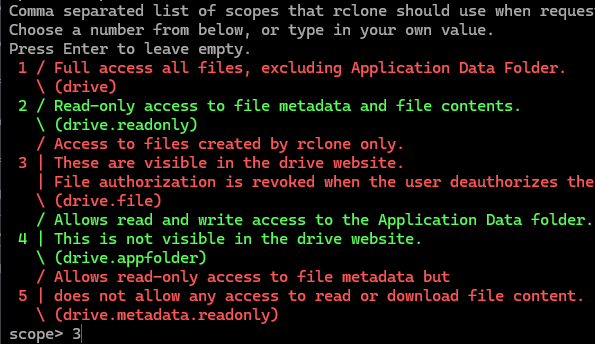
client_idandclient_secret. You can leave these fields empty. In this case, Rclone will use its shared OAuth client ID.Google plans to retire Rclone’s built-in shared client ID entirely later in 2026. Therefore, we strongly recommend creating your own application in your Google account and generating your own client_id and client_secret. We describe how to do this in detail at the end of this article. - The next step is to configure access level permissions for the Rclone client to your Google Drive files. If you select
1: Full access (drive), Rclone will have access to all files on your Google Drive. If you only want to back up files from your local computer to cloud storage, we recommend choosing the more secure option3: Access to files created by rclone only (drive.file). In this mode, Rclone only has access to the files and folders that it has created itself.

- Leave the
service_account_fileblank and press Enter. - In the Edit advanced config step, select
n - The next step is: Use web browser to automatically authenticate rclone with remote? Type
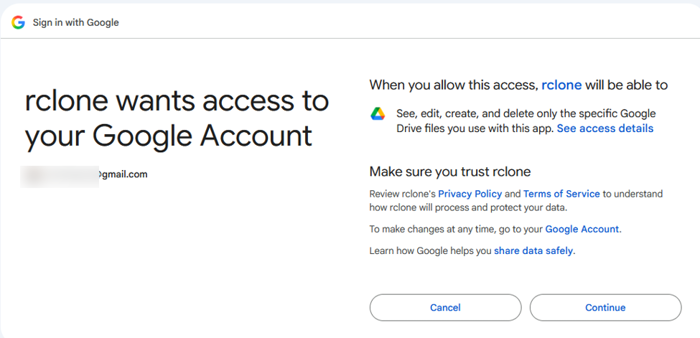
yif the machine running rclone has a web browser that can be used for authentication. - This will open a browser in which you will need to perform OAuth authentication using your Google account.
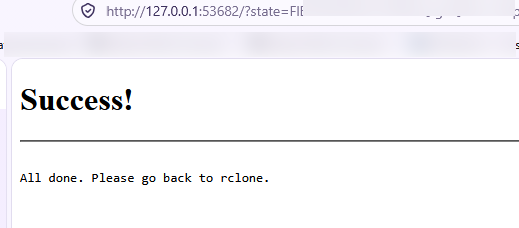
- Grant rclone access to Google Drive files.

- You should receive a message indicating that the access token has been successfully received.
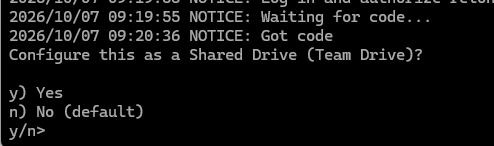
- When prompted to configure this connection as a Shared Drive (Team Drive), select
No(default).
- Press
yto confirm saving the configuration, and then pressqto exit rclone interactive mode.
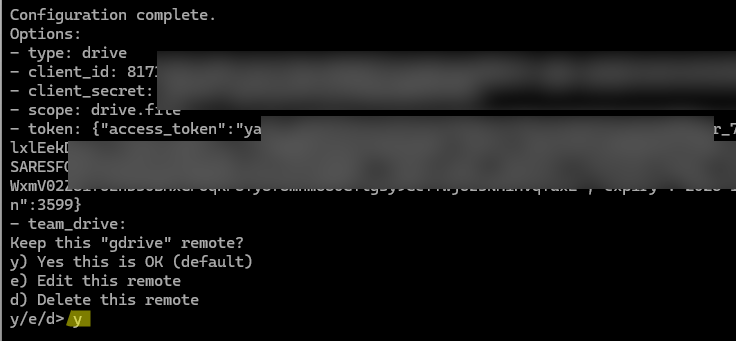
Rclone stores the cloud connection configurations in the rclone.conf file, which is located under the current user’s profile. This file contains the access_token that was obtained to access your Google Drive storage. You can get the path to the current rclone configuration file using the command:
rclone config file
C:\Users\username\AppData\Roaming\rclone\rclone.conf

Basic Rclone Commands: A Beginner’s Guide
Now, let’s take a look at some of the basic Rclone commands.
List the root directories in the cloud storage:
rclone lsd gdrive:
As we have only granted access to Google Drive files created using rclone, this list will be empty initially.
Rclone supports several cloud synchronization modes, ranging from simply copying individual files and directories to synchronizing directory contents, including bidirectional synchronization.
To copy a specified local folder to the cloud:
rclone copy "C:\Backup" gdrive:HomePCBackup --progress
This command copies new and modified files from the source directory to the HomePCBackup directory in the remote cloud storage. If the destination directory does not exist, Rclone will create it automatically.
The --progress option has been added to display the current transfer speed and the estimated remaining time. If you want Rclone to display information about every processed file, add the -v (--verbose) option.
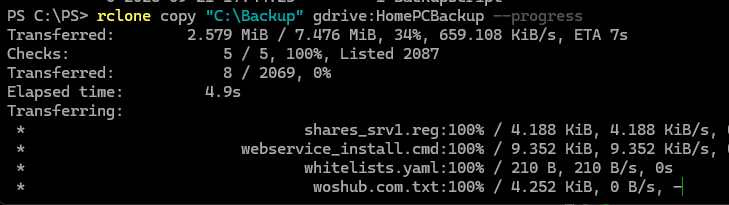
Open Google Drive in your browser to check that a new folder has been created and that the files have been copied from your computer.
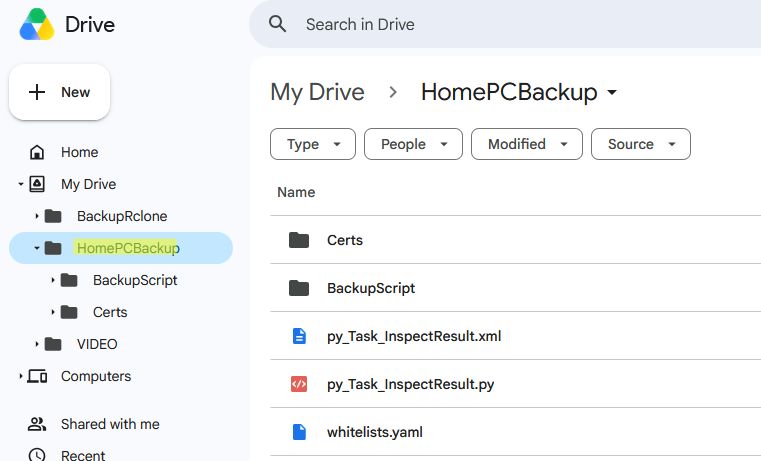
To list the files in a cloud directory:
rclone lsf gdrive:HomePCBackup
Delete a specific file from the remote cloud storage:
rclone delete gdrive:HomePCBackup /whitelist.yaml --verbose --progress
To empty the Google Drive trash folder:
rclone cleanup gdrive:
As mentioned above, rclone copy command copies and replaces only new and modified files. If a file is deleted from the local source directory, it will not be deleted from the cloud copy.
If you need to configure full directory synchronization between a local folder and a cloud directory, use the sync command. When this mode is used, any file deleted from the local computer will also be deleted from the cloud after sync.
rclone sync "C:\Backup" gdrive:HomePCBackup --progress
The rclone sync command is not ideal for data backups because it is primarily designed for synchronizing data. If a file is deleted or becomes corrupted in the source directory, the copy in the cloud will be affected too.
To use rclone sync for backup purposes, it is advisable to add the --backup-dir option. In this case, rather than deleting files from the cloud, Rclone simply moves them to the specified backup directory during sync:
rclone sync "C:\Backup" gdrive:HomePCBackup --backup-dir gdrive:HomePCBackupTrash --progress
Use Rclone to verify the integrity of your cloud-stored files. To protect against storage-related errors on the cloud provider’s side, which are rare but worth accounting for, you can periodically verify file sizes and cryptographic hashes in the cloud storage.
rclone check "C:\Backup" gdrive:HomePCBackup --one-way

Rclone also supports bidirectional file synchronization (bisync). In this mode, the tool monitors changes in both the local directory and the cloud, propagating changes in either direction when the two copies differ.
To enable bidirectional synchronization, you need to use the --resync option during the initial run:
rclone bisync "C:\Backup" gdrive:BackupFolder --resync
Rclone creates a local database that contains information about the structure and state of the synchronized files. Once initial synchronization has been completed, you can run the regular synchronization task without the --resync flag. These tasks can be scheduled using Windows Task Scheduler:
rclone bisync "C:\Backup" gdrive:BackupFolder --resilient --conflict-resolve newer
The last two options control conflict resolution and error handling:
--conflict-resolve newer– determines how conflicts are resolved when the same file has been modified on both sides. In this case, the version of the file modified most recently will be considered the current.--resilient– allows the synchronization process to continue if the existing synchronization database becomes corrupted or unavailable.
Rclone also includes a built-in Rclone Backend web interface that can be accessed from a browser. To start the web interface, run:
rclone rcd --rc-web-gui
This will start a lightweight web server that provides access to Rclone through a web-based GUI. From there, you can configure storage connections, browse the contents of cloud storage, and monitor running Rclone tasks in real time.
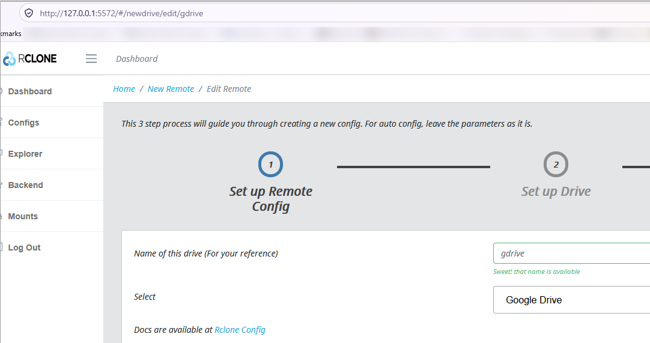
By default, Google Drive offers 15 GB of free storage (shared with Gmail and Google Photos) for all users. You can use rclone to view the total quota limit, the current used and free space in Drive, the size of all files in the Trash, and the space used by other Google services. Run this command to display current Google Drive stats:
rclone about gdrive:
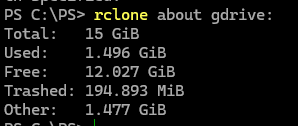
Additional Useful Options:
- If you are copying a large number of small files, you can increase the number of simultaneous file transfers from the default value of 4:
--transfers 8 - When synchronizing large files, it can be useful to increase the buffer size allocated to each transfer from the default 16 MB:
--buffer-size 64
It is possible to exclude specific file types or directories from an Rclone synchronization. You can specify the list of exclusion files and folders directly in the command line:
--exclude "/TEMP/" --exclude "*.{log,tmp,temp,lock,bak}" --exclude "pagefile.sys,thumbcache_*.db"
Or, you can specify a path to a text file containing the list of exclusions:
--filters-file "C:\rclone\filters.txt"
How to Mount Google Drive in Windows Using Rclone
If you don’t use Rclone exclusively for automated backups and file storage, it can be inconvenient to run Rclone commands from the command line each time you need to work with your files. It will be much more convenient to mount Google Drive as a usual network drive and assign it a drive letter in Windows.
First, install the WinFSP (Windows File System Proxy) tool (which is similar to FUSE on Linux):
winget install WinFsp.WinFsp
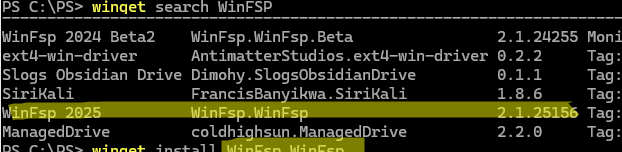
Then you can mount your Google Drive to a specific drive letter using a command:
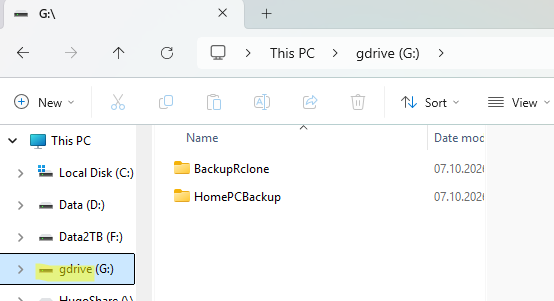
rclone mount gdrive: G:

To make the drive letter available in File Explorer, run this command from a non-elevated command prompt session. This is related to how Windows handles access to mapped network drives from elevated and non-elevated apps.
Make sure that the contents of your Google Drive are now displayed as a separate network drive in File Explorer.
Backup and Sync Local Files to Google Drive Using PowerShell and Rclone
Let’s look at an example of how to automate the synchronization of local folders with Google Drive cloud storage. We created a small PowerShell script that uses Rclone to synchronize several local folders with Google Drive.
Here’s the basic logic of the backup script:
- Two directories are created in the cloud:
current(which is a current mirror of your local files) andarchive(where previous versions and deleted files are stored). - Each time
rclone syncruns, it updates thecurrentdirectory. If a file on the local computer has been modified or deleted, its previous version is moved to thearchive/YYYY-MM-DDfolder. - Then the script removes files from the
archivedirectory that are older than 60 days. This will free up space on Google Drive by deleting old changed file versions.
$Remote      = "gdrive:"
 $Folders     = @("C:\Backup\","C:\Users\woshub\Documents\","F:\Projects\")
 $Dest        = "BackupRclone/DesktopHome/current"
 $Archive     = "BackupRclone/DesktopHome/archive"
 $Timestamp   = Get-Date -Format "yyyy-MM-dd"
 $ExcludeFile = "$PSScriptRoot\exclude.txt"
 $HasErrors = $false
 foreach ($F in $Folders) {
 if (Test-Path $F) {
 $FolderName = Split-Path $F -Leaf
 rclone sync $F "$Remote$Dest/$FolderName" --backup-dir "$Remote$Archive/$FolderName/$Timestamp" --exclude-from $ExcludeFile --progress --verbose
 if ($LastExitCode -ne 0) { $HasErrors = $true }
 }
 }
 # Delete file versions from the Trash that are older than 60 days ( if there are no errors in the previous sync)
 if (-not $HasErrors) {
 # 1. Delete files older than 60 days.
 rclone delete "$Remote$Archive" --min-age 60d --ignore-errors --progress --verbose
 # 2. Clean up empty folders
 rclone rmdirs "$Remote$Archive" --leave-root --progress --verbose
 } else {
 Write-Error "Error! Cannot cleanup files"
 }
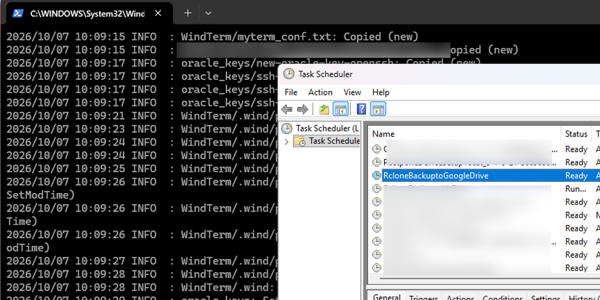
Then create a task in Task Scheduler that runs this PowerShell script automatically. For example, you could set it to run once a day at a specified time. You can create the task through the taskschd.msc graphical interface or by using the following commands:
$TaskName="Rclone_Backup_to_GoogleDrive"
 $Trigger = New-ScheduledTaskTrigger -Daily -At 6:00PM
 $Action= New-ScheduledTaskAction -Execute "PowerShell.exe" -Argument "-NoProfile -ExecutionPolicy Bypass -NonInteractive -WindowStyle Hidden -File C:\Scripts\Rclone_Backup_to_GoogleDrive.ps1"
 Register-ScheduledTask -TaskName $TaskName -Trigger $Trigger -Action $Action
Configure Cloud Backup Data Encryption with Rclone
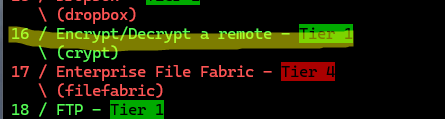
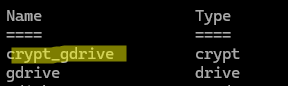
Rclone can encrypt files before uploading them to cloud storage. To enable data encryption, run rclone config and create a new remote storage with the crypt type (option 16 in my example). Name it crypt_gdrive .
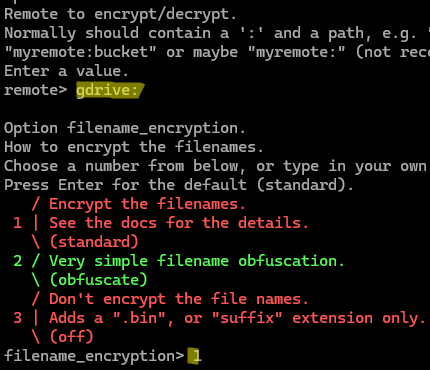
The new encrypted storage is created on top of the previously configured Google Drive connection. Specify the previously created drive name (gdrive:) or a specific folder on a Google Drive where you want to store encrypted backups (gdrive:BackupCrypt)
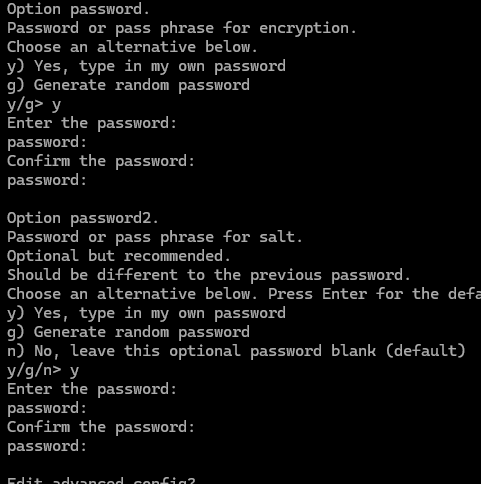
Select the file name encryption mode. For example, select ‘1 – Standard‘, which encrypts file names. Then enable directory name encryption (Encrypt directory names = True) and specify your own encryption password or generate it automatically.
Next, generate a password for the salt. Make sure to remember both passwords and store them in a secure location.
Now, when you want to upload files in encrypted form, simply copy or sync them to the crypt_gdrive remote.
For example:
rclone copy "C:\Docs\" crypt_gdrive:HomePCBackup --progress
Rclone automatically encrypts the files as they are uploaded to the cloud and decrypts them when they are downloaded back to your computer.
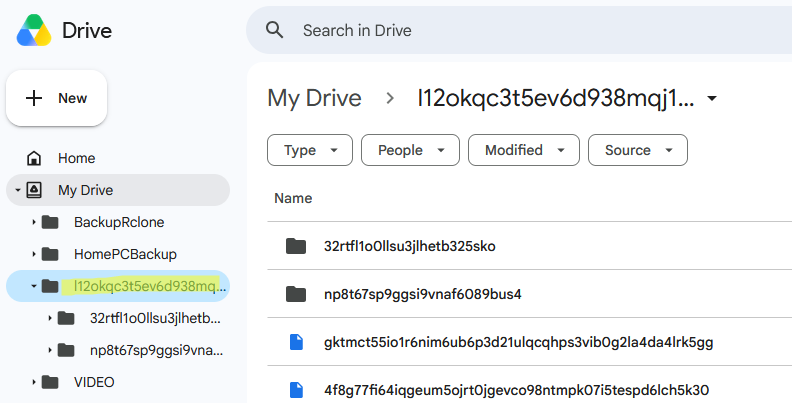
In the cloud storage, instead of readable file and folder names and their contents, an attacker or even the cloud provider’s employees will see only an unreadable set of files.
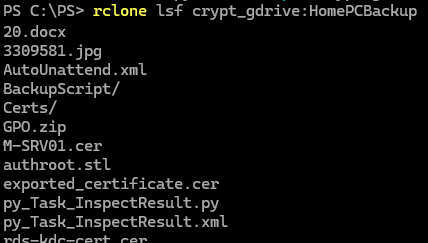
If you list encrypted files in the remote crypt storage via Rclone, their names are displayed unencrypted:
rclone lsf crypt_gdrive:HomePCBackup
Creating Client ID and Client Secret to Access Google Drive from Rclone
When you use rclone with Google Drive in its default configuration, rclone’s default client ID is used. It is shared between all the rclone users. This shared client ID is being retired and will stop working in 2026.
Leave blank to use rclone's shared client_id, or if you are using a service account.
The shared client_id is being retired and will stop working during 2026, so creating your own is now strongly recommended.
See https://rclone.org/drive/#making-your-own-client-id for how to create your own.

Here is how to generate your own Google Drive client_id and client_secret for rclone in the Google Cloud Console:
Step 1: Create a Google Cloud Project
- Go to the Google Cloud Console.
- Log in with your personal Google account.
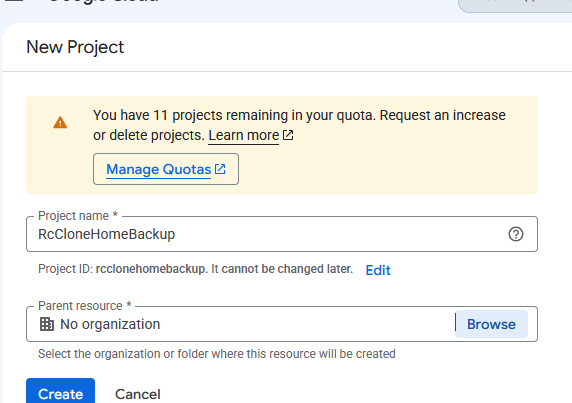
- Click the project dropdown in the top-left corner and click New Project.
- Name it something like
RcloneHomeBackupand click Create.
Step 2: Enable the Google Drive API
- Select your new project in the top-left dropdown.
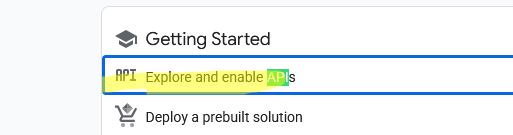
- Under Getting started, click Explore and enable APIs
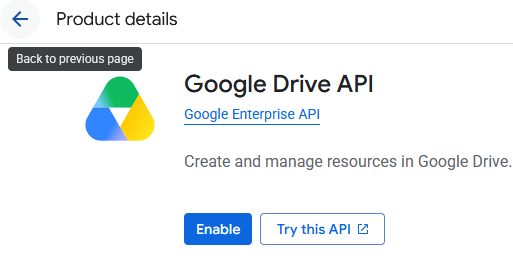
- In the search bar, type Google Drive API and click on it.
- Click the blue Enable button.

Step 3: Configure the OAuth Consent Screen
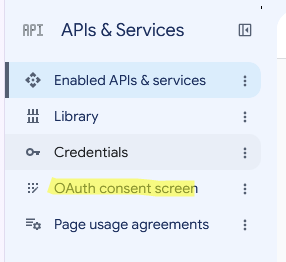
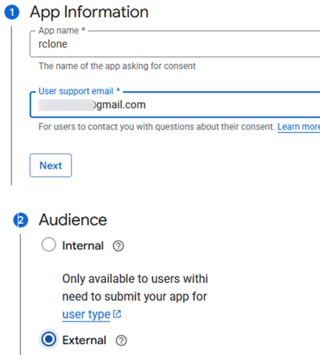
- In the Navigation Menu, select OAuth consent screen.
- Set the App name (
Rclone Backup) and select your email. - Select External (this is normal for personal accounts) and click Create.
- Fill in the contact information fields:
- Click Create.
Step 4: Configure Google Drive Data Access
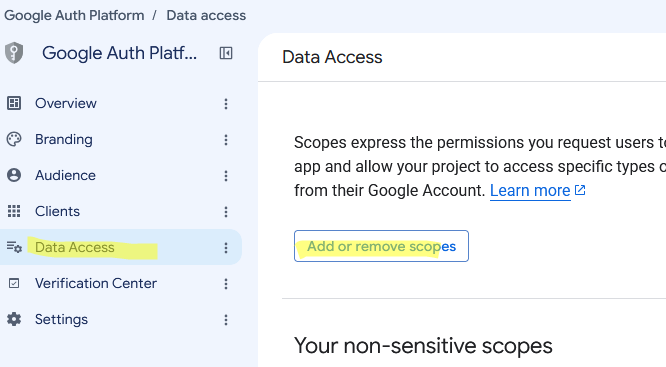
- Go to the Data Access section and add a new scope.

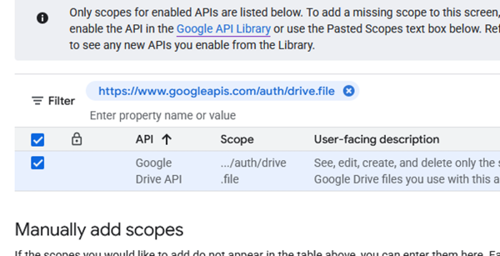
- In the search bar, type
drive.file. Check the box for.../auth/drive.file(View and manage Google Drive files and folders that you have opened or created with this app). Click Save.
Step 5: Create a Custom Google App
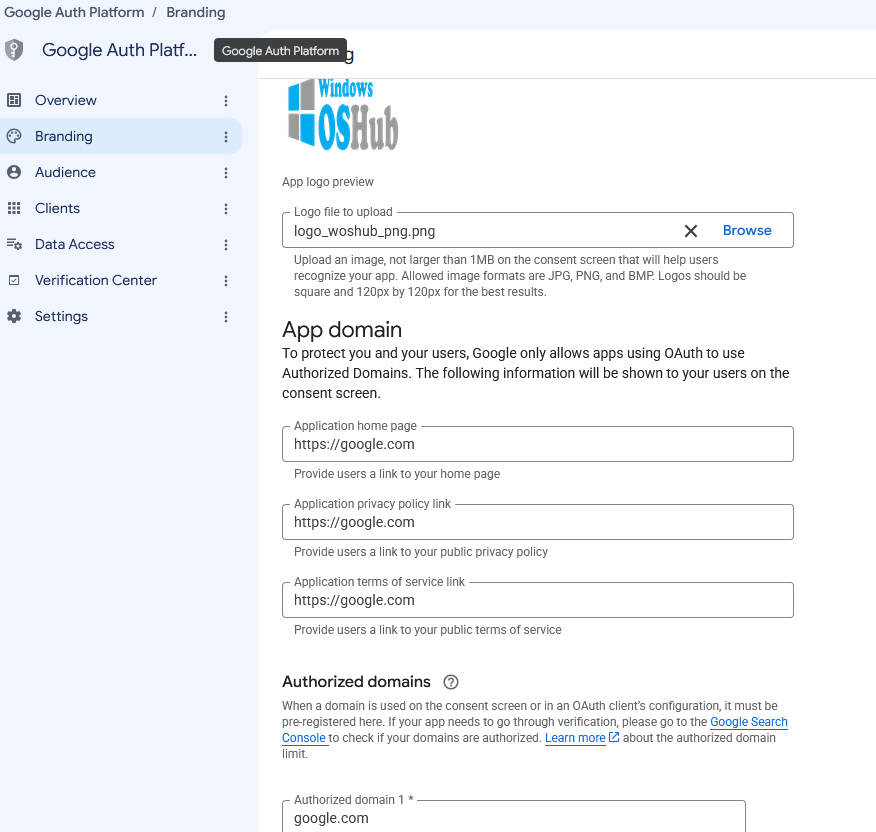
- Go to the Branding section and fill in basic information about your app.
- Enter your app name and user support email
- Then scroll down and fill in the URLs. Since you’re creating an app only for yourself, Google doesn’t check their content. Paste any working URLs there, for example:
https://google.com - In the Authorized domains field, enter the domain of these links:
google.com - Save the changes

Step 5: Publish a Custom Google App
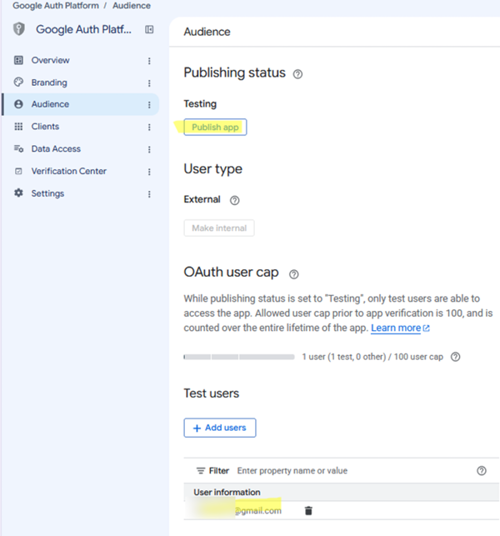
- Go to the Audience tab and click Publish app.
- Add your Google account email under Test users.

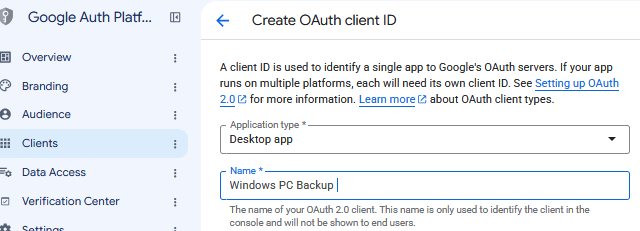
- In the left sidebar, click Clients.
- Click + Create client to create a new OAuth client ID.
- In the Application type dropdown, select Desktop app.
- Name it
Windows PC Backupand click Create.
- A pop-up will appear displaying your Client ID and Client Secret. Copy these down safely!
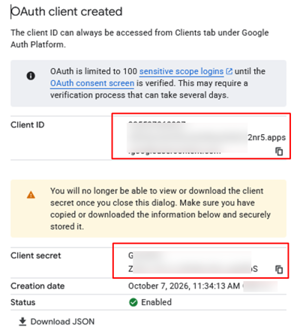
Use these secrets when creating a remote connection to Google Drive in rclone.