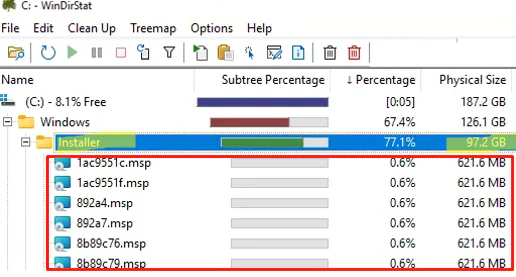
One of the common causes of running out of free space on the system drive is the C:\Windows\Installer system folder. When I analyzed disk usage with the WinDirStat tool, I found that this folder’s size had grown to almost 100 GB. In this article, we’ll explain what the C:\Windows\Installer folder is used for, whether the files stored in it can be deleted manually, and how to clean it up safely.
What Is the Windows Installer Folder Used For?
The hidden system folder C:\Windows\Installer stores cached copies of app installers in the *.MSI (Microsoft Installer) format and their update *.MSP packages (Microsoft Installer Patch). When a user starts the installation of an MSI-based software, the Windows Installer service (msiserver) is invoked. The msiserver service copies the source *.MSI installer file to the hidden system folder %windir%\Installer and renames the original file to a random character sequence while keeping the *.MSI file extension. For example: C:\Windows\Installer\1db12be7.msi .
Having a cached copy of the source MSI installer allows Windows to safely uninstall, repair, or modify an installed application even if the original installation files have been removed. Windows Installer also automatically uses cached MSI files to repair a program when one or more of its important files have been corrupted or deleted.
Consequently, whenever an application is installed or updated, a process that frequently occurs silently in the background without user interaction, new installation packages are cached in the %windir%\Installer directory. As a result, the size of the Installer folder continually increases.
When an application is uninstalled via standard procedures, such as the Settings -> Apps ->Installed Apps (ms-settings:appsfeatures), the legacy Programs and Features Control Panel applet item (appwiz.cpl), or the msiexec command-line tool, the corresponding cached MSI and MSP packages within the C:\Windows\Installer directory are automatically removed.
If a cached MSI file has been deleted, attempting to uninstall the app will display a Windows Installer dialog asking you to provide the path to the original MSI file.
The feature you are trying to use in on a network resource that is unavailable.
The installation source for this product in no available/ Error Code: 1612
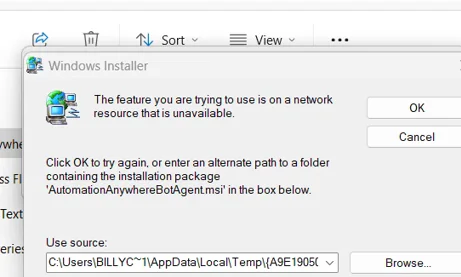
Therefore, if you manually delete files from the C:\Windows\Installer folder, you may no longer be able to uninstall some apps properly if you don’t have the original installation files. So the main recommendation is: don’t delete files from this folder without giving it any thought.
How to Properly Clean Up Files in the Windows Installer Folder
Over time, the %windir%\Installer folder can accumulate a large number of files that are no longer associated with any installed programs. For example, this can happen if the application installation or removal is interrupted, if a third-party or custom uninstaller is used, or if old MSI packages remain in the cache after successive automated application updates.
The main challenge is to identify which application a particular MSI/MSP installer file belongs to. This is difficult because all installer files in C:\Windows\Installer are renamed to random names such as 19bf84.msi.
To make it easier to identify MSI and MSP source files in this folder, you can enable the display of their metadata directly in File Explorer.
- Navigate to
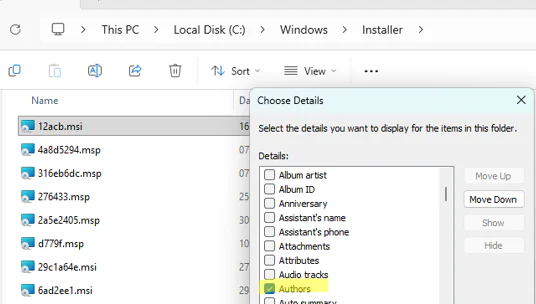
%windir%\Installerfolder - Switch to Details view.
- Right-click any column header and select More.
- Enable display of the following properties: Authors (developer) and Subject (this property most often contains the full application name).

- Most MSI files should now display the name of the application they belong to.

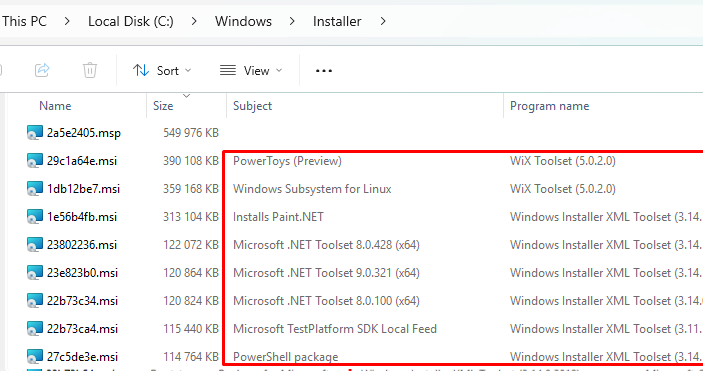
If you know that this application has already been uninstalled or updated, you can safely delete the corresponding MSI and MSP files from this folder manually.
Find Orphaned MSI and MSP Installer Files Using PowerShell
You can automate the process of finding orphaned MSI/MSP files in the C:\Windows\Installer directory using a PowerShell script. The idea is that all registered programs can be retrieved from the registry. You can simply enumerate the keys under HKLM\SOFTWARE\Microsoft\Windows\CurrentVersion\Installer\UserData . The LocalPackage value for each registered program should contain the path to its locally cached MSI package.
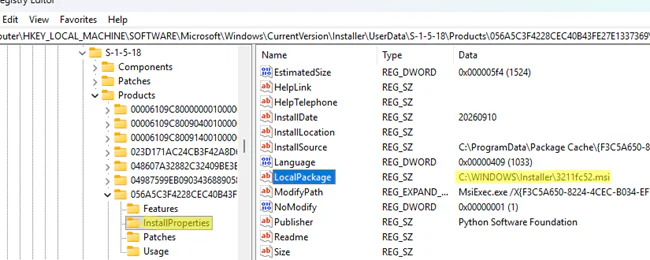
However, it is simpler to request a list of the cached packages registered in the system from the Windows Installer service directly. The resulting list of files can then be compared with the files that actually exist in C:\Windows\Installer. An MSI installer file is likely to be considered orphaned if it exists on the disk but is not found in the Windows Installer database.
Here is a ready-to-use PowerShell script that implements this algorithm and lists (it only lists files, without deleting anything!) orphaned .MSI and .MSP files in the C:\Windows\Installer folder that are not associated with apps registered within the msiserver service.
Download the script to your computer. Then enable PowerShell script execution in the current session and run the script:
Set-ExecutionPolicy RemoteSigned -Scope Process
 .\Get-OrphanedMSIInstalers.ps1
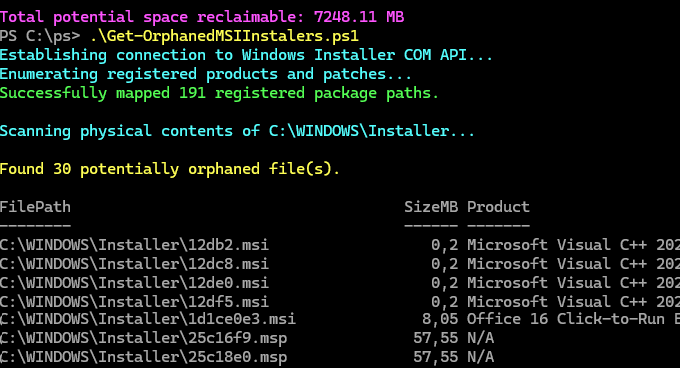
You now have a potential list of files to delete. However, we recommend moving the listed files to another drive first rather than deleting them immediately
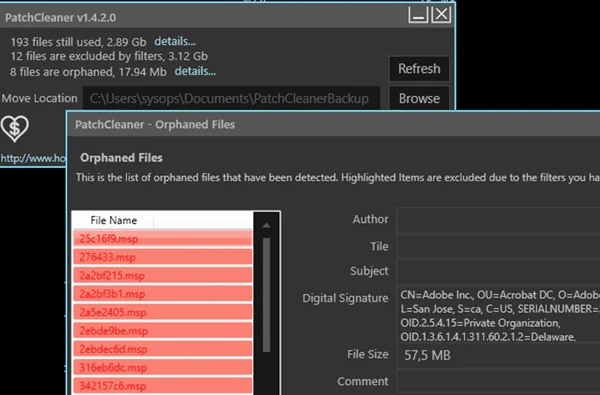
PatchCleaner (https://www.homedev.com.au/free/patchcleaner) is a third-party graphical tool that works on a similar principle. It can scan the Installer directory to identify any orphaned MSI and MSP packages.
Acrobat.PatchCleaner enables administrators to move (the recommended action) or permanently delete identified orphaned MSI packages to quickly clean up the C:\Windows\Installer folder.
Moving the Windows Installer Folder to Another Drive
If you need to keep all the MSI installer files in the Installer folder, but are running low on space on your system drive, you can move the folder’s contents to a different drive and create a symbolic link from the original location to the new one.
You can move the folder to another drive while preserving NTFS permissions from the command prompt using this Robocopy command:
robocopy C:\Windows\Installer E:\Windows\Installer /E /MOVE /COPYALL /DCOPY:DAT /XJ
Remove the original directory:
rmdir C:\Windows\Installer
Make a symbolic link to the new folder:
mklink /J C:\Windows\Installer E:\Windows\Installer
Restart the computer and attempt to install or uninstall any MSI-based app to verify that the Windows Installer service is working correctly.